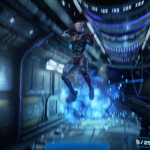
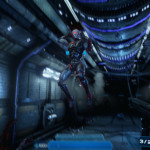
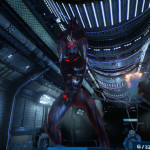
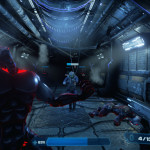
In this tutorial I will be doing Sci-Fi ninja enemy which will:
- Run fast to player,
- Jump and make attack with katana,
- Do slomo effect not affecting player,
I’m missing fast enemy which is dealing melee damage.
|
1 2 |
<strong>This Tutorial has been created using Unreal Engine 4.8.2</strong>. Make sure you are working on the same version of the engine. |
IMPORTING NINJA
In this tutorial I will be using High Poly Cyborg Ninja from MijiKai Game Studio. It was created in old 3ds max so you will need to download FBX Converted and convert all animations to 2013 FBXes. They work well.
You don’t need to change scale and anything – just make sure you are importing meshes in bone hierarchy. That’s all. Easy and fast.
PREPARING NEEDED ASSETS
You will need to create animation montages from this animations:
- CYBORG_NINJA_3HitComboFirstSwordDrawn,
- CYBORG_NINJA_3HitComboSecondSwordDrawn,
- CYBORG_NINJA_3HitComboSword2,
- CYBORG_NINJA_3HitCombothirdSwordDrawn,
- CYBORG_NINJA_dash1SwordDrawn,
- CYBORG_NINJA_spinningAttackSwordDrawn,
- CYBORG_NINJA_thrustAttack, (this will be our jump attack),
Basically all katana attack animations.
Open CYBORG_NINJA_runNoWeapon and change Rate Scale to 1.3.
Next create blend space 1D from NINJA_IdleSword to NINJA_RunNoWeapon named IdleToWalk.
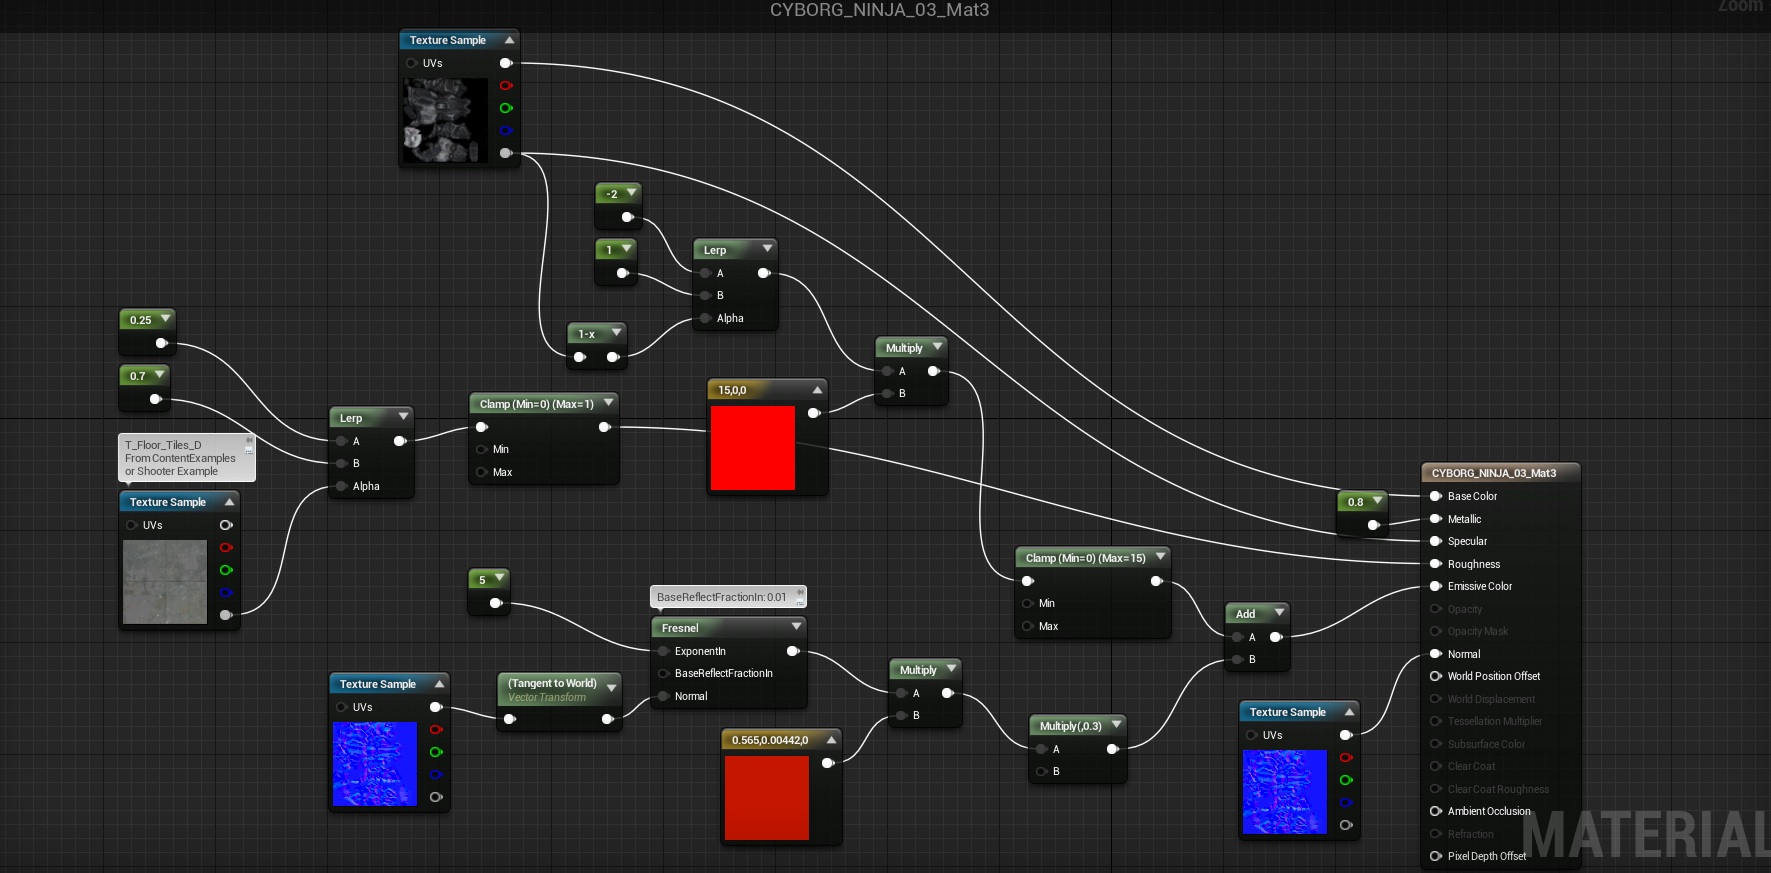
I have used CYBORG_NINJA_03 texture as base. Added some rim lighting and roughtness to make better feeling of enemy. Here’s the material:
As for the Physics Asset it will be easy to create it. Remember to place phys materials on body parts. If you don’t know what I’m talking about you should go back to older tutorials.
Make sure body from KATANA bone is breakable. Thanks to that ninja will lose the sword on ragdoll.
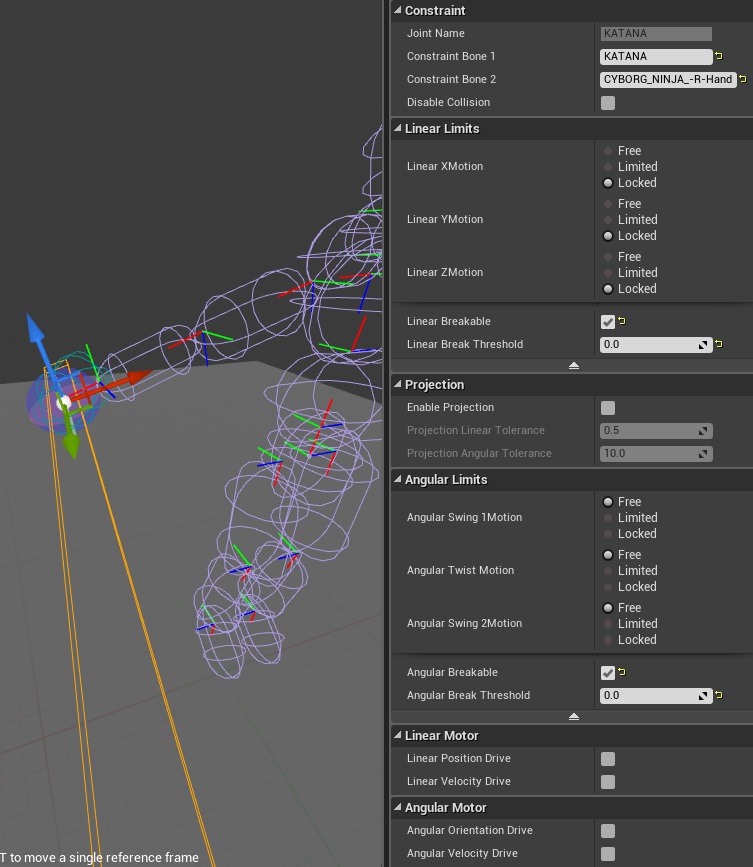
Add one socket from KATANA bone named KATANASocket.
ANIMATION BLUEPRINT
Create animation blueprint named Cyborg_Ninja_AnimBP and add one float variable named NinjaSpeed. Here is the anim graph:

Just taking our blend space 1d and making sure we could use DefaultSlot for montages animations.
Make sure you are driving NinjaSpeed float in Event Graph.
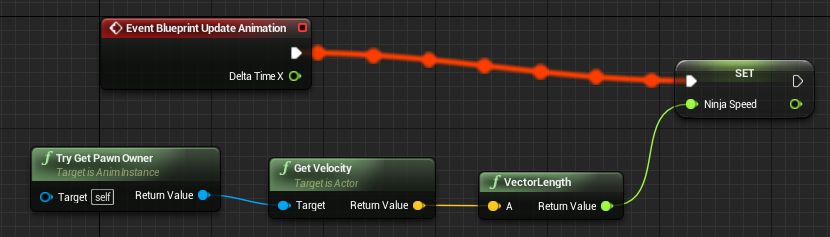
As always taking velocity. This time without any interpolation.
UPDATING GAMEPLAYCHARACTER
To be sure our Ninja Chick will work we need to do some changes to GameplayCharacter.
You will have issues with ragdoll overlapping Pawn so open GameplayCharacter and make those changes:
CapsuleComponent:
- Capsule Half Height: 100,
- Capsule Radius: 100,
- Dynamic Obstacle: False,
- Enable Gravity: False,
- Collision Presets: Custom: Block Everything instead Visibility – it should be set to Ignore,
MovementComponent:
- Max Acceleration: 0,
- Land Movement Mode: None,
- Water Movement Mode: None,
- Max Custom Movement Speed: 0,
- Enable Physics Interaction: False,
- Auto Update Tick Registration: False,
- Auto Register Updated Component: False,
- Can Jump: False,
- Can Swim: False,
Thanks to that Ninja ragdoll will be blocked and won’t be adding impulse to our player.
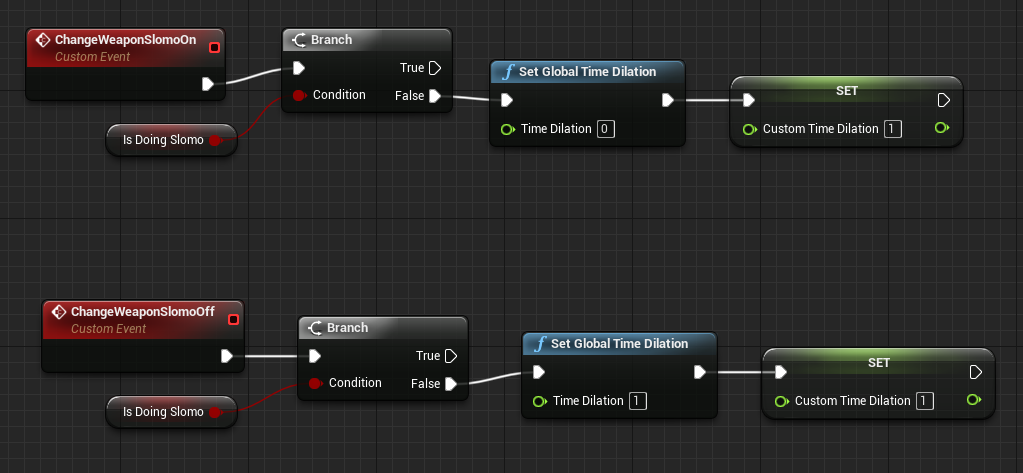
Now still in GameplayCharacter I would like to show you how to create slomo which won’t be enabled on Player.
Add new bool variable: isDoingSlomo.
Create new custom events: ChangeWeaponSlomoOn and ChangeWeaponSlomoOff
We will need to update UI_ChangeWeapon to call those events instead of changing Global Time Dilation.
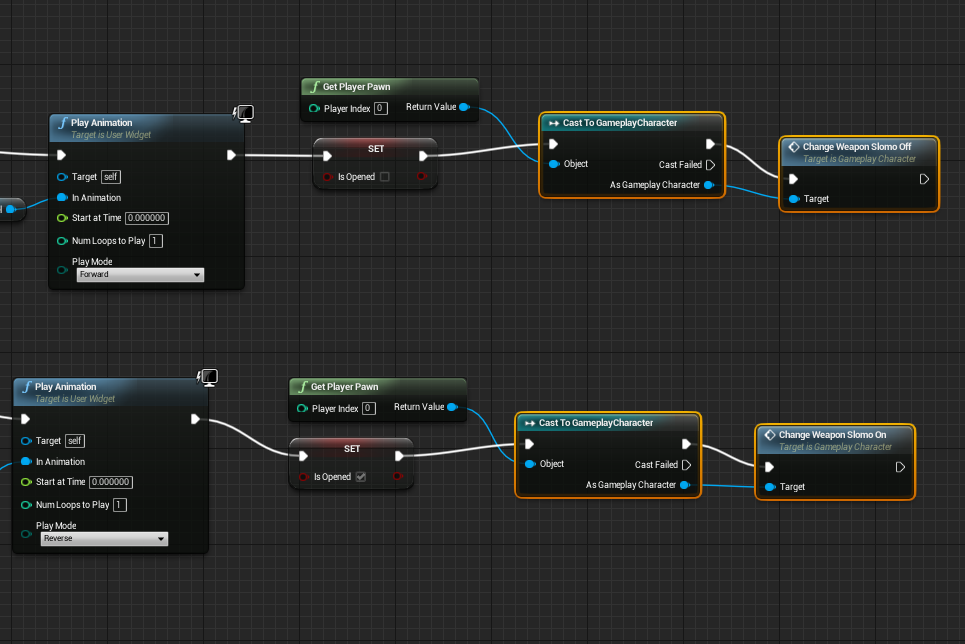
USEFUL TIP: Changing Custom Time Dilation in Tick wont work.
Go back to GameplayCharacter and create new custom event named DoQuickSlomo.


Remember to put timeline length to 0.2.
This function will be triggered by Ninja when we shoot at the head to help out clear rest of the ninja chicks:)
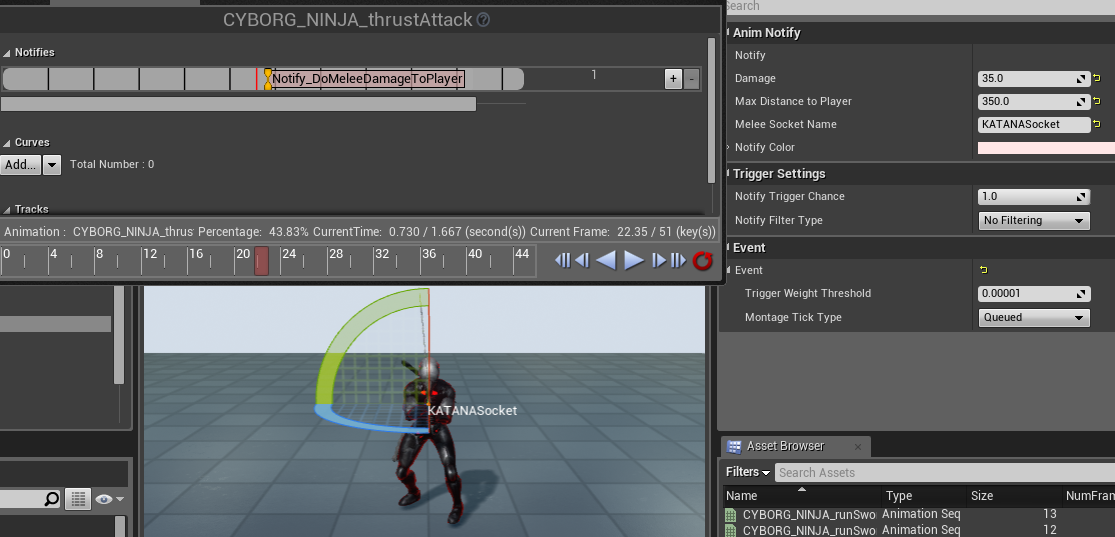
Last thing to prepare is to change earlier created notify: Notify_DoMeleeDamageToPlayer. It isn’t checking if enemy dealing damage is dead or not.
USEFUL TIP: If you are firing animations notifies will be fired as well even if mesh is in ragdoll state.
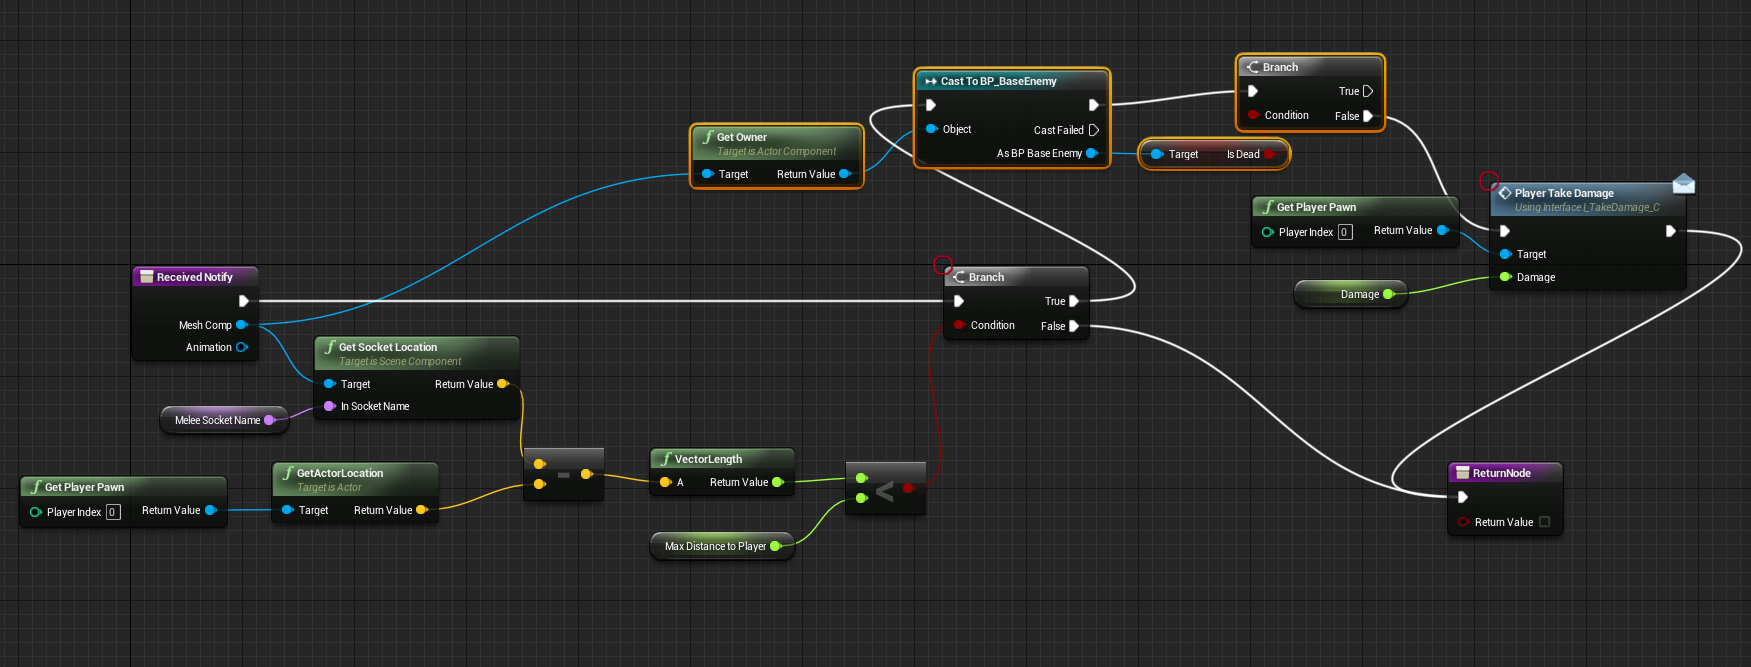
So now it wont fire if our enemy is in ragdoll. Ragdoll means he is dead.
Now add this notify to your attack animations in places where you want to make damage to player.
USEFUL TIP: I have found sometimes notifies aren’t fired when added to montages. Be sure you add them to animation not anim montage!
CREATING NINJA BLUEPRINT
We are ready to go with ninja blueprint! Create new blueprint extending from BP_BaseEnemy named Enemy_Ninja open it and go to components.
Mesh Component:
- Mesh: you should know that already 😉
- Animation Mode: Use Animation Blueprint,
- Anim Blueprint Generated Class: Cyborg_NinjaAnimBP,
- Collision Preset: Custom: Block All instead of Physics Body – it should be ignored,
- Can Character Step Up On: ECB No,
- Rotation: Z: -90,
Capsule Component:
- Capsule Half Height: 88,
- Capsule Radius: 50,
Yes it’s big but it will prevent overlapping with other actors. Animations are moving a lot from root so it is possible.
Character Movement:
- Orient Rotation To Movement: True,
- Max Walk Speed: 500,
Open Event Graph and add:
Begin Play:

Ninja comes with gun as well, attached to bones. We need to hide all of attached weapons instead of back katana. You can do that using Hide Bone By Name node.
Custom Event: HideBackSword.
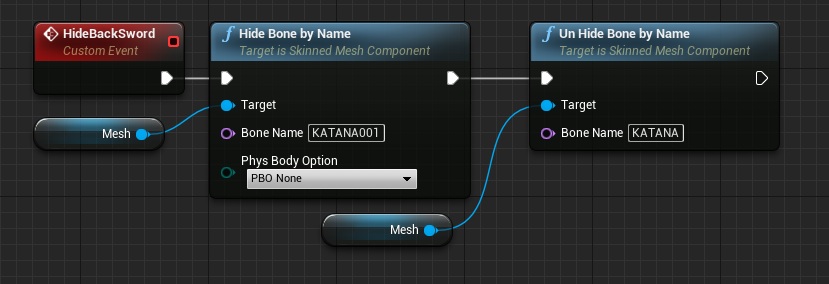
This is hiding back katana and showing sword in hands.
Custom Event: MeleeAttack
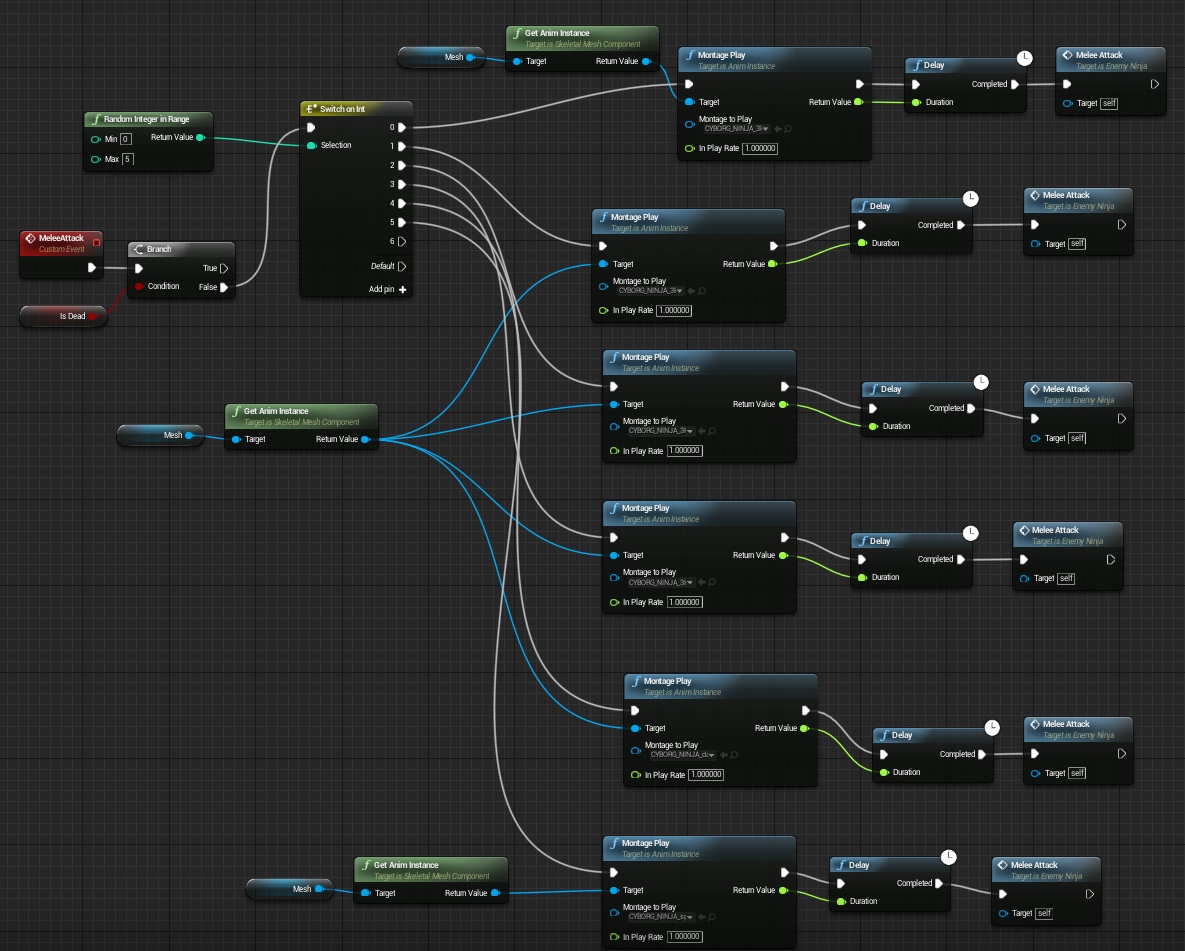
This is just randomly playing earlier created animation montages from attack animations.
Event Tick Part One:

This is just moving ninja forward if far of the player. If near move to player.
Event Tick Part Two:
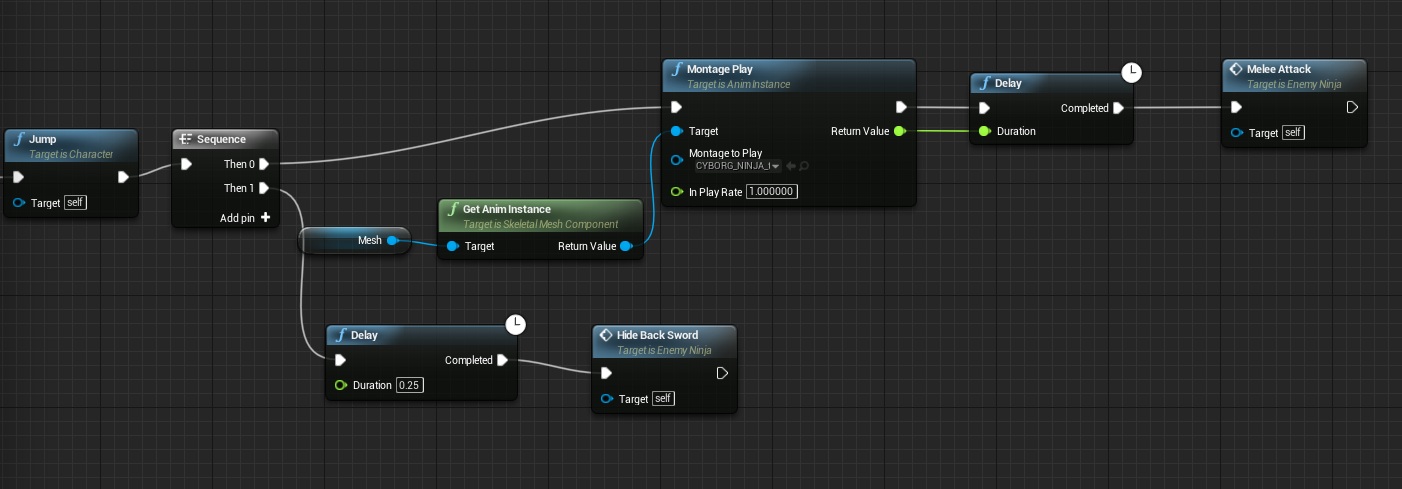
Jump and play attack animation, after that do melee attack. It’s really that easy!
Event Take Damage:

This is checking if we hit head. If we are near instant kill (this function was created in earlier tutorials) the enemy and do slomo effect.
Event Die:
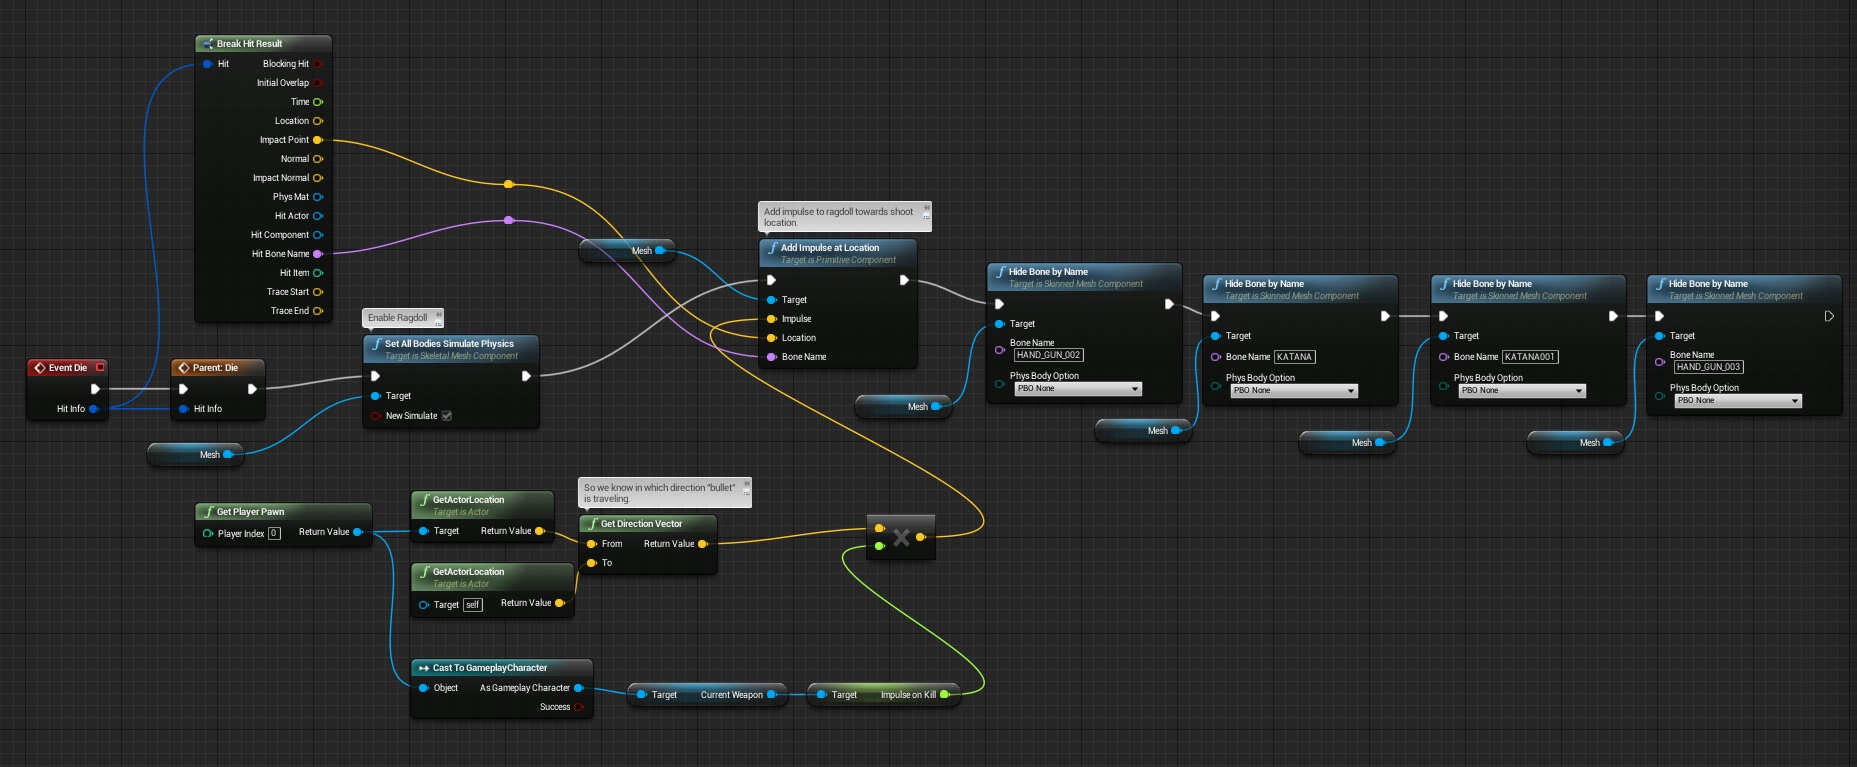
Just enable ragdoll and make sure all guns and katanas are hidden.
And that’s it!
Creating ShooterTutorial takes a lot of my free time.
If you want you can help me out! I will use your donation to buy better assets packs and you will be added to Credits /Backers page as well.Implementing game is taking time but writing about it is taking much more effort!

Reblogged this on King Designs.
In 4.10 I was only able to get the melee notifies to work if they were in the attack Montages, not the anims themselves. Although that may be because I never set up the Anim Notify properties when I added them the first time. It’s worth noting that when you place your notify in each timeline, you’ll need to set the Damage and Max Distance to Player values in the properties for each one. The “Damage” float value in the Ninja_Enemy blueprint was set to 100 (default) but was not affecting much. Though I guess if he had a bullet weapon it would have. Thanks for these tutorials and keep ’em coming!