Working alone on a game is really hard sometimes. For example I’ve bought K-Spree GUI and I don’t have weapon icons for UI. I would like to show you guys how to use Unreal Engine 4 features to create icons from 3d meshes.
- Goal: Create weapon icons from 3d assets,
- Have one level to configure everything to create icons,
Let’s go!
|
1 2 |
<strong>This Tutorial has been created using Unreal Engine 4.8.2</strong>. Make sure you are working on the same version of the engine. |
Using Outline Postprocess Material
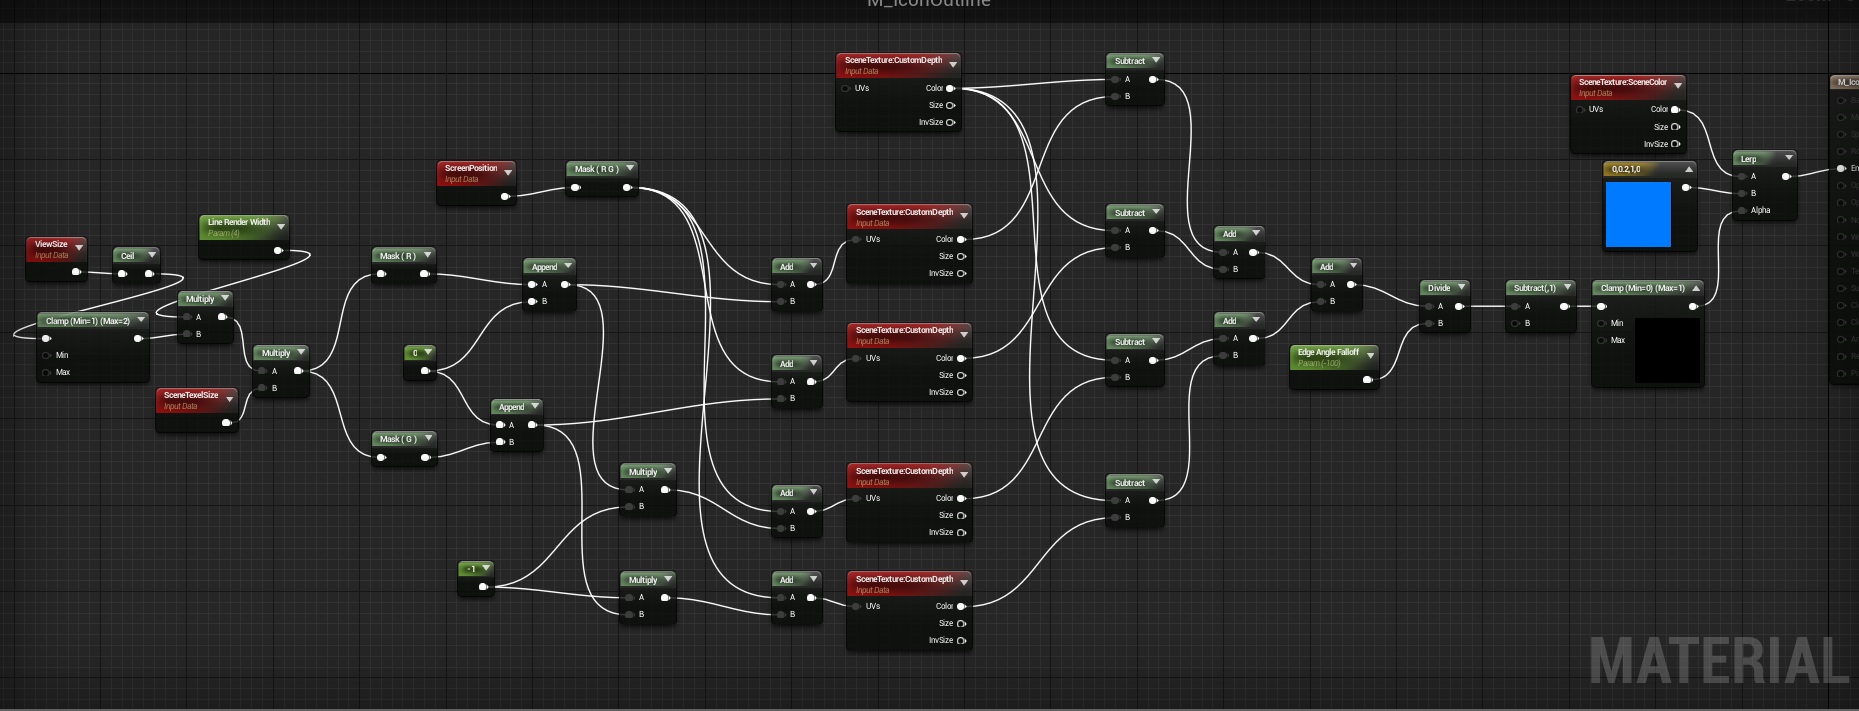
As you can see in K-Spree gui the best way for weapons icons would be outline graphics. We could use Postprocess material to draw outline for our objects. Material can be found in Content Examples -> Blueprint Communication -> M_Hightlight.
You can read more about outlines here and here. (btw great blogs! must read!) Here’s screenshot of the material. I’m using Line Render width: 5
- Material Domain need to be PostProcess,
- Blendable Location need to be Before Translucency,
Creating Level
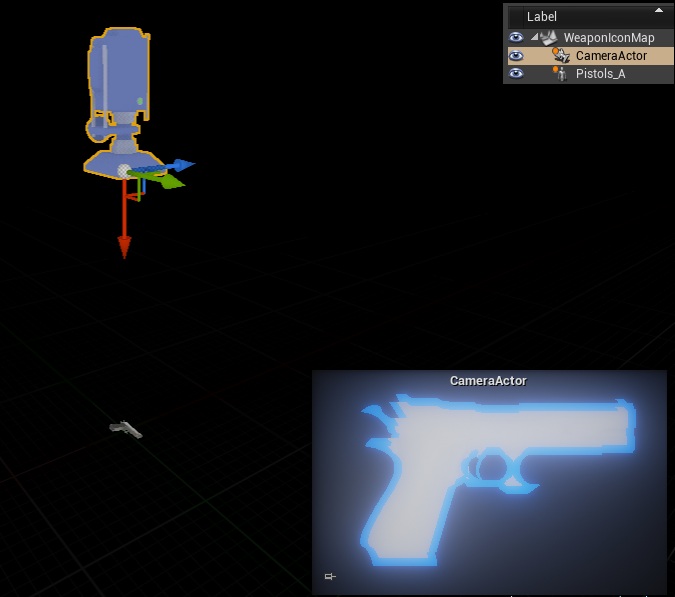
Create new blank level named WeaponIconMap. Insert Camera and change some variables:
- Location: (X=0.000910,Y=-0.000600,Z=218.031403)
- Rotation: (Pitch=-90.000000,Yaw=0.000000,Roll=0.000032)
- Projection Mode: Orthographics,
- Ortho Width: 35
- Constrain Aspect Ratio: false,
- Post Process Settings -> Bloom -> Intesity: 100, Threshold: 0.1 (this values work for me but you can iterate what will be best for outline)
- Post Process Settings -> Auto Exposure -> Min Brightness: 5, Max Brightness: 5 – try to iterate those values when you will have outline visible,
- Post Process Settings -> Misc -> AA Method: FXAA -> Screen Percentage: 200,
- Post Process Settings -> Add one blendable which will be outline material created earlier.
Now insert mesh into the level. I’m using Pistol_A mesh as example.
- Location: (X=-3.461101,Y=-7.529733,Z=-0.000214)
- Rotation: (Pitch=0.000000,Yaw=89.999489,Roll=-90.000000)
- Most important: Rendering -> Render Custom Depth: True,
The clue is that camera should point the weapon.
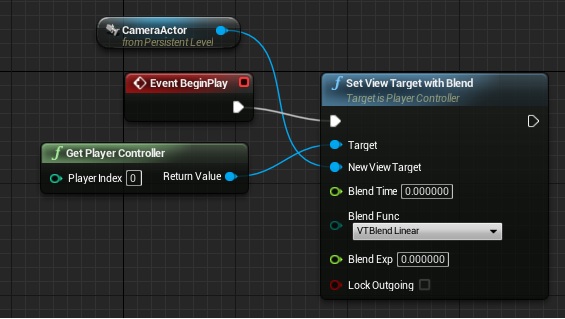
Go to Level Blueprint and on begin play change player camera.
If you run the game you should see outline effect on your mesh. Tweak the values and as always – take your time to get best results!
Configuring Screenshot Taking
Open Level Blueprint and add r.setres 512×512 and HighResShot console commands to it.
You should get notification that your screen is saved @ GameSavedScreenshotsWindows folder. I’m using 512×512 texture because there is some issues with non square textures for UMG on Android.
Basically there is lot more you can do with screenshot feature. Please read this and this documentation pages. Basically you could create blueprint to generate icons for all of your weapons.
Importing icon to UMG.
Import your screen to Content Browser and create material from it.
Use Power Node to tweak opacity. If you have the Gimp/Photoshop skill you can create Alpha channel for this image. I don’t have so I’m hacking here.
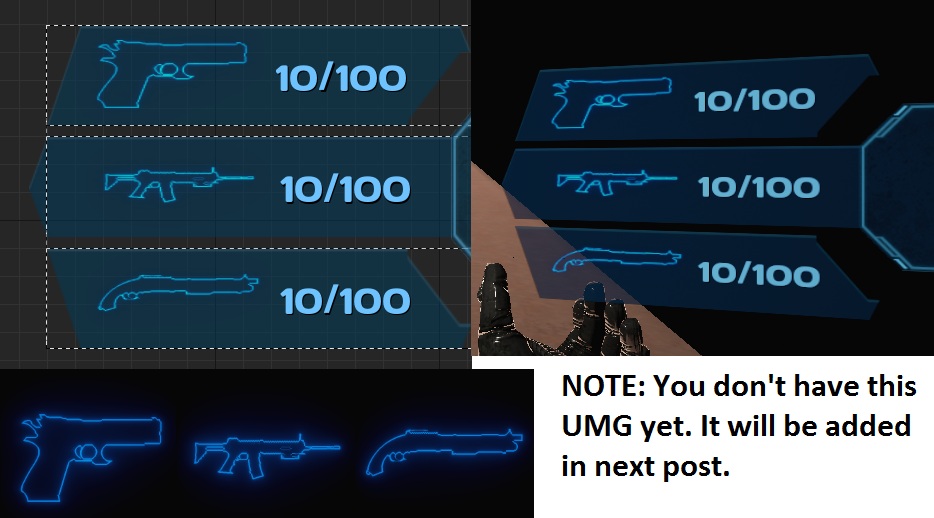
Final Result
That’s it. Add Image to UMG Widget and select material as brush.
You can use this method for any 3d object!
Creating ShooterTutorial takes a lot of my free time.
If you want you can help me out! I will use your donation to buy better assets packs and you will be added to Credits /Backers page as well.Implementing game is taking time but writing about it is taking much more effort!


Pingback: UMG: Change weapon panel | Shooter Game Tutorial
very nice friend! .. continue this! You ROCK!
Pingback: Menu – Level Selection – UMG | Shooter Game Tutorial
Pingback: How to create icons with alpha? | Shooter Game Tutorial
Pingback: Tutorais e Documentação para Unreal Engine 4 |
How did you get it to look like the actual object, i.e. not the outline. I cant really get it to show without putting a light in the scene
Is there a version of that for 4.14?
Pingback: Unreal Engine Resources and Tutorials – Pixel Friend Blog
Pingback: Using Unreal Engine 4 to create Game Jam – Shooter Tutorial