Moving forward with level selection screen. This time I will create:
- UMG for Level icon,
- UMG for Level data,
- Main UMG widget to show level selection screen,
|
1 2 |
<strong>This Tutorial has been created using Unreal Engine 4.9.2</strong> Make sure you are working on the same version of the engine. |
Updating Level Data Structure
In earlier post I have created Level Data Structure using C++. Please add two variables to the structure:
- ID (int),
- isUnlocked (bool),
I won’t use isUnlocked now but it will be needed in later tutorials.
Adding Levels to Game Instance
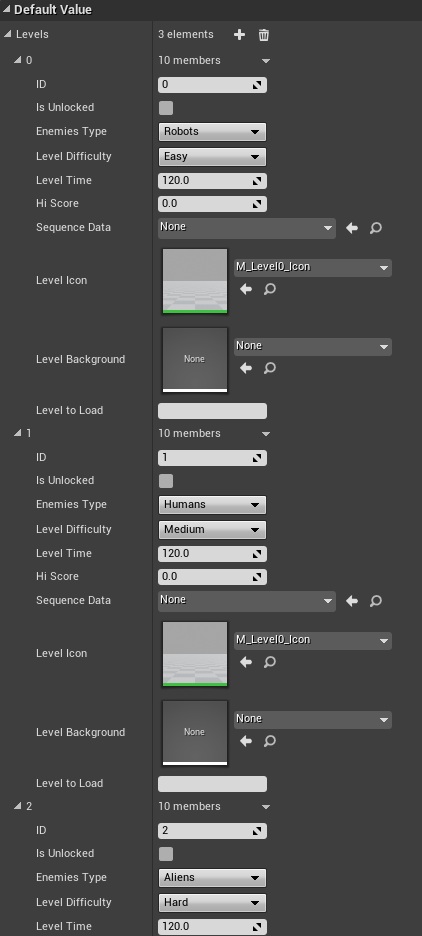
Open your Game Instance class and create variable named “Levels” from LevelData structure, mark it as array and add three levels.
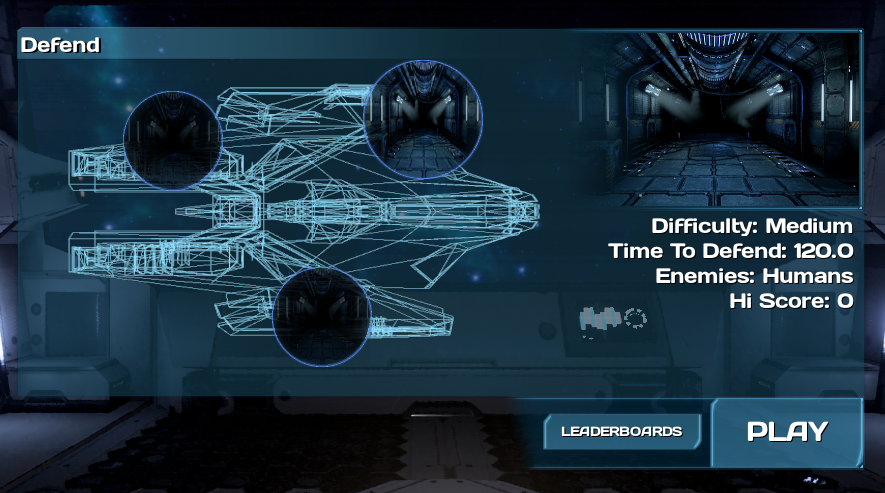
Basically each level will have different icon (placed on ship texture) and background (top right side of the level selection screen)
Creating Level Icon
It’s easy – open your gameplay map and create screenshot. Resolution depends on you. Mine have 200×114.
Import the screenshot to content browser and create material from it named M_Level0_Icon.
I don’t have enough Photoshop skill so I’m using material to create the icon. Later in development I will update this to simple texture without the material.
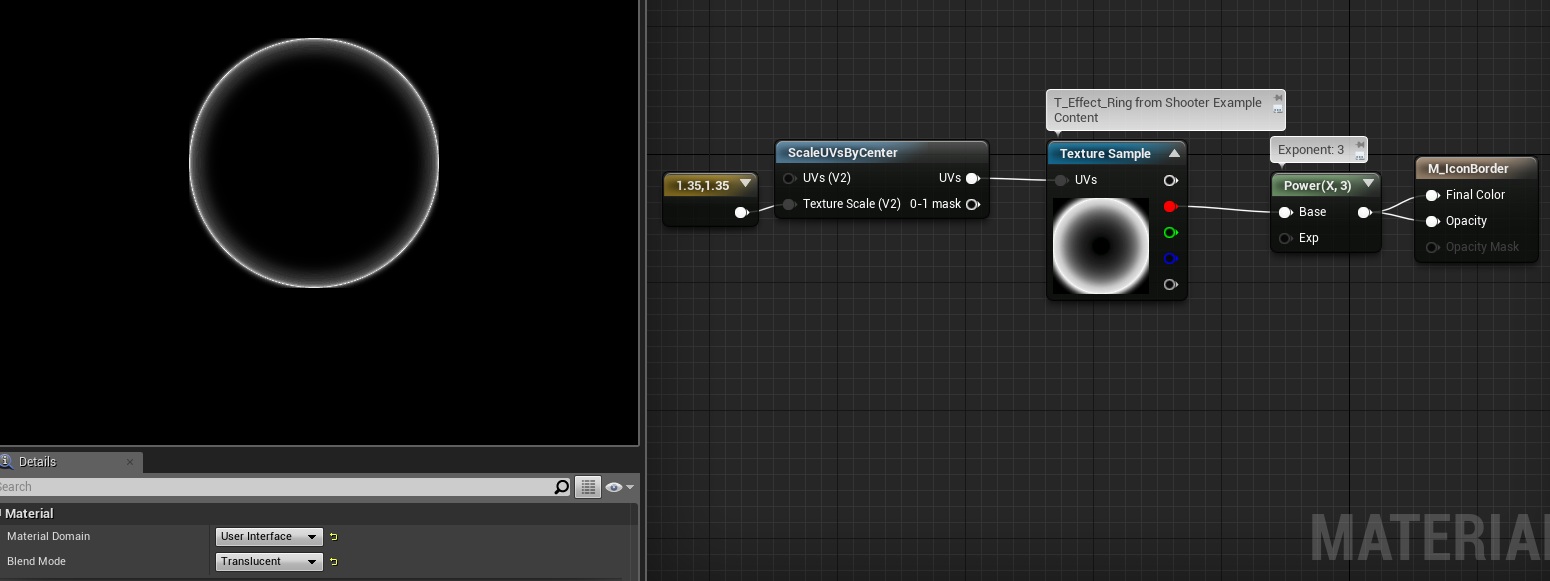
Now I need border – again this can be added to the texture directly without using material.
Create new material named M_IconBorder:
Creating Level Background
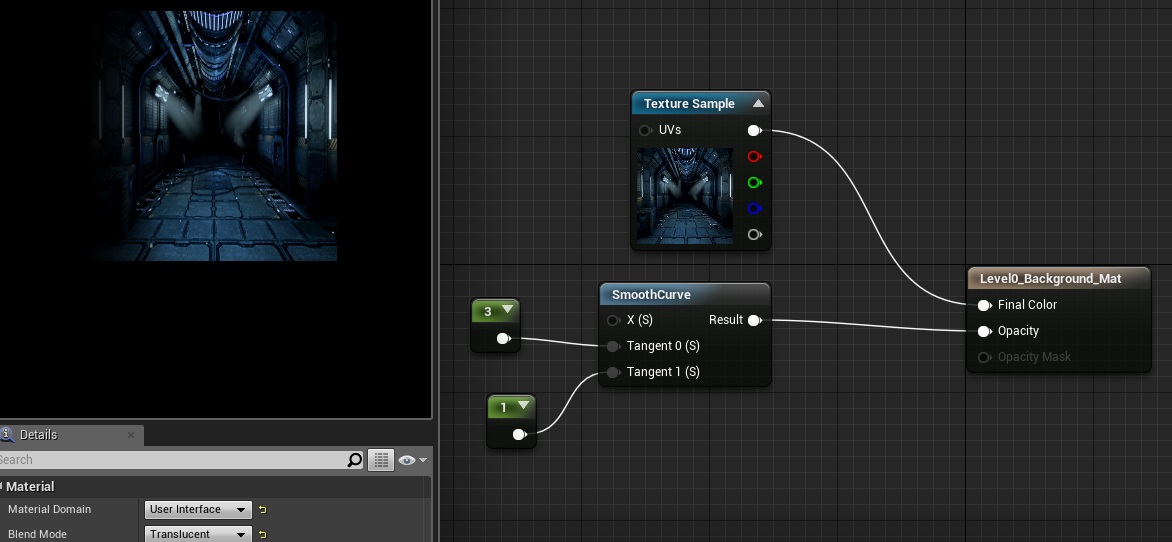
You can take the same screenshot but with bigger resolution. Mine is 606×346. Create Level0_Background_Mat material:
Again – this can be done in Photoshop without using materials!
Creating Ship Texture
I will use wireframe material feature for this. Download this asset and import FBX file to Content Browser. I will use early created map for icons which was described here.
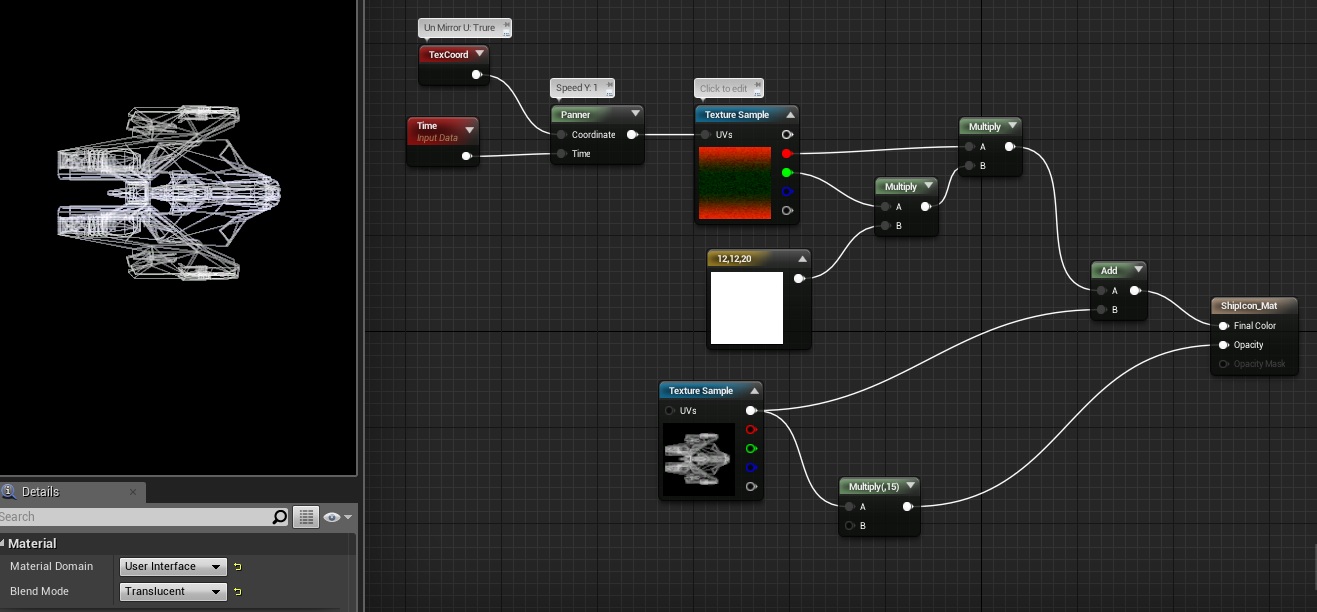
Create new material which should draw wireframe of the mesh:
Place your ship in the level assign the material and just create 1024×1024 screenshot.
Now create new material from the texture named ShipIcon_Mat
You are ready to go! Assign your icon and background materials to Levels array created earlier! For now I have only one level so levels have the same data.
Creating Level Icon Widget
Now let’s move to some UMG! Create new widget named UI_LevelIcon.
Here’s the hierarchy:
Open Graph and add those variables:
- Level Data (Level Data Structure),
- isSelected (bool),
- LevelID (int, editable),
And add Dispatcher named OnSelected with one Level Data structure input.
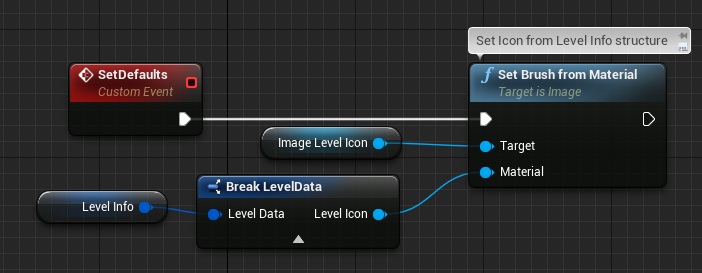
Create new custom event named SetDefaults
Create another custom event named GetLevelInfoFromID:
This is searching for level with the same ID in Levels array. If found level with the same ID will store their Level Info for later use.
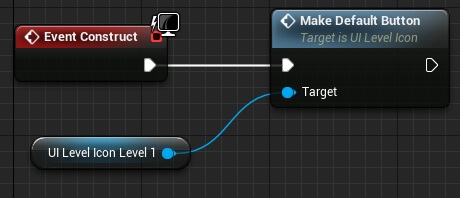
Now call those function in Construct Event:
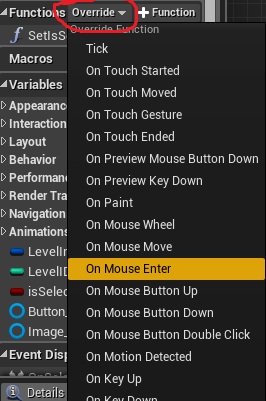
Because UMG doesn’t have OnHovered event in Buttons we will use global functions. To do this override OnMouseEnter and OnMouseLeave functions:
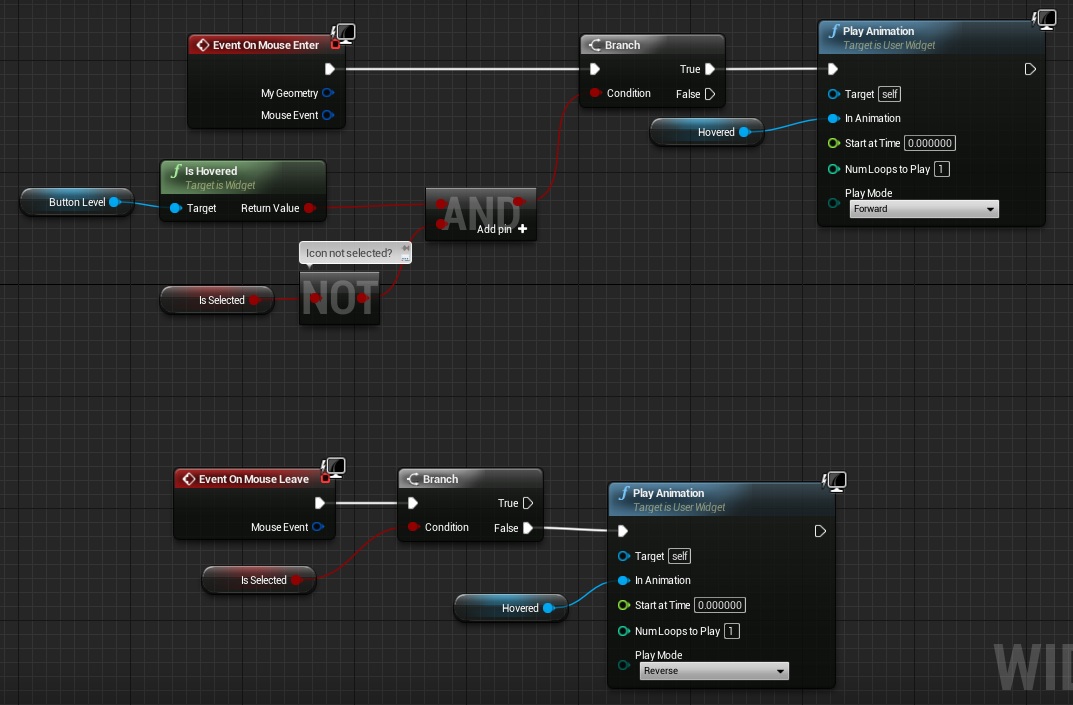
Thanks to this we know when button is hovered and when not. I’m playing scale animation:

Now the last thing. Manage clicking on the button.
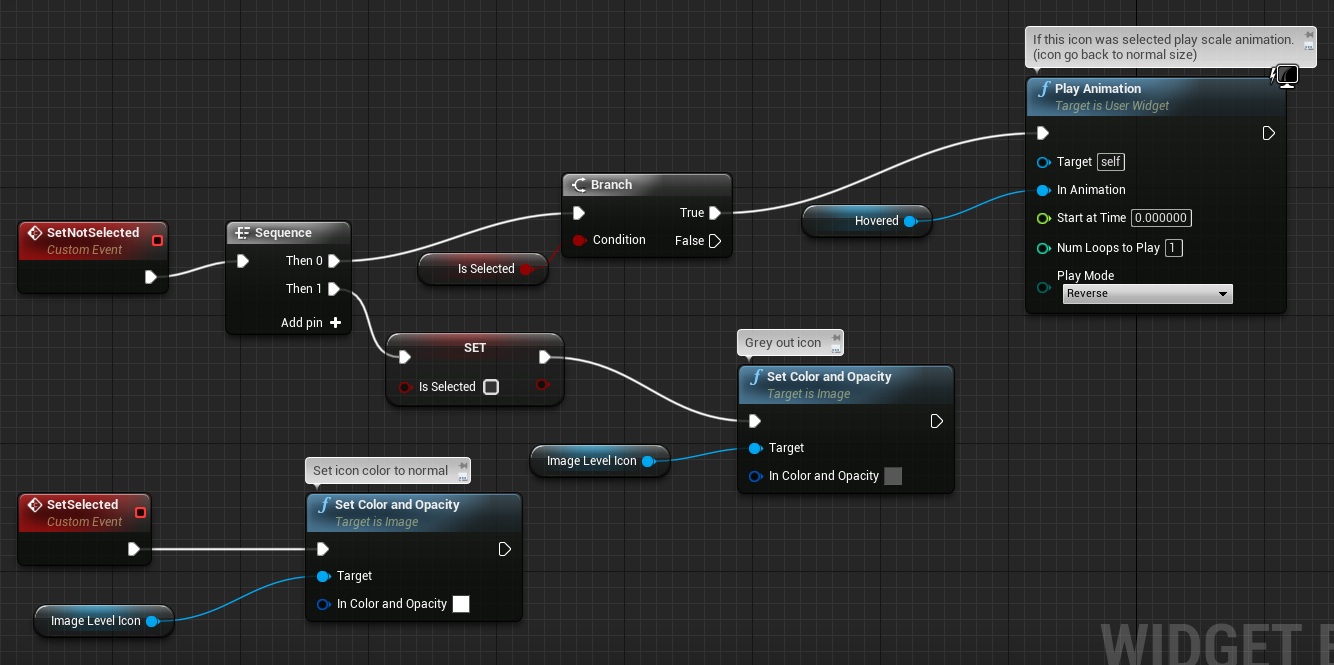
Create two custom events: SetSelected and SetNotSelected:
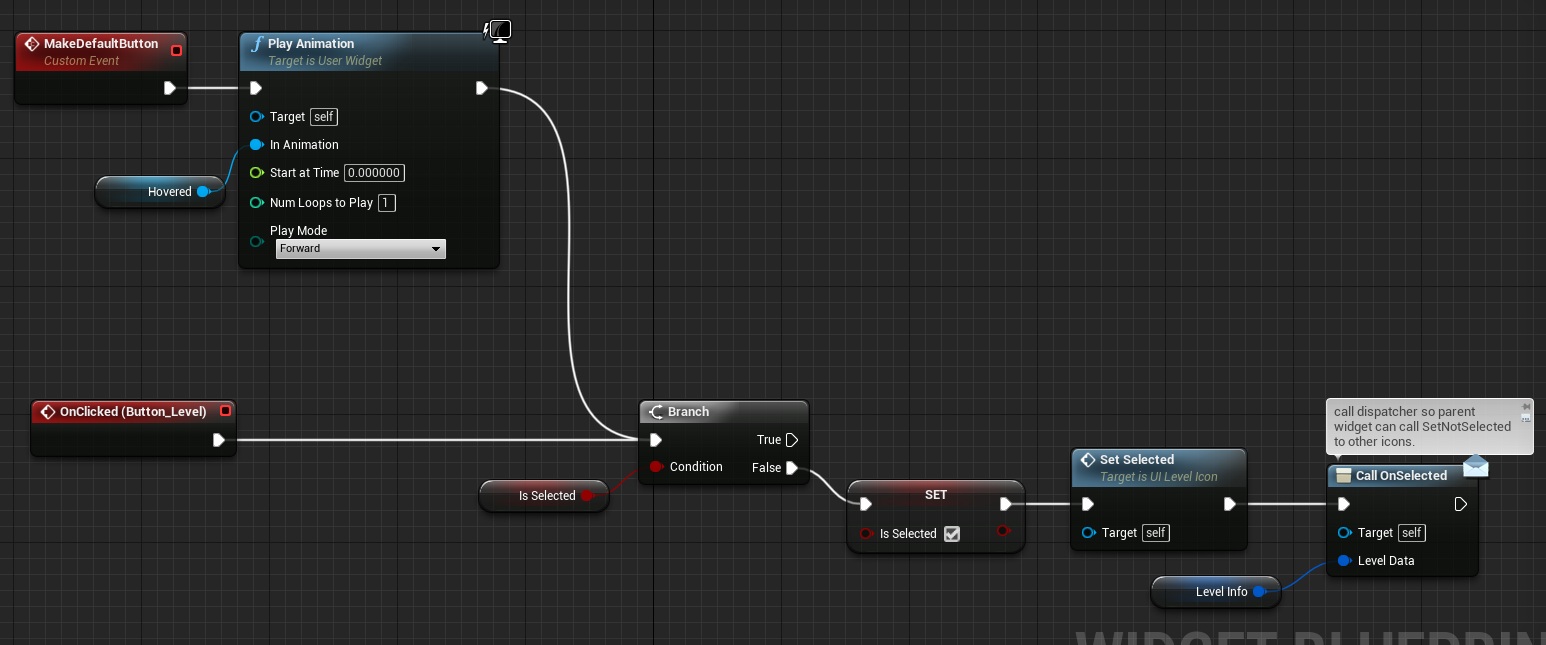
Now add OnClicked event to the Button and create new custom event named MakeDefaultButton:
Why MakeDefaultButton is needed? I want to select first level icon when opening the level selection screen. This will call OnSelected as well.
Creating Animated Text Widget
I will use knowledge from last tutorial about subtitles. Create new widget named Widget_AnimatedText.
It should contain only Text (is variable should be set to true) without Canvas Panel!
Add those variables:
- Text (string),
- TextChar (string array),
- AnimationSpeed (float, default: 0,02, editable),
- Counter (int),
- AccumulatedDelay (float)
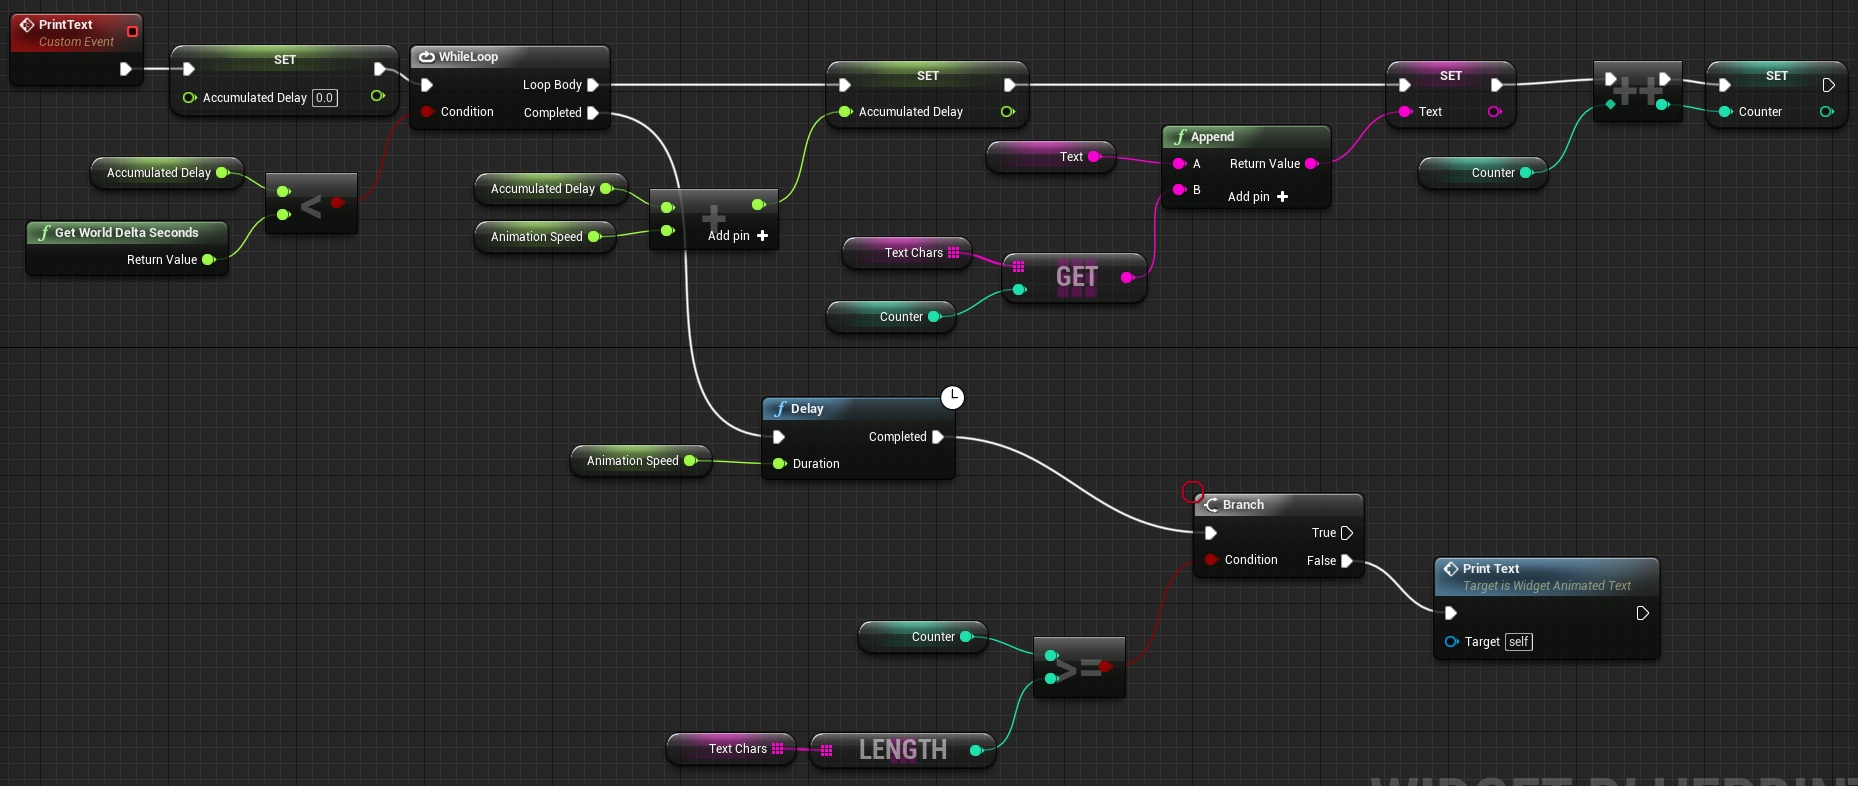
Create new custom event named PrintText:
You should know this already after subtitles tutorial.
Create new custom event named AnimText with one String Input:
This is just triggering the animation and making sure variables are reset.
Creating Level Selection UMG
Now the meat – level selection screen. Here you can find hierarchy:
Open Graph and add those variables:
- SelectedLevelData (Level Data Structure),
On Construct let’s make Level 1 default selected button:
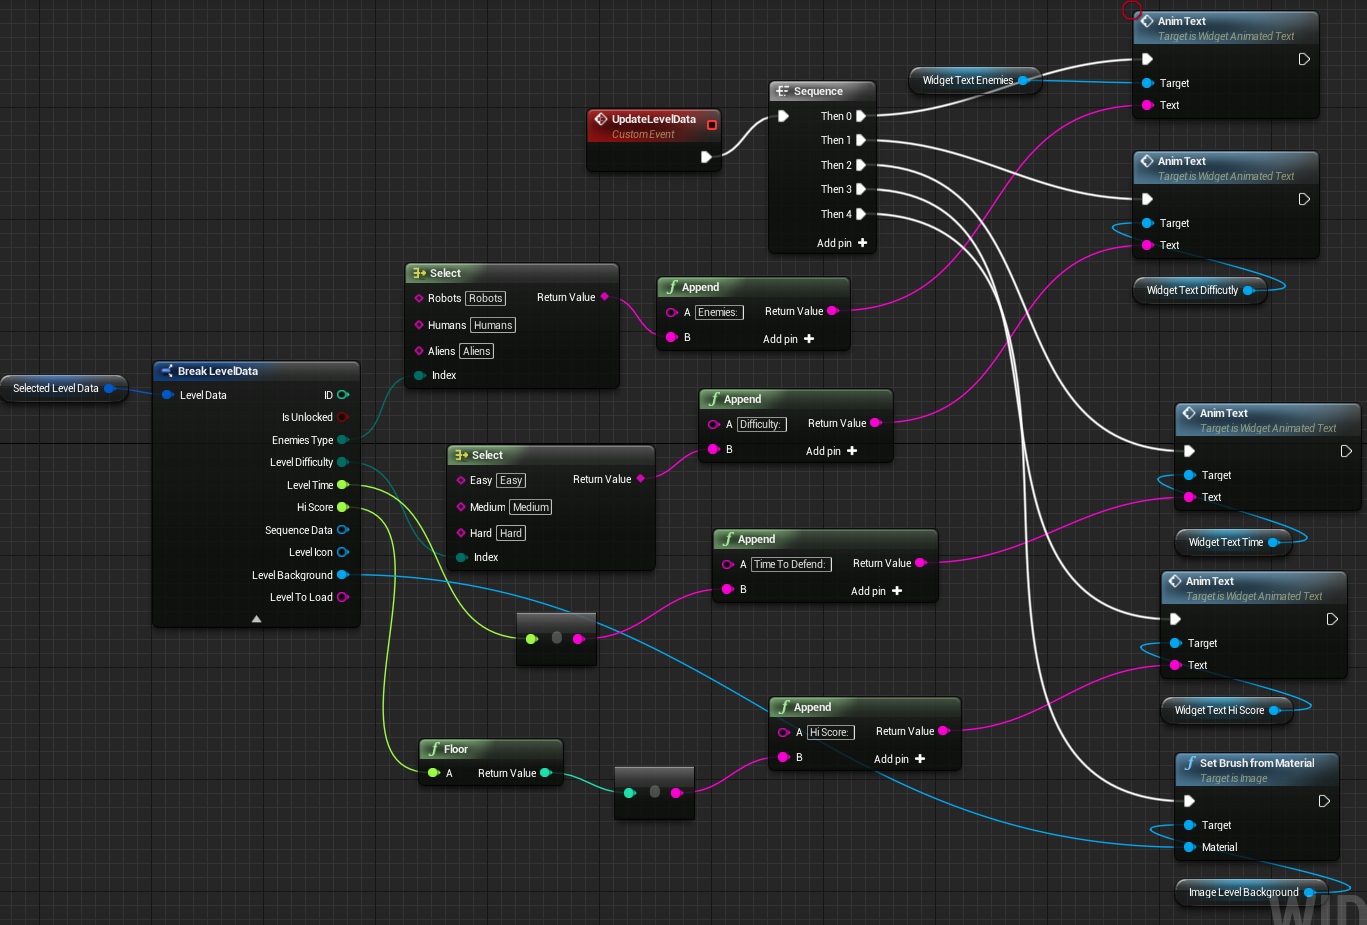
Create new custom event named UpdateLevelData:
This is taking SelectedLevelData structure information and update all widgets. Triggering text animations and changing background icon.
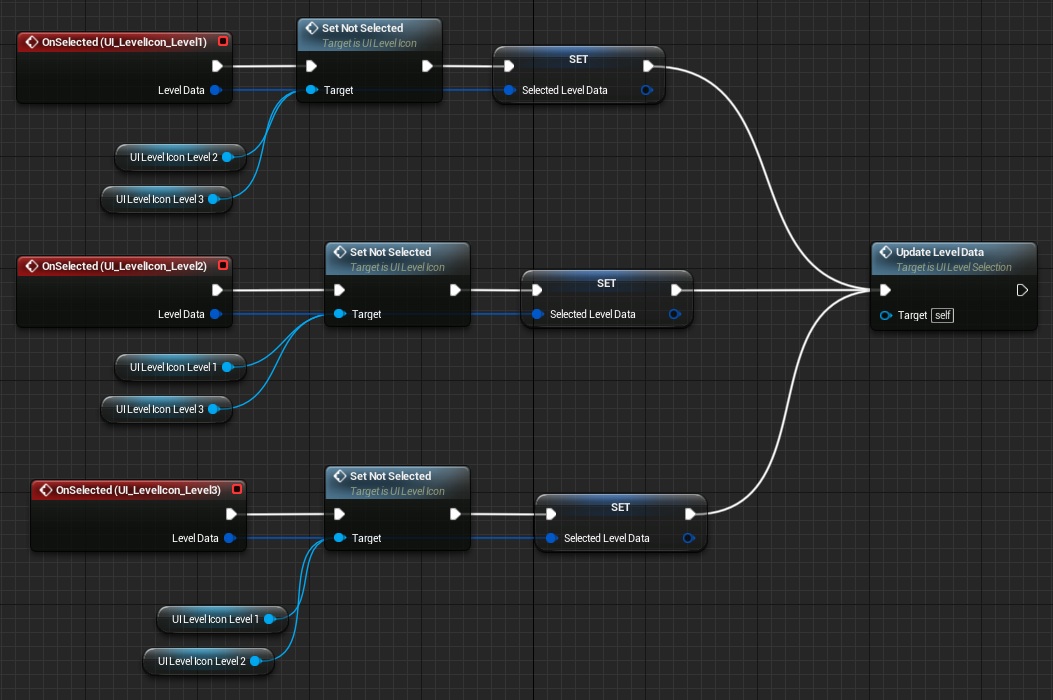
In Designer your UI_LevelIcon can add OnSelected event:
Add OnSelected to all UI_LevelIcon added to Designer.
This is getting LevelData from Icon and pass it to UpdateLevelData event. It’s making sure all other icons aren’t Selected.
That’s all here! The best way to test widget is to open Level Blueprint and add these:
Creating 3d Widget
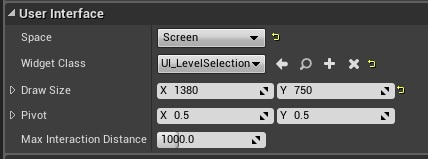
Create new blueprint extending from Actor named UI_LevelSelectionActor. Add Widget component:
I’m using Screen space because there is an issue in 4.9 with buttons in 3d widgets.
Go to Event Grap and add Begin Play to trigger mouse.
Place this actor in your main menu level and you can test it out!
Final Effect
Creating ShooterTutorial takes a lot of my free time.
If you want you can help me out! I will use your donation to buy better assets packs and you will be added to Credits /Backers page as well.Implementing game is taking time but writing about it is taking much more effort!







Ummm… I think you have the wrong link for this page? This is supposed to be the main menu tutorial, however it displays the level selection tutorial.
Great series by the way.
Thanks, fixed!
Pingback: Summary Screen | Shooter Tutorial
For anyone struggling to get your compile done in VS after adding the int and bool variables at the beginning – Use uint8, int32, or uint32 instead of int.
https://answers.unrealengine.com/questions/45937/getting-unrecognized-type-int.html