You guys requested melee tutorial and I’m right after game jam where my colleague (cheers Tomek!) did really simple but powerful melee weapon. This tutorial will be about:
- How to do melee damage,
- Create basic weapon class to drive melee damage,
- Weapons can be added to AI characters as well and they will do melee damage to others as well (Player and other AI)
- There will be two versions: one without any additional preparation and second one in which you need to add sockets to weapon mesh.
So, lets go!
Used Assets
In this tutorial I have used Animated Medieval Bludgeoning Weapons Pack which basically isn’t needed in this tutorial but with animations it’s easier to show you guys how to do melee damage. (btw hope Ironbelly will do more first person medieval animations like two handed swords, dual weld weapons etc.
So basically what you need is:
- Weapon Mesh – as skeletal mesh,
- Hands with some animation because information when to start/end melee will come from animation,
Base Classes
Base Weapon Class
Create new Blueprint extending from Actor named BP_BaseWeapon. For now leave it blank.
Structure with weapon data
It isn’t needed for melee but I would like to show you guys how I’m creating weapons to be easy modified by designers.
Create new structure named FWeaponInfo and add those variables:
| Name | Type | Description |
| Damage | float | Base damage for weapon. Default 1. |
| DistanceModifier | float | Melee range modifier for this weapon. It’s important that default will be 1. |
| WeaponMesh | Skeletal Mesh | Reference to Skeletal Mesh weapon. Default should be leaved as blank. |
Basically here you can put all of your mesh statistics and data which you are interested in. (eg. UI texture reference, weapon type enum, attack speed etc)
Data Table to store all weapons data
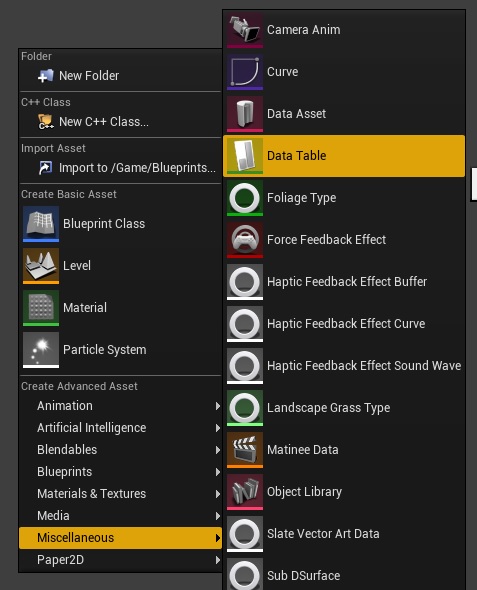
After creating structure create new Data Table:
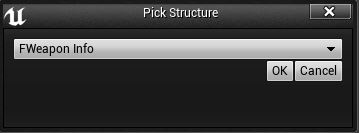
Which will use FWeaponInfo:
Pick some name for your Weapons Data Table.
Open it and add one weapon. Make sure it will have Skeletal Mesh assigned to WeaponMesh.
Why you should use DataTables? It’s really fast to iterate while using them. You can have one folder in your Content named Data with all of your data tables (eg. enemies stats, perks, level informations) so people won’t be searching in your code / blueprints to change some variable they will have one place with all of them.
You can find more information about Data Tables here.
Damage Interface
Next create new Blueprint Interface named IDamage. It should have two functions:
TakeDamage – with 3 inputs:
- Damage, float
- HitResult, Hit Result
- Instigator, Actor Reference
And GetHoldingWeapon function with one output:
- Weapon, BP_BaseWeapon reference
Interfaces are used to communicate between classes. You can create function with output as well which is super useful.
Weapon Class / Melee Here
Now go back to your BP_BaseWeapon and add some variables:
| Name | Type | Description |
| WeaponInfo | FWeaponInfo | This will store weapon information which will be populated from Data Table. |
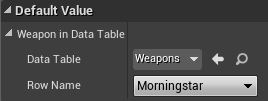
| WeaponInDataTable | DataTableRowHandle | This is the link to Data Table and specific weapon. Make sure you have selected your data table and pick some weapon! |
| isInAttack | bool | This bool will represent if this weapon is in attack and we should trace for melee. |
| isUsingSockets | bool | This will indicate if melee trace will use sockets or not. We will try to find sockets in weapon and use them if added. |
| HitActors | Actor Reference Array | This array will store all actors that have been hit by melee. |
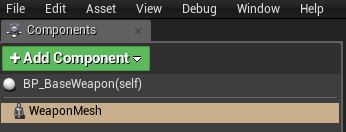
In Viewport tab make sure you have added Skeletal Mesh Component which will be root.
Now let’s add some Functions.
Start Attack
EndAttack
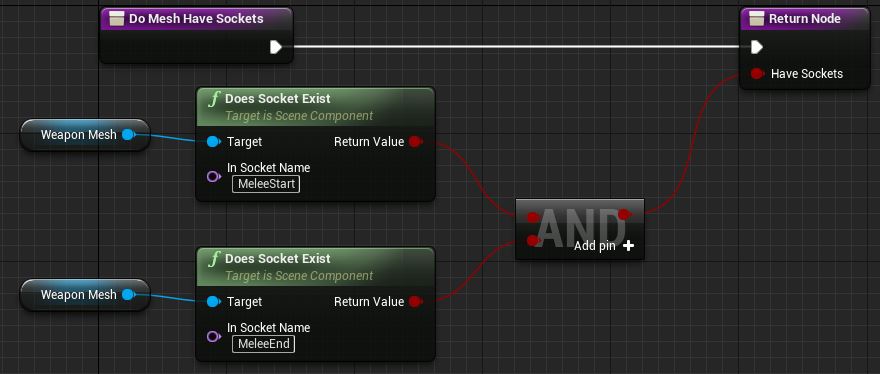
DoMeshHaveSockets
Sockets names are hard coded as you see. If you want to use them for trace start / end – just put them into your skeletal mesh.
Note: You don’t need to add them – we will have small algorithm to get mesh bounds and calculate start end trace. It’s optional but you will have more control of melee trace with them.
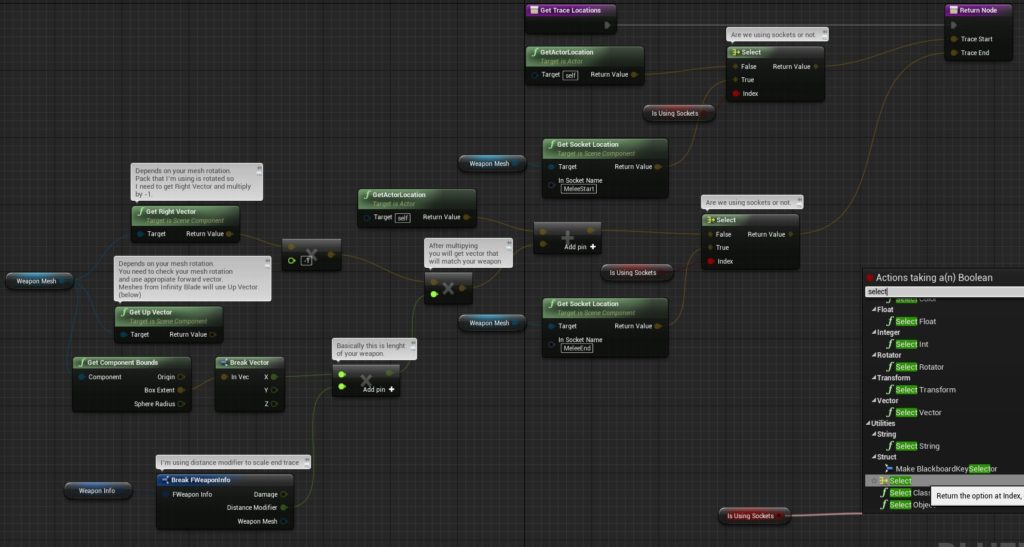
GetTraceLocations – Pure Function with two outputs:
- TraceStart, Vector
- TraceEnd, Vector
This part is important take some time to figure out what it does. Part with sockets is simple but without them it’s more complicated but still with small amount of calculations.
I’m taking box extend of a weapon which will give me lenght on X. Then I need to get the same direction vector (and it depend on weapon – read comments) to multiply my extend with it – so it will point end of the weapon.
What you can do here is to add Socket as Root and rotate your mesh, but more pro way is to have the same rotation for all of the imported weapons. If you are using Infinity Blade weapons they will use Up Vector and if you are using Medieval Bludgeoning Weapons Pack they are using Right Vector multiplied by -1.
GiveDamageOnce with two inputs:
- To, Actor Reference
- HitResult, Hit Result
This is making sure we won’t add damage twice to the same actor in the same attack swipe.
We will be calling this function in tick, during animation that’s why it’s needed.
Now go to Event Graph and add some Events.
Begin Play
As you can see it’s responsible for weapon configuration.
This should be self explanatory. Basically weapon is waiting (IsInAttack) to check what is under line trace.
Configuring Character – Attach mesh to hands
Now when we have weapon class ready we need to attach weapon somehow to our character.
I’m using Character with hands (FirstPersonCharacter_MedievalBludgeoningPack) from Medieval Bludgeoning Weapons Pack but it is doable in any assets that you have.
First your Character need to have HoldingWeapon variable – of course extending from BP_BaseWeapon.
Next your Character (or any actor that will use weapons – enemies for example) need to have IDamage interface implemented. So go to your class settings and add IDamage interface.
Then double click on GetHoldingWeapon to override interface function and return HoldingWeapon.
Now in your Begin Play you need to:
- Spawn the weapon,
- Make sure spawned weapon is Holding Weapon,
- Attach it into hands,
Let weapon know to trace and do damage
Now we need to inform holding weapon that we would like to trace and do melee damage. What’s the best way to do this? Use animations and anim notifies.
Pack that I’m using have couple of attack animation and I will use them, but you can use any animation you have.
First create new Blueprint extending from AnimNotifyState named Notify_MeleeDamage. Open it and Override two functions:
Received_NotifyBegin
Received_NotifyEnd
Now open some attack animations and add you notify when attack should appear.
And that’s it! If you want to add damage to actors/enemies you need to add IDamage interface to them and add Event Take Damage. AI isn’t in scope of this tutorial but it’s on my list 😉







Looks amazing, thank you.
Question: This method will work with multiple enemies at one? I mean, I can hit 2 or more ?
Yes.
thanks a lot! 😀
Awesome friend . Doyou want to do a series of tutorials covering a melee fight with use of weapons and enemies ?
PLEAAAS
Can you send the project in a “cloud” (googledrive/ dropbox….) ?
please
Hi Again, I have a new question. How I Know which kind of object I just hit? I want to make different effects to eatch kind of object type.
For example, I want make a spark + sound if I hit a static mesh, after hit a wall. and thanks again for your time 🙂
Hi, I have a problem with the GiveDamageOnce function inside baseweapon, when I call “Take Damage” in “target” I can not link to “To” on the output node, says it is not compatible, any idea?
Hi,
Finished the tutorial.
Implemented the damage interface. Its as simple as can get. call event >reduce health by damage > debug print string
what I noticed is that the event in never called, so “give damage once” function must have some issues. Even if I hardcode the damage not taken from a variable it still doesnt call the event not pass the value.
Any idea what I could $#$%& up?
I get multiple hit noted, but somehow the entire part of adding to hit actors array doesn’t work.
There is an obvious error: in GiveDamageOnce – the branch should link FALSE instead of TRUE.
Yes, this is definitely the error.
Hi, great tutorial by the way.
However, I do have one question. After implementing all the scripts and necessary components how would you make your character perform the melee attack.
Thanks
Keep getting “Error Blueprint Runtime Error: Accessed None trying to read property CallFunc_GetHoldingWeapon_NewParam from function: ‘Received_NotifyEnd’ from node: End Attack in graph: Received_NotifyEnd in object: Notify_MeleeDamage with description: Accessed None trying to read property CallFunc_GetHoldingWeapon_NewParam”
I can’t seem to get this working, I have it tracing lines but it doesn’t seem to pick up hits on any of the enemy models I put in the level whether they have an Idamage interface or not
Pingback: Using Unreal Engine 4 to create Game Jam – Shooter Tutorial