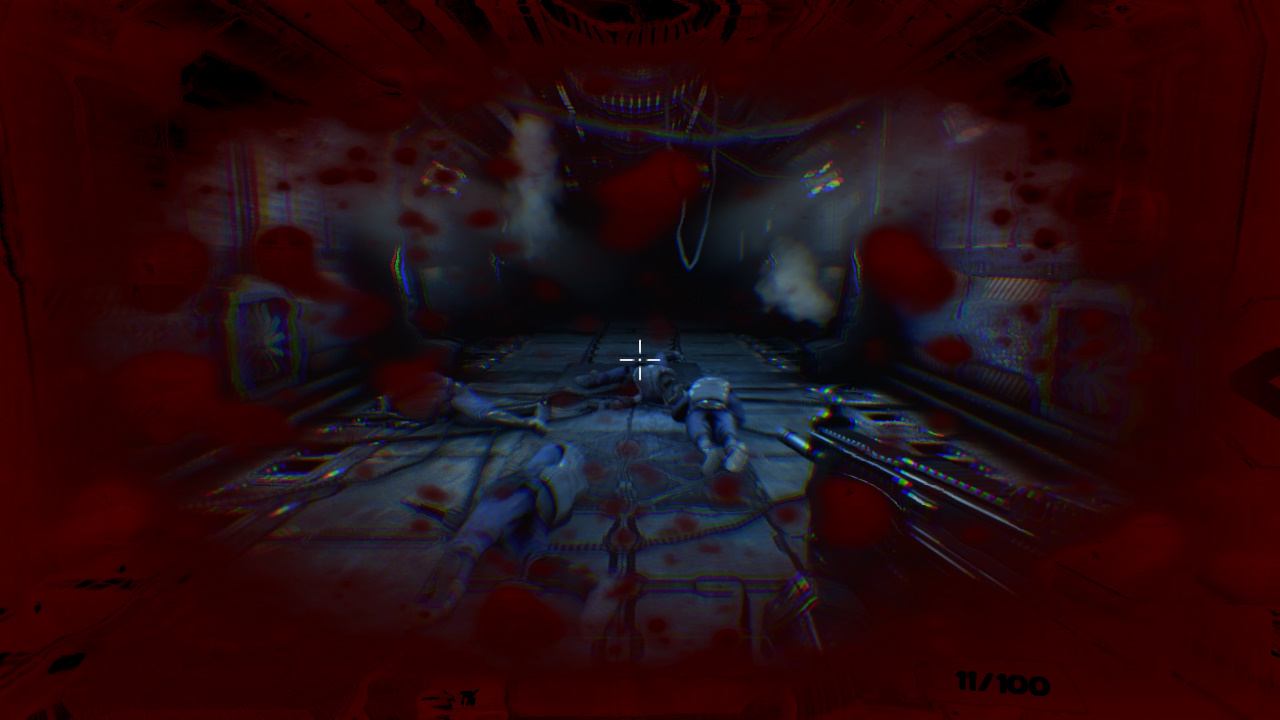
In this tutorial I will focus on effects when player is taking damage. This will cover:
- PostProcess material for blood effect,
- Driving variables to Material,
- Distortion,
- Dying camera effect,
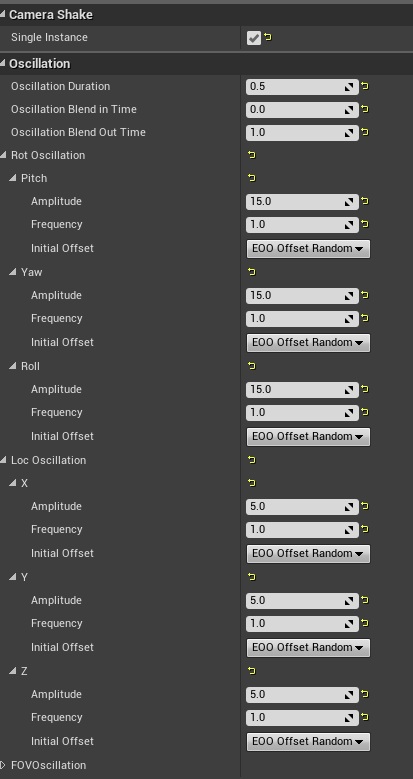
- Camera shakes,
I have searched whole internet for player damage effects using post process materials but haven’t find anything. Hope it will be helpful!
|
1 2 |
<strong>This Tutorial has been created using Unreal Engine 4.8.2</strong>. Make sure you are working on the same version of the engine. |
First of all you need blood textures. I have found this on Unity Store. It’s cheap and for this price you will get two textures, both with normalmap. You could search for blood leaks by yourself, but better textures will be much more expensive.
If you bought this package normalmap comes as grayscale (height information) and you need to convert it to normalmap. I have used this great site to convert those online. You just need to save the TGA as PNG before uploading file to this tool.
After converting import diffuse and normalmaps to engine.
CREATING MATERIALS
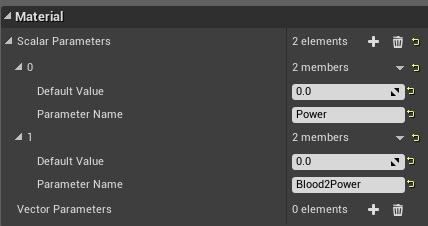
Create Material Parameter Collection named DamageIndicatorPower, open it and add two scalar variables (btw scalar means float)
Power will be used for whole screen effect when low health. Blood2Power will be used for instant blood splashes after taking hit.
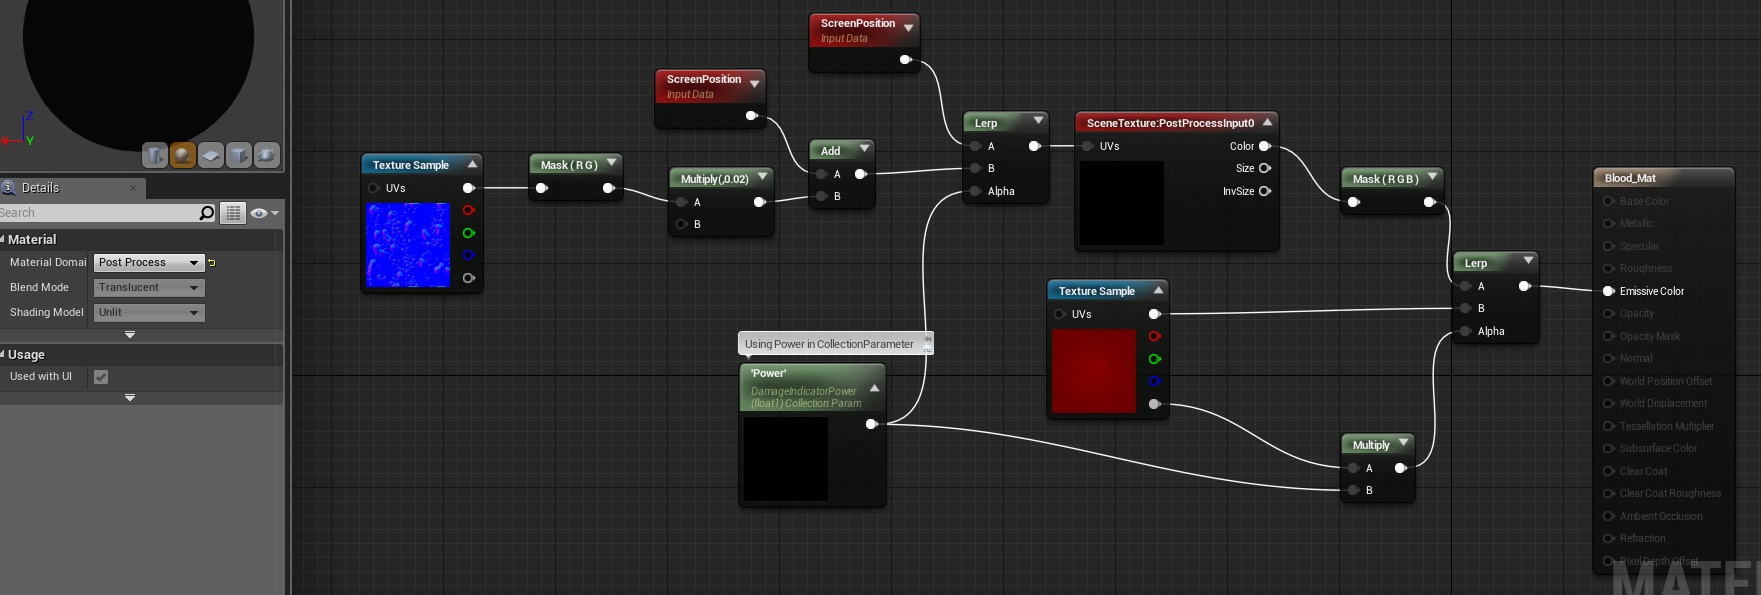
Create first material from Blood texture. Here’s the material.
The second material is exactly the same but using Blood2Power as parameter and Blood2 diffuse and normalmap. Just duplicate this material and change variables.
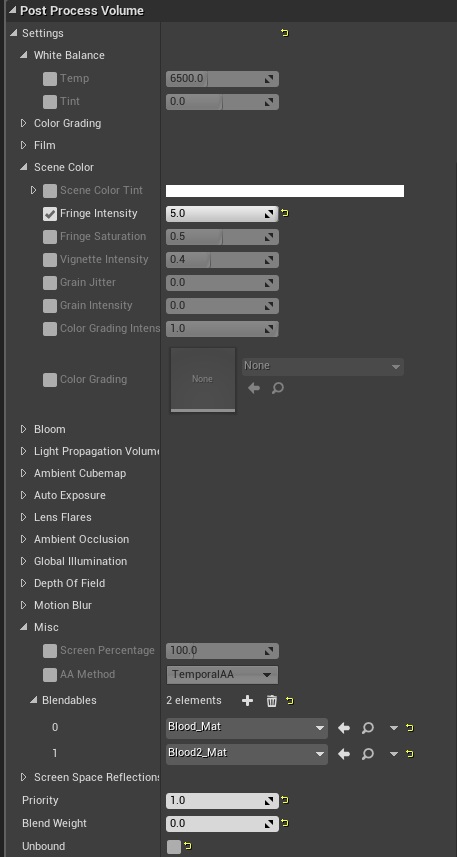
You can preview this in editor by:
- Set scalar values to 1,
- Open level and find post process volume,
- Navigate to Misc and Blendables category,
- Add your material,
- Make sure you have Lit mode,
CREATING DAMAGE EFFECTS
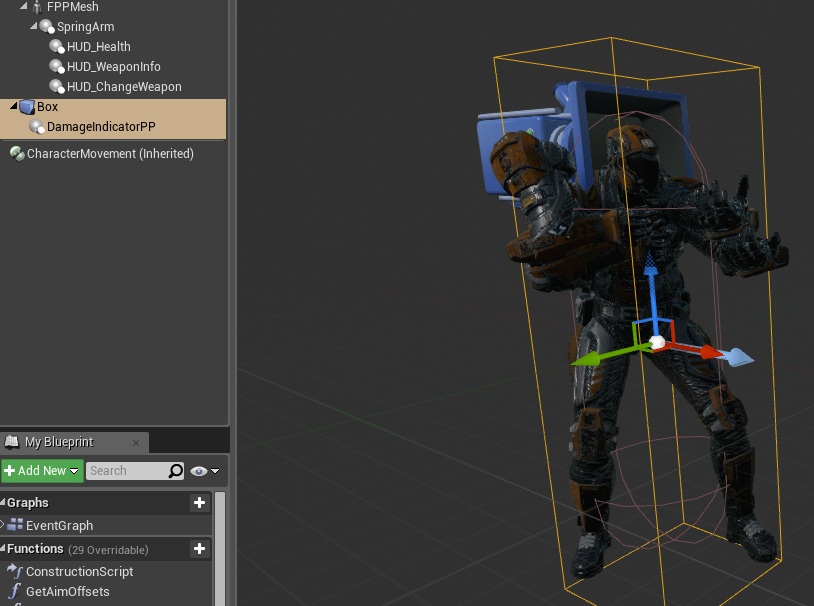
Open GameplayCharacter blueprint and add Box Component without any collisions. Add PostProcess Component named DamageIndicatorPP and attach it to Box Component.
As you can see my Box is covering whole player. Basically PostProcess component will use this Box Component as Volume.
DamageIndicatorPP properties:
Now open Event Graph and add those variables:
- CurrentDamageIndicator (float),
- MaxDamageIndicator (float, default: 2),
- MinDamageIndicator (float),
- DeltaTime (float),
- DesiredDamageIndicator (float),
- DamageIndicatorSpeed (float, default: 5),
- LowHealthIndicatorPower (float),
Before moving forward create new blueprint extending from Camera Shake named PlayerTakeDamageCameraShake.
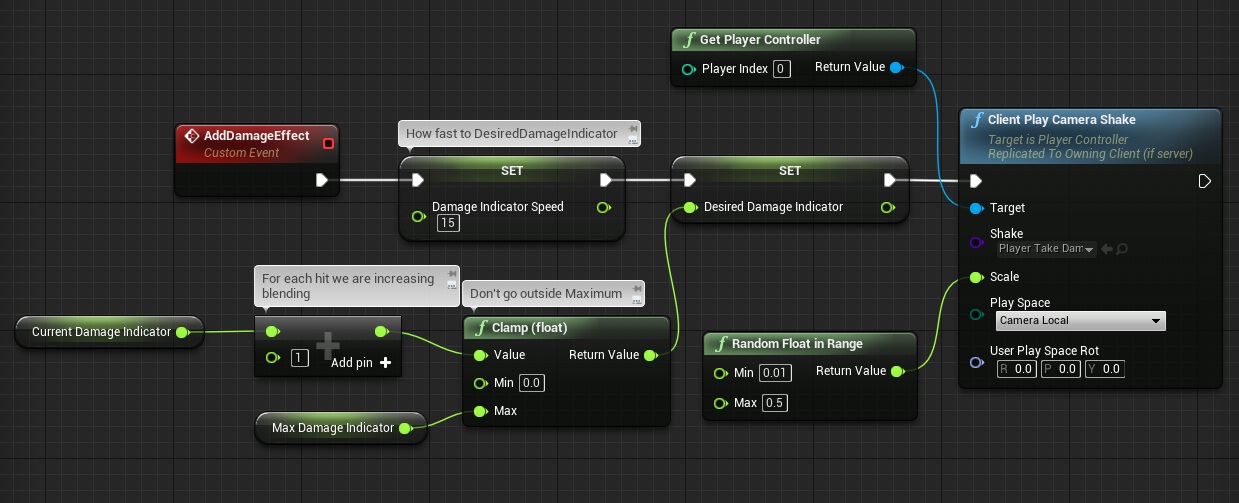
Go back to GameplayCharacter and create new custom event named AddDamageEffect.
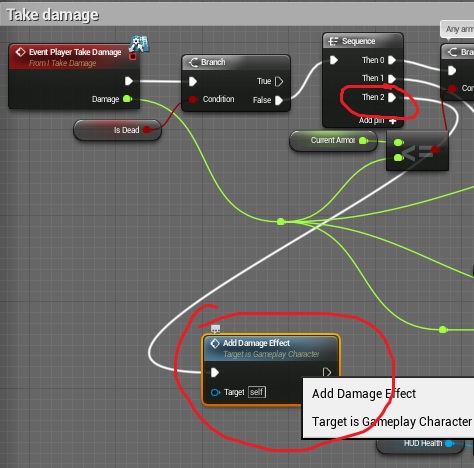
Now find your PlayerTakeDamage event and call AddDamageEffect in the end.
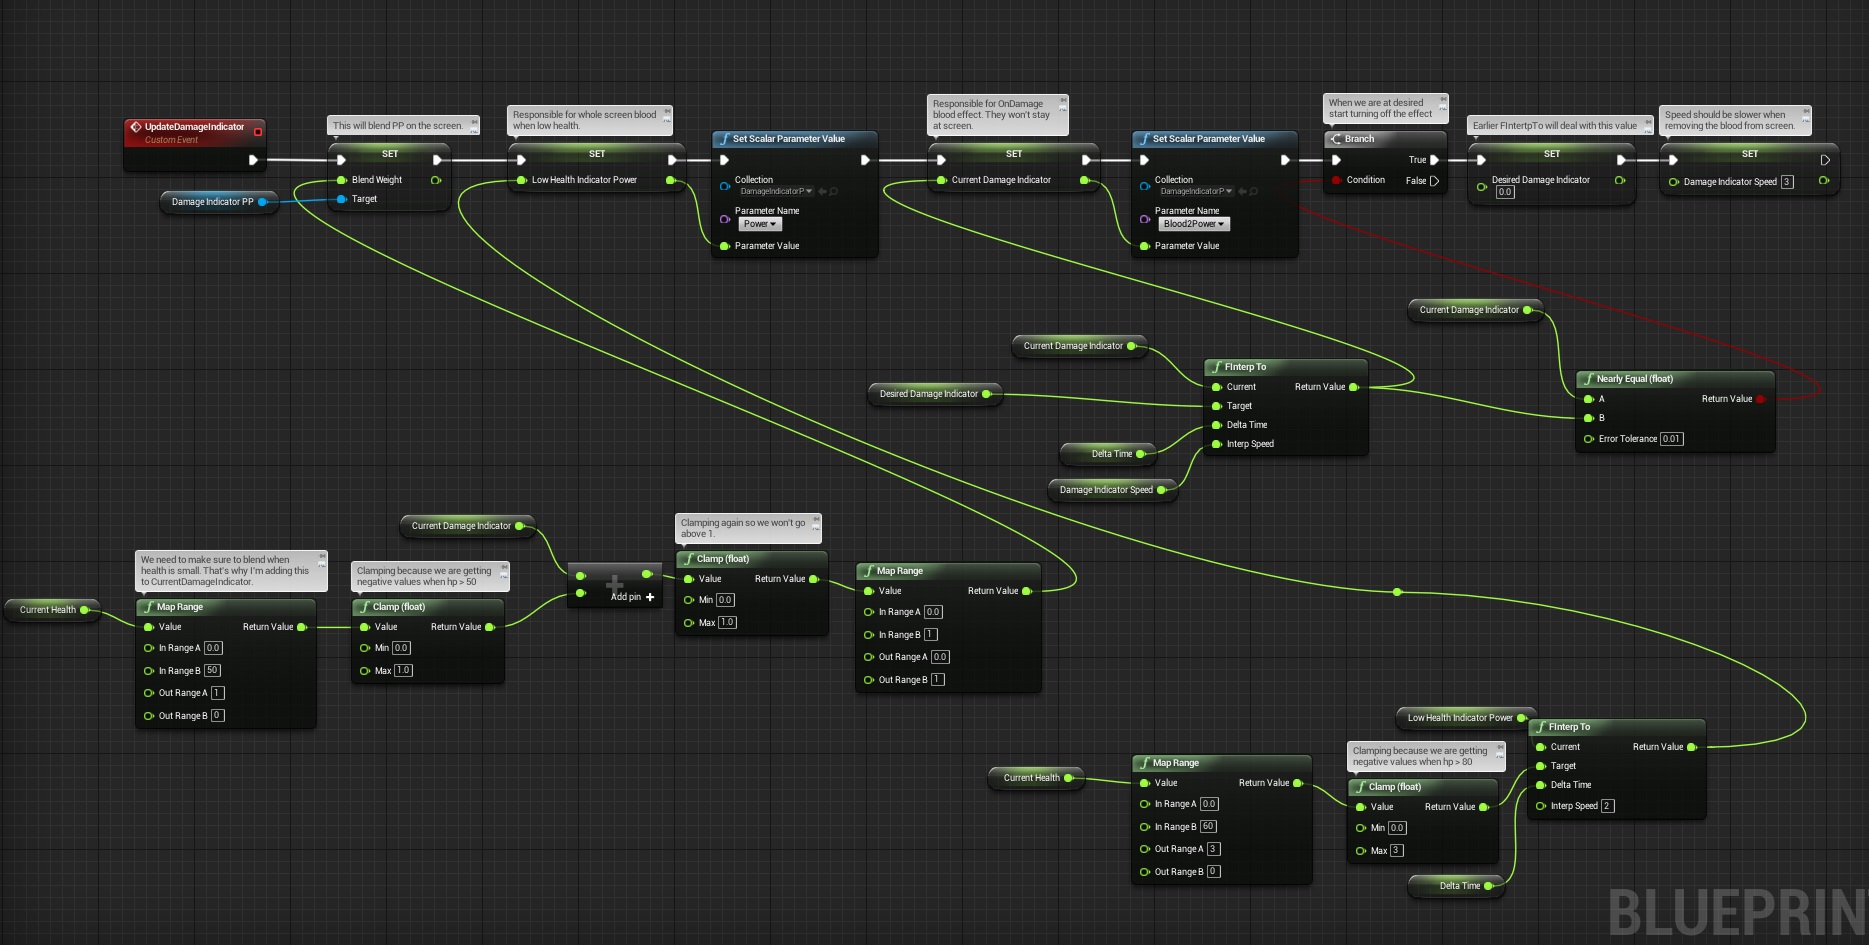
Create new custom event named UpdateDamageIndicator. This is the place where magic happens.
It’s updating two scalar parameters – one for low health blood material and one for taking damage blood material. Hope my comments are enough for you guys.
Now create Tick event and connect UpdateDamageIndicator.
And that’s all. You should get blood splashes on damage and on low health.
CREATING DYING EFFECT
Create new Physical Material named DyingHeadPhysMat. Make sure Restitution is 0. Now create new blueprint based on Actor named PlayerDyingEffect.
Components:
Root Component – Sphere from Basic Shapes.
- Simulate Physics: True,
- Linear Damping: 3,
- Angular Damping: 0,5,
- Phys Material Override: DyingHeadPhysMat,
- Collision Presets: Only block WorldStatic – rest should be set to ignore,
Add new Radial Force Component named LeftForce:
- Location: (X=45.000000,Y=11.005877,Z=5.437829)
- Radius: 50,
- Impulse Strength: 500,
- Impulse Vel Change: True,
- Auto Activate: False,
Add new Radial Force Component named RightForce:
- Location: (X=45.000000,Y=-11.000000,Z=5.437829)
- Rest settings are the same as LeftForce.
Add new Post Process Component and leave it as it.
Now open Event Graph and add one Post Process Settings variable named PPSettings – it should be editable and exposed on spawn.
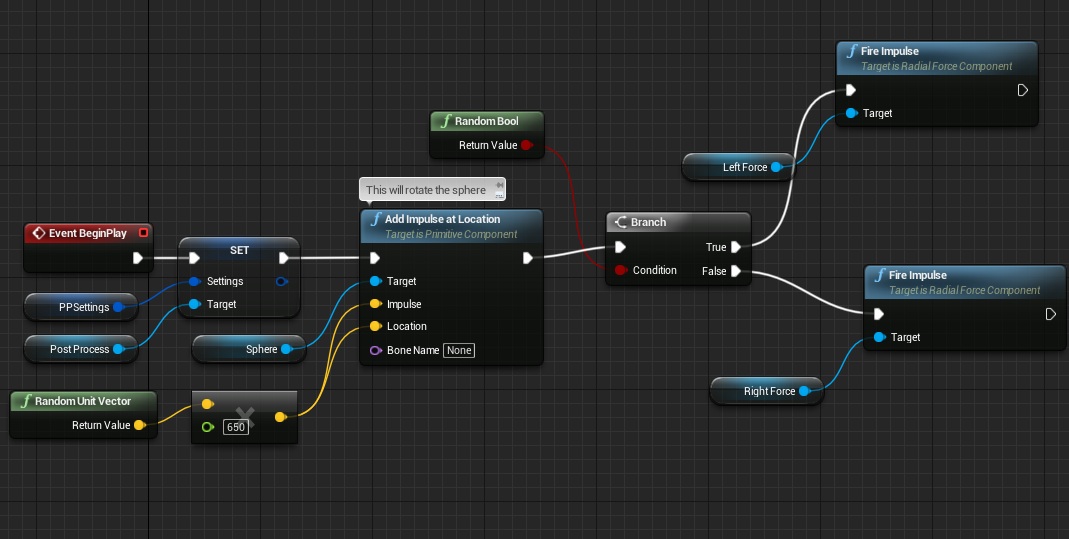
Add Begin Play event.
This is the fastest and the simplest way to do camera dying effects. Basically you could work on this more and try to get Direction from where enemies are hitting and add impulse to the Sphere depending on the direction and the damage that was taken.
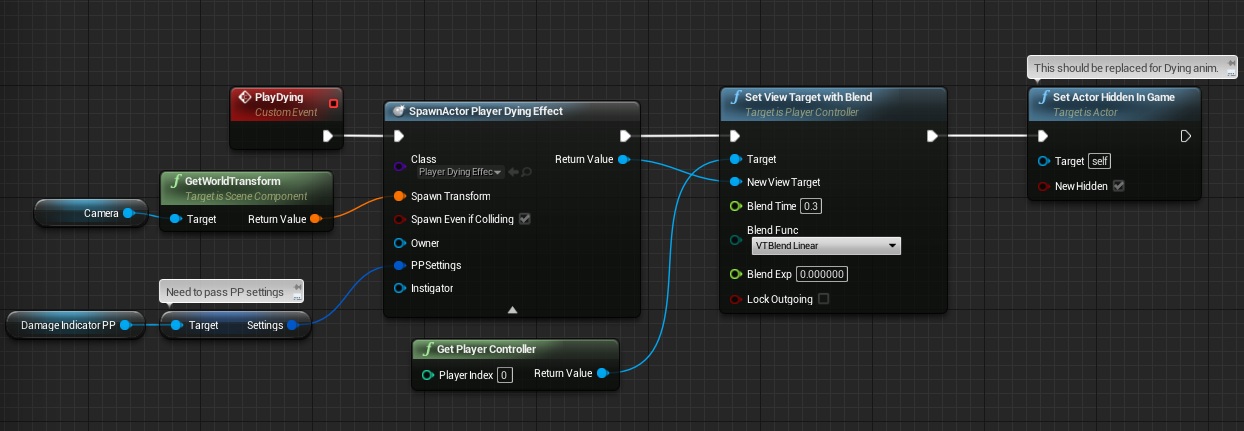
Now go back to GameplayCharacter and create new custom event named PlayDying.
You need to call PlayDying from TakePlayerDamage when you are sure player is dead.
And whala you have camera dying effect!
Here’s the final result. Remember to tweak the values for your needs.
Creating ShooterTutorial takes a lot of my free time.
If you want you can help me out! I will use your donation to buy better assets packs and you will be added to Credits /Backers page as well.Implementing game is taking time but writing about it is taking much more effort!




Reblogged this on King Designs.
Hi there, You’ve done a fantastic job. I’ll certainly
dogg it and personally sughgest to my friends. I’m sure they will be benefited
from this site.
That dying effect not worked for me yet, but when i added Camera into sphere, it worked properly. You forgot to mention it or im doing something bad? 🙂
and again thx for these tutorial series, they are godlike
Pingback: Эффект получения урона и смерти в unreal engine 4 | RedComrade
Excellent tutorial. Very clean way of doing the damage effect. I was wondering if you found a solution for the effect turning off instantly when a certain health threshold is reached? Because the effect scales with damage, when recovering (if you have a regen system for example), the effect doesn’t scale back to zero over time, it snaps back to zero.
Any thoughts on how you would change this?
how do i save the TGA as PNG in unity i need help, also for this to work will i need to have followed all the other tutorials?
how do i save the TGA as PNG in unity? Also do i have to follow all of the previous tutorials for this to work?
This is not working in 4.16 can you update this?!