In this tutorial I will create first boss enemy. Which:
- Can do melee damage to other enemies,
- Do melee damage to player,
- Fire projectile to player direction,
- Will only react on plasma weapons and only in one weak spot,
Everything will be done using just blueprints. I would like to show you how to create AI without using Behavior Trees.
|
1 2 |
<strong>This Tutorial has been created using Unreal Engine 4.8.2</strong>. Make sure you are working on the same version of the engine. |
I have bought Robot Warrior 3 from Dexsoft for this enemy.

Pack pros:
- Small price,
- Low poly,
- One material,
- Easy to import to UE4,
- Skeleton have separated parts so you could implement bone breaks, and I will do this in later tutorial,
Pack cons:
- Really bad skeleton. It will be impossible to create good ragdoll for this mesh,
- Need to import in different scale than normal (scale 6 works fine) and because of that sockets will have big scale and preparing phys asset will be pain,
- Long naming in bones and animations,
I have created issue on AH about importing animated assets with different scale. Before going further find out if it’s resolved.
Basically I wouldn’t recommend buying this asset if you are beginner. I was able to create some functionality from it but it was really hard.
IMPORTING ROBOT
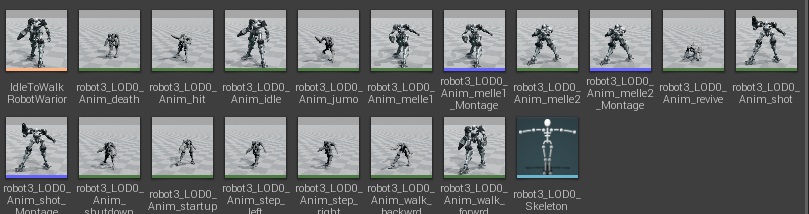
Import robot3_LOD0.fbx. Make sure you are importing animations (animated time) and scale is 6 instead of 1. After importing you should see all animations separated.
PREPARING NEEDED ASSETS
Open Skeleton and add those sockets.
S_WeaponSpawn:
- BoneName: robot_elbowext_rt_jnt
- Location: (Pitch=-0.002838,Yaw=-70.000000,Roll=-0.000000)
- Rotation: (Pitch=-0.002838,Yaw=-70.000000,Roll=-0.000000)
- Scale: (X=0.050000,Y=0.050000,Z=0.050000)
S_RightHand:
- BoneName: robot_elbowext_rt_jnt
- Location: (X=0.056248,Y=-1.378158,Z=-0.028321)
- Rotatoin: (Pitch=0.000000,Yaw=-90.000000,Roll=0.000000)
- Scale: (X=0.100000,Y=0.100000,Z=0.100000)
S_Damage:
- BoneName: robot_pelvis_jnt
- Location: (X=0.300622,Y=-0.000000,Z=0.299654)
- Rotation: (Pitch=0.000000,Yaw=0.000000,Roll=0.000000)
- Scale: (X=0.010000,Y=0.010000,Z=0.010000)
Because of the issue with scale it’s hard to place the sockets to specific location. Remember to change the sockets scale!
Create Phys Asset from the skeleton.
This will be really hard and it takes me couple of hours to make phys asset that will not blow away. Before moving with this be sure you know how to use Physics editor (eg. read previews tutorials!)
Here you can see on which bones I have created bodies.
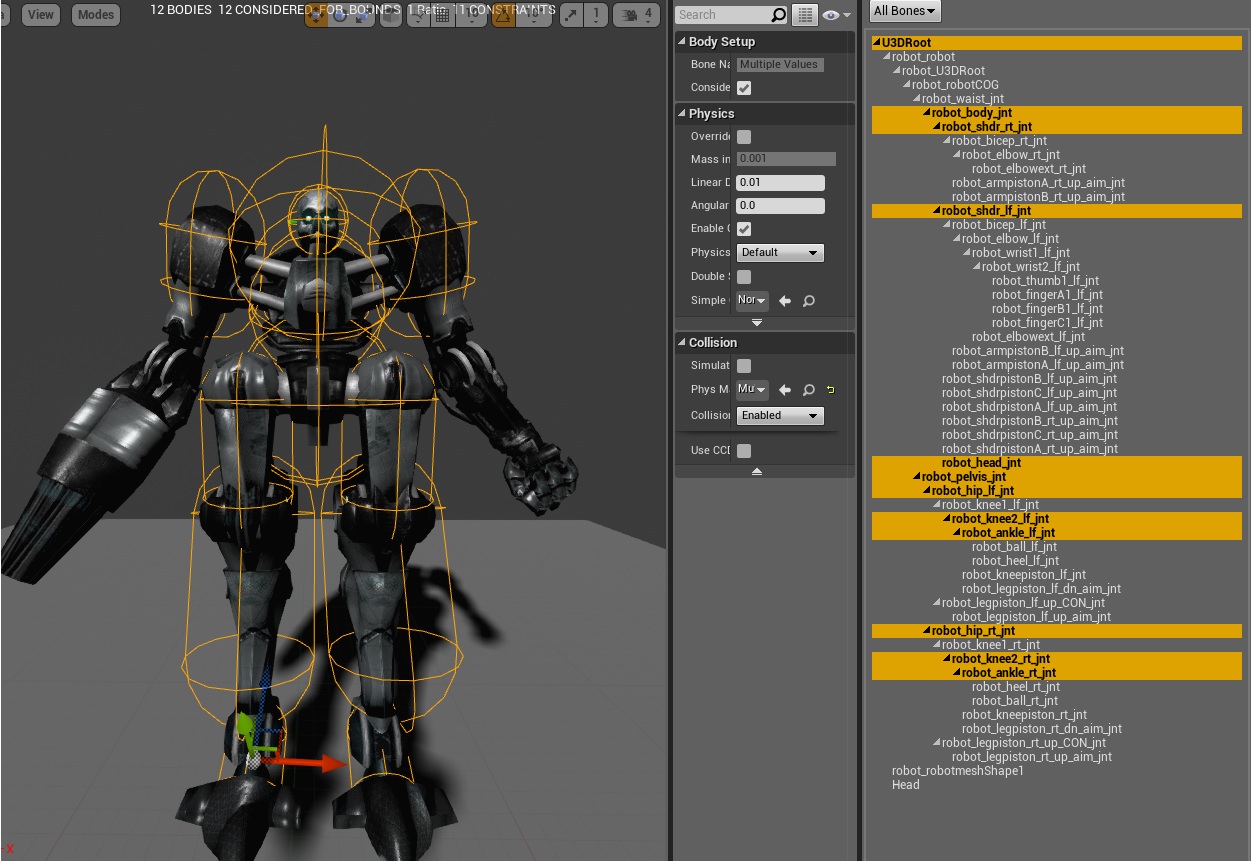
All of the bodies should have Phys Material: Metal_LeftFoot. Just one body should have Metal_Head phys mat- robot_pelvis_int. If you read other tutorials you should know that Phys Mat has information about damage.
Two contains are breakable:
Take your time with the phys asset. It is really hard to create one from this asset.
Animations
Create blend space 1D named IdleToWalkRobotWarrior.
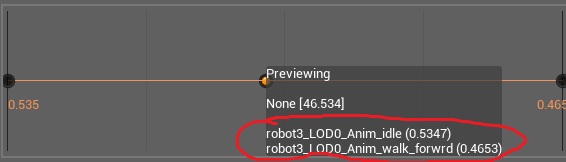
It should go from Anim_idle to Anim_Walk_Forwrd.
Now we need to create couple of anim montages from animations.
- robot3_LOD0_Anim_Melle1_Montage from robot3_LOD0_Anim_Melle1 animation,
- robot3_LOD0_Anim_Melle2_Montage from robot3_LOD0_Anim_Melle2 animation,
- robot3_LOD0_Anim_shot_Montage from robot3_LOD0_AnimShot animation,
I’m sorry for the names – they comes with the package from Dexsoft.
Create new Animation Blueprint from the robot skeleton. Name it Robot3_AnimBP and add one variable RobotSpeed (float) Anim graph is really simple:
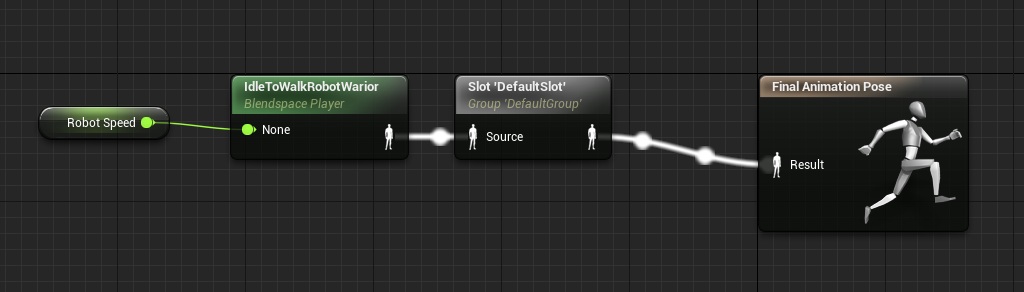
Event graph is simple as well.
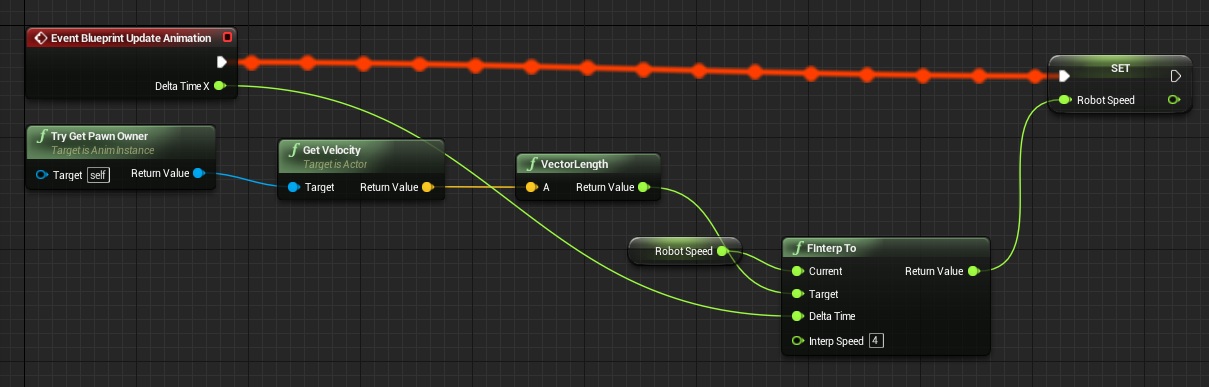
I’m interpolating the speed to avoid glitches on the blend space. At this point those kind of things should be really easy for you – if they are not I suggest to go back to previews tutorials again.
This is enough now to move with Robot enemy blueprint!
CREATING ROBOT BLUEPRINT
Create new blueprint based on BP_BaseEnemy named BP_Enemy_RobotWarrior. Open it.
Components
CapsuleComponent:
- Radius: 52,
Mesh:
- Skeletal Mesh: Robot3_LOD0,
- Anim Blueprint: Robot3_AnimBP,
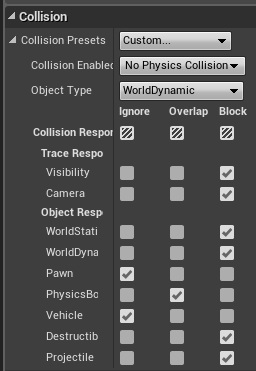
- Collisin Presets: Custom:

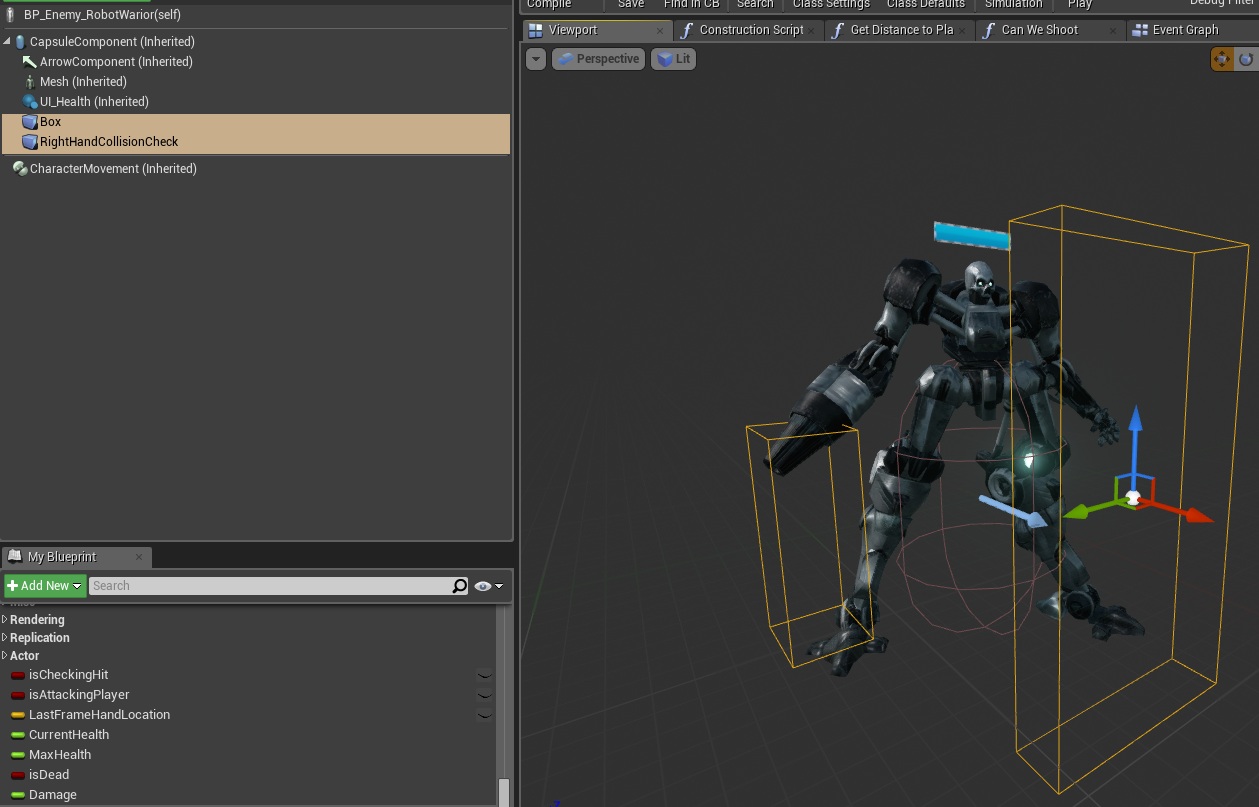
Add new Box Component named Box:
- Location: (X=122.634567,Y=-0.000000,Z=28.943697)
- Box Extend: (X=13.977953,Y=53.559517,Z=106.927612)
- Enable Gravity: False,
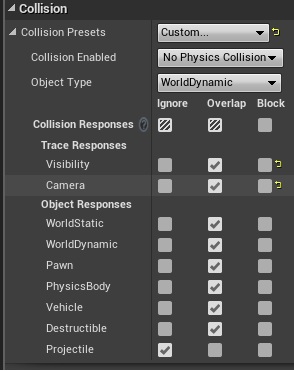
- Collision Preset: Custom:

- Create On Component Begin Overlap event and leave it blank,
This Box will overlap with other enemies so robot will know that enemy is in front of him.
Add new Box Component named RightHandCollisionCheck:
- Location: (X=-0.000061,Y=100.403839,Z=0.000000)
- Scale: (X=0.722769,Y=0.598182,Z=1.691808)
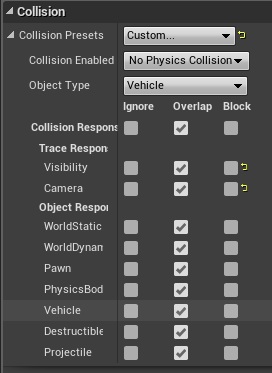
- Collision Preset: Custom:
- Create On Component Begin Overlap event and leave it blank,

This component will be used to check if something is in hand location. It will be base to melee damage to other enemies. You should play with size of this component after you are done.
That’s all in the components. Make sure you copied my collision presets!
Now open event graph and add new variables:
- isCheckingHit (bool, false),
- isAttackingPlayer (bool, false),
- LastFrameHandLocation (vector),
Change variables:
- CurrentHealth: 1000,
- MaxHealth: 1000,
Now add new functions.
GetDistanceToPlayer – pure function

CanWeShoot – pure function with one local variable ClearView (bool, false)
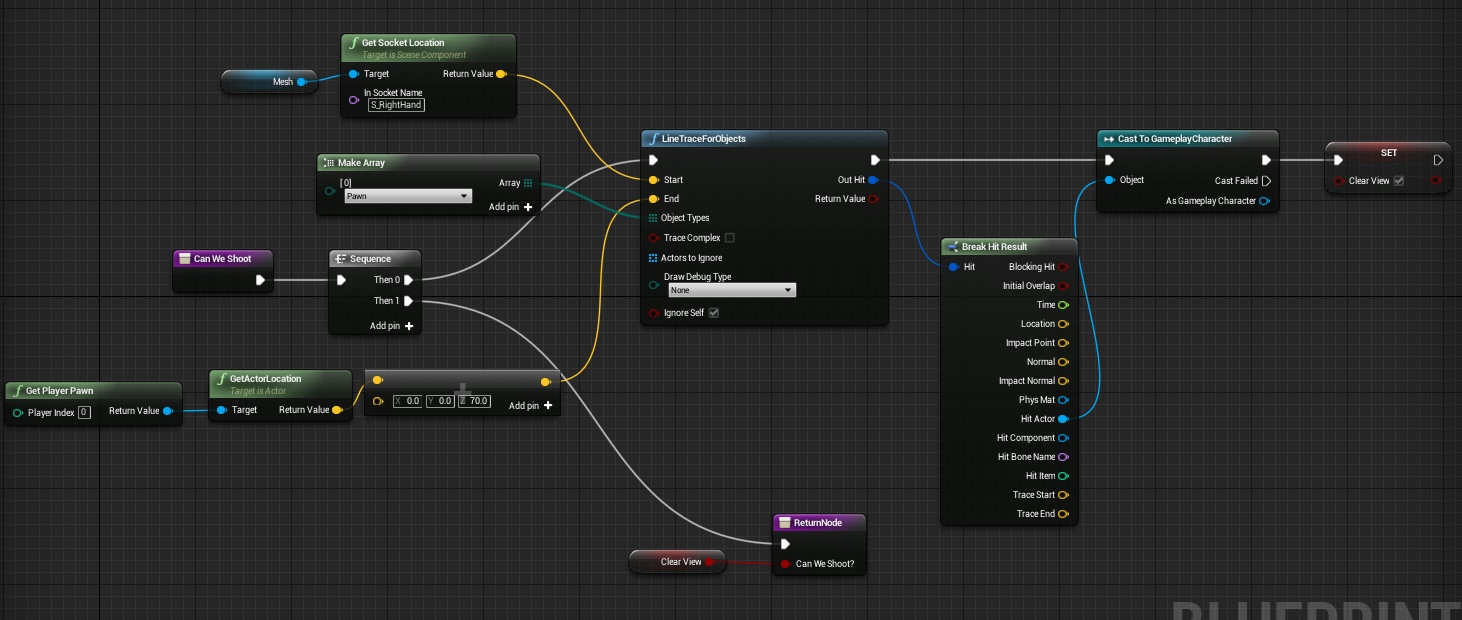
This will tell us if we have clear trajectory to player.
Now let’s go to events.
Create new custom event named CustomTick:

For now it will just store S_RightHand location. I will be used later for checking the direction of where hand is going when doing melee animation.
Create new custom event named MoveToPlayer:

This will tell robot to move to player.
Create new custom event named AttackPlayerFormDistance:

It will fire up shoot anim montage and when finished try to move to player again. We don’t have any notifies in animations yet – so it won’t be doing nothing just playing the anim.
Create new custom event named AttackPlayerMelee:
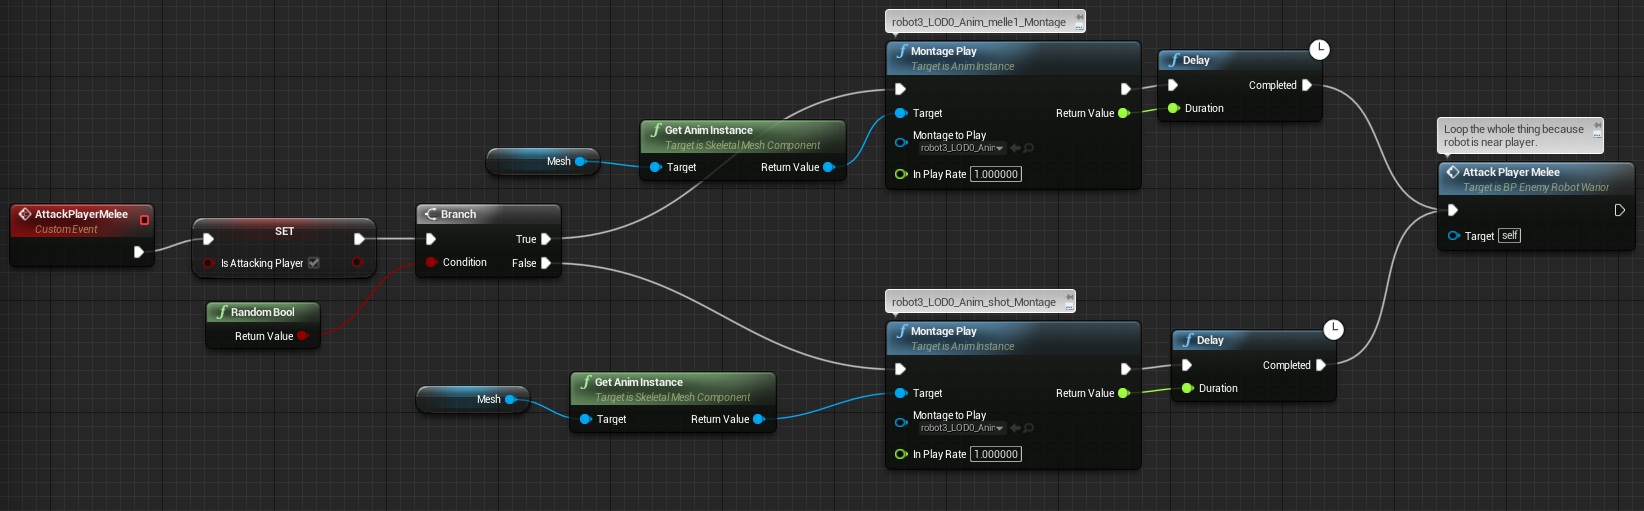
This event won’t fire if robot isn’t near player so it can loop playing random melee animations.
Create new custom event named UpdateData:
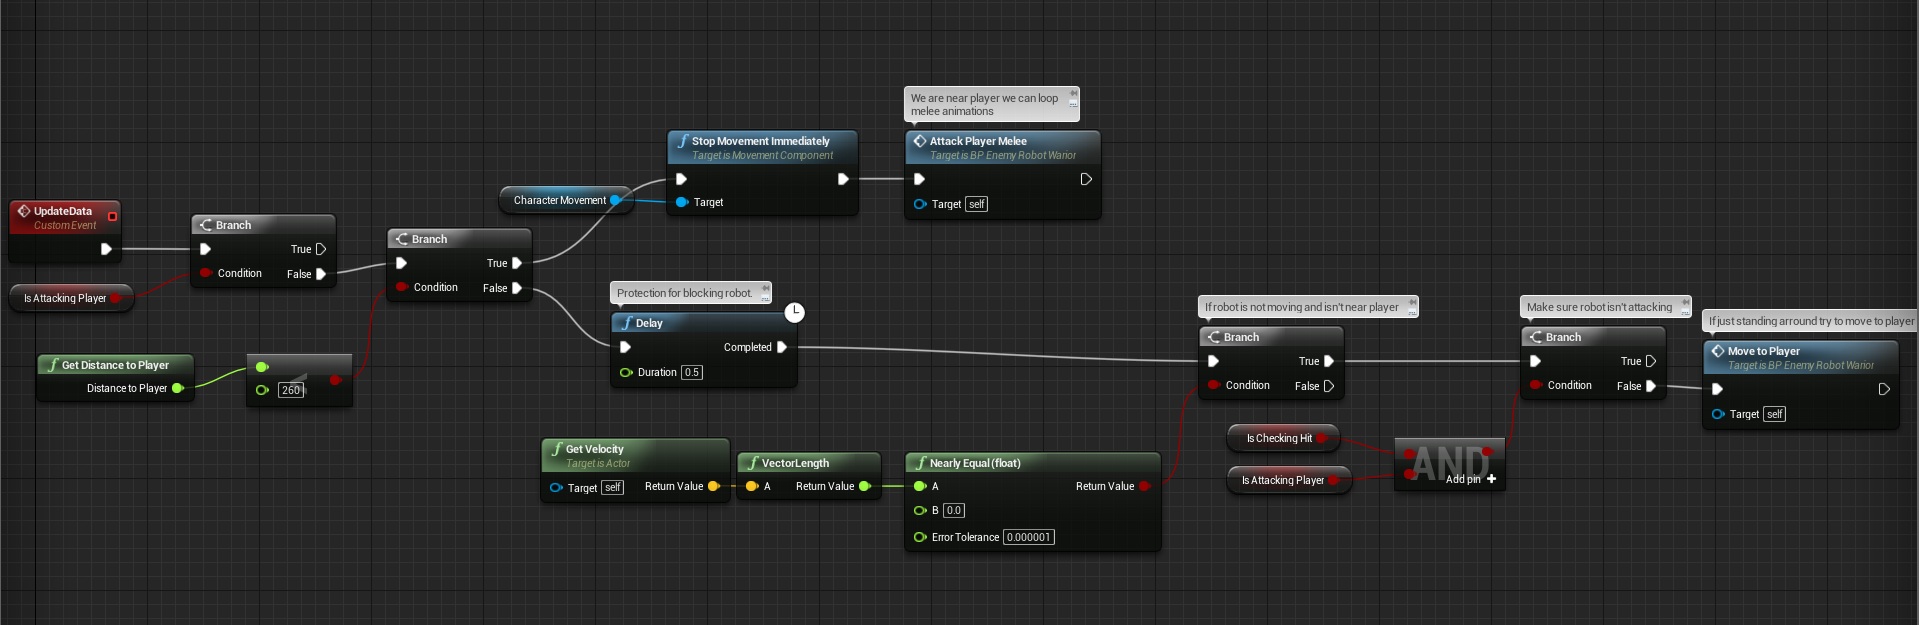
This is most important event. Basically it is checking how far robot is from the player. If far – move to player. If near – attack player with melee.
BeginPlay:
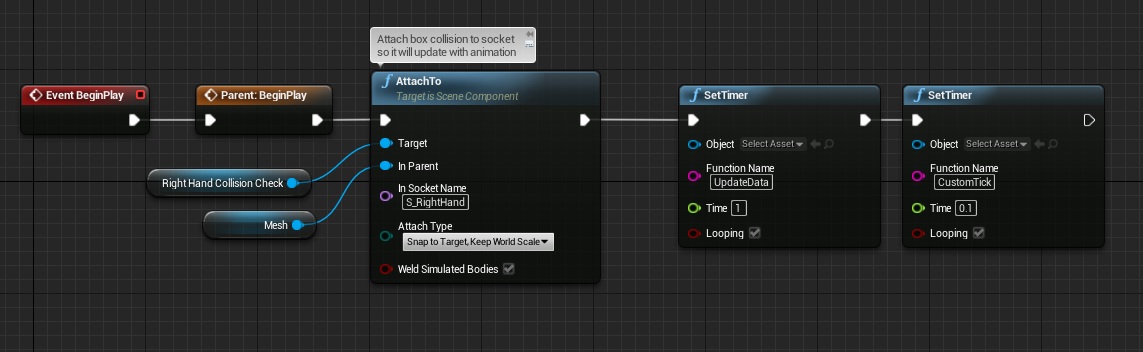
Fire up timers and attach RightHandCollisionCheck to S_RightHand socket.
Now two events from Box Component.
First one is Box On Begin Overlap. This is the big box that’s checking if there is enemy in front of the robot.
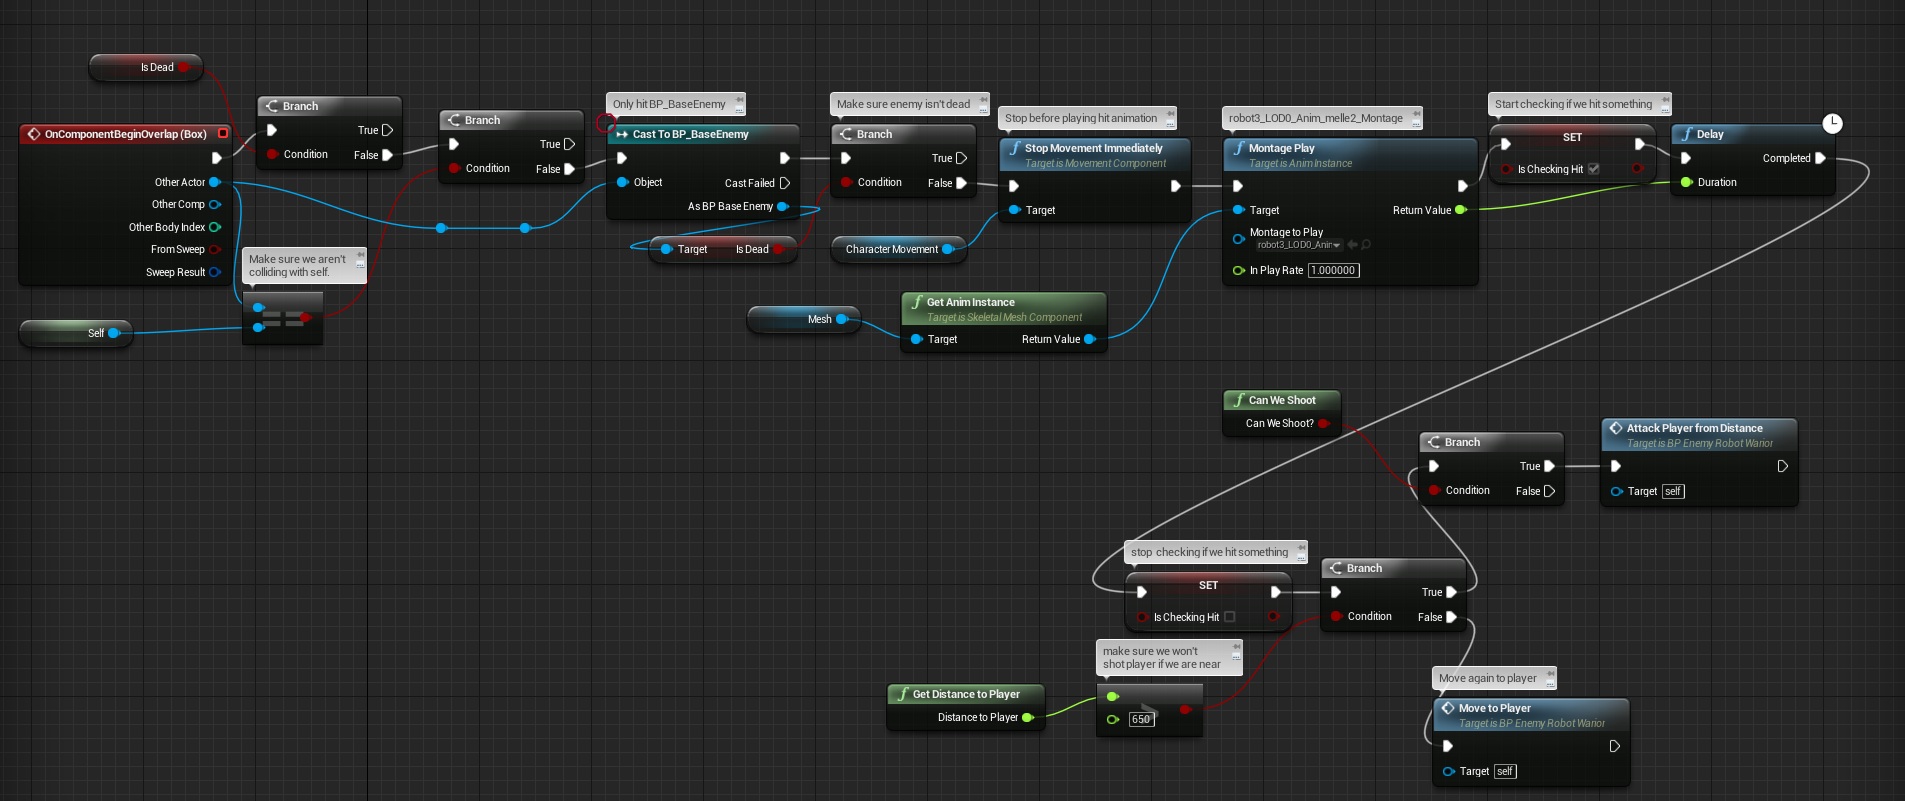
This is just playing melee animation to hit enemies. For now the animation doesn’t have necessary notify to make the hit. If completed move to player or attack player from distance.
Before moving to next On Overlap event open BP_BaseEnemy and create new function InstantKillWithRagdoll with inputs:
- HitInfo (Hit Result),
- ImpulsePower (float),
- HitDirection (vector),
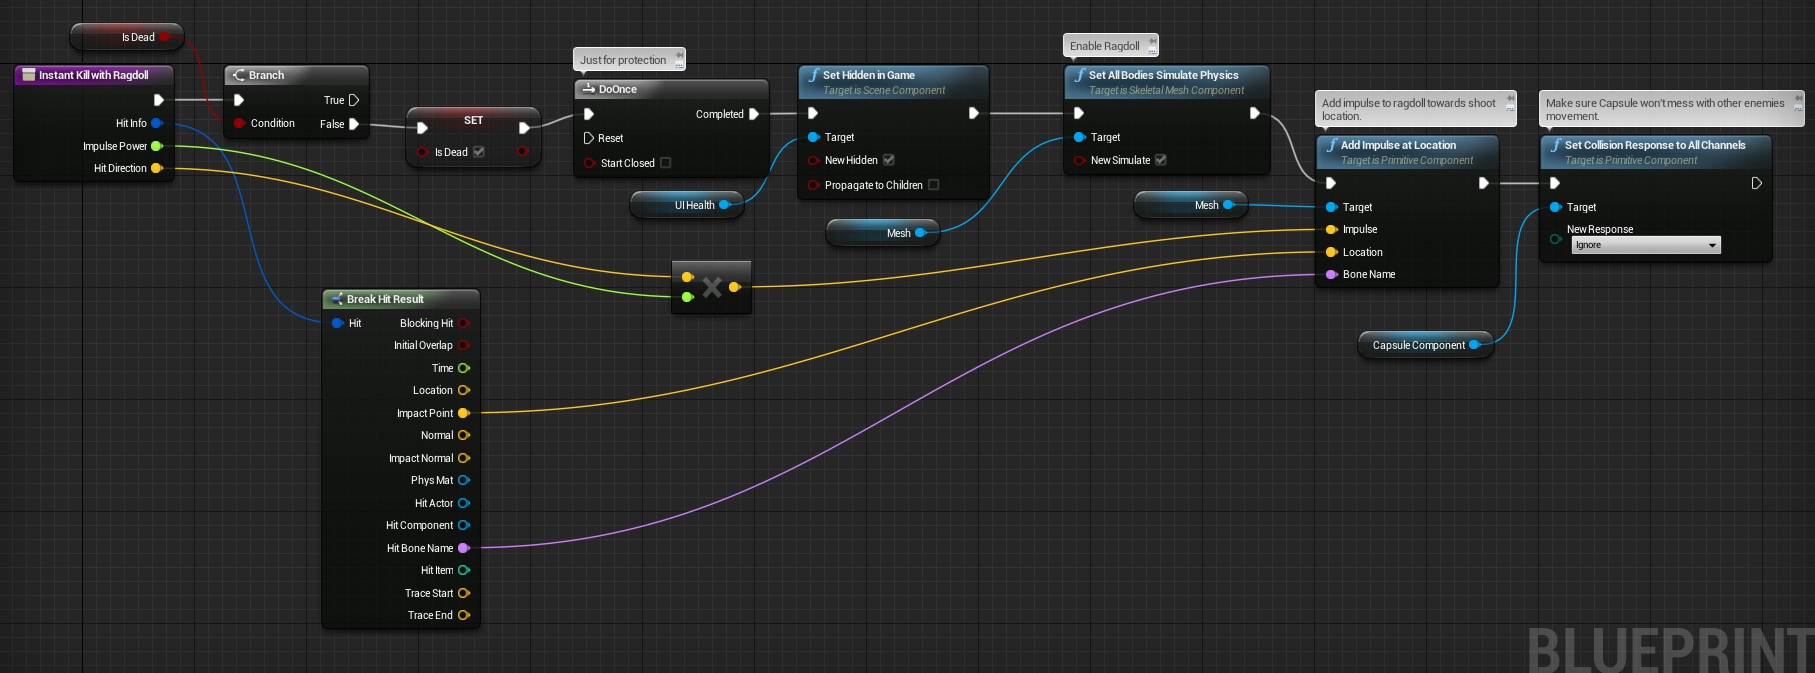
This is helper function to just kill someone with ragdoll and impulse.
Go back to RobotWarrior and here’s RightHandCollisionCheck overlap event:

So during melee animation (isCheckingHit) this is killing enemies on the way.
Create event Die – it will be overwritten from BP_BaseEnemy.
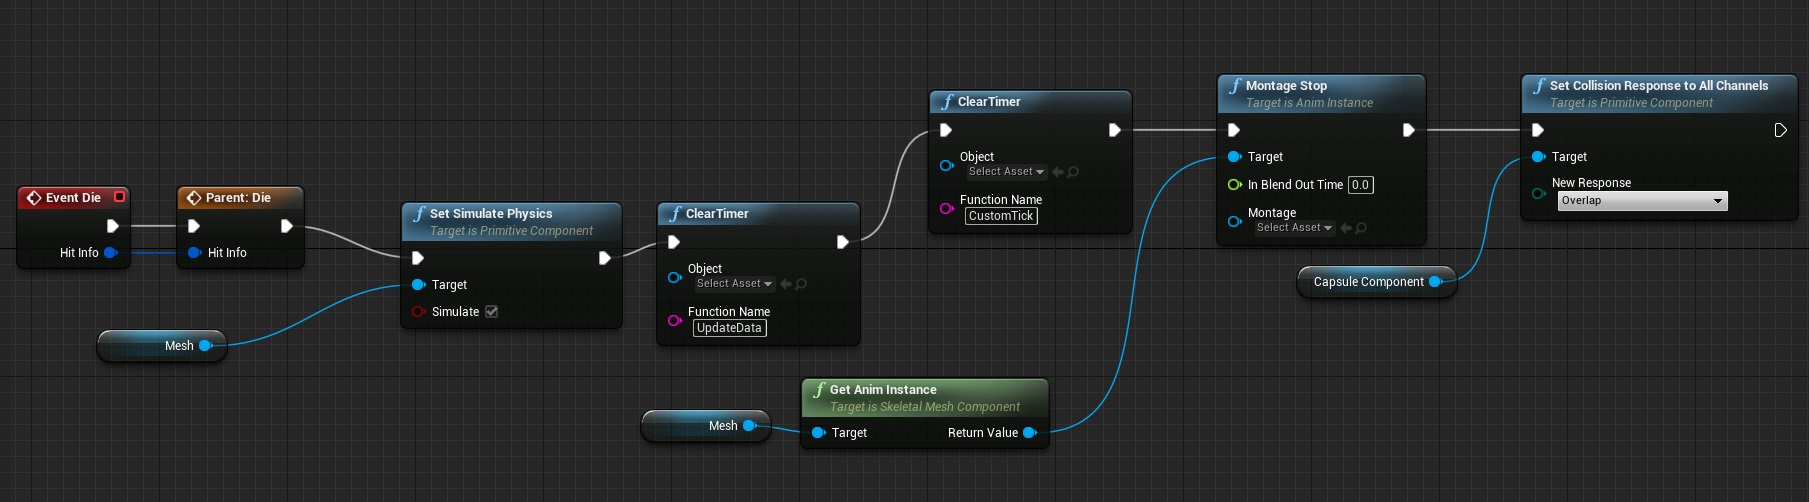
I’m just enabling ragdoll on the robot. You could just play dying animation instead.
The last thing here is Take Damage. I want the robot to be fragile for plasma weapons and only when we are hitting body with Metal_Head phys material attached. For now I don’t have any plasma weapon so this part isn’t implemented but there is a place for this in Take Damage event.
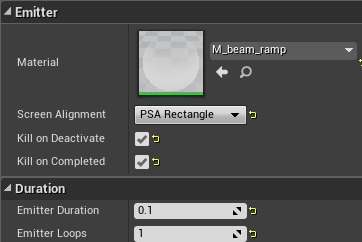
Before we move with TakeDamage let’s create new particle emitter named FX_RobotDamage. It will be spawned only when firing Metal_Head phys mat on the mesh. If you don’t want to go with details here you can download the particle.
Beam Data:
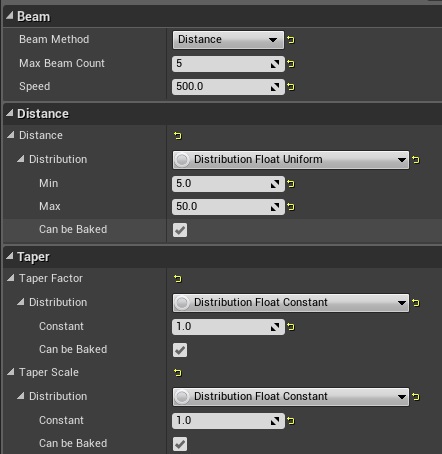
Required:
Spawn:
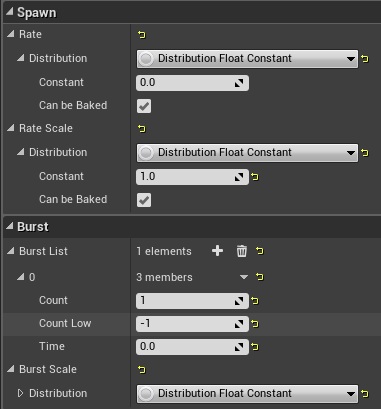
Lifetime:
- Min: 0,1,
- Max: 0,6,
Initial Size:
- Max: (X=2.500000,Y=2.500000,Z=2.500000)
- Min: (X=0.500000,Y=0.500000,Z=0.500000)
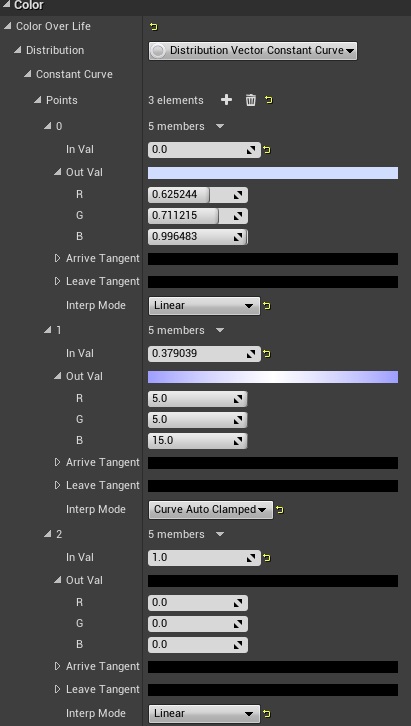
Color Over Life:
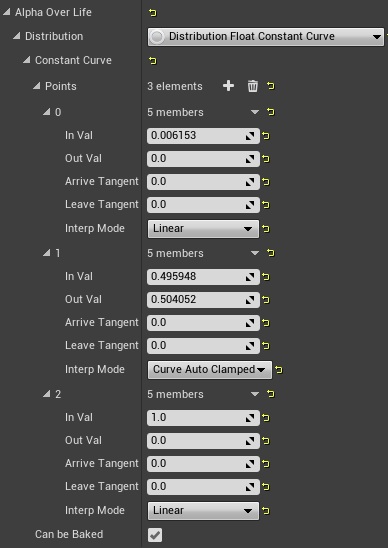
Color Over Life – Alpha:
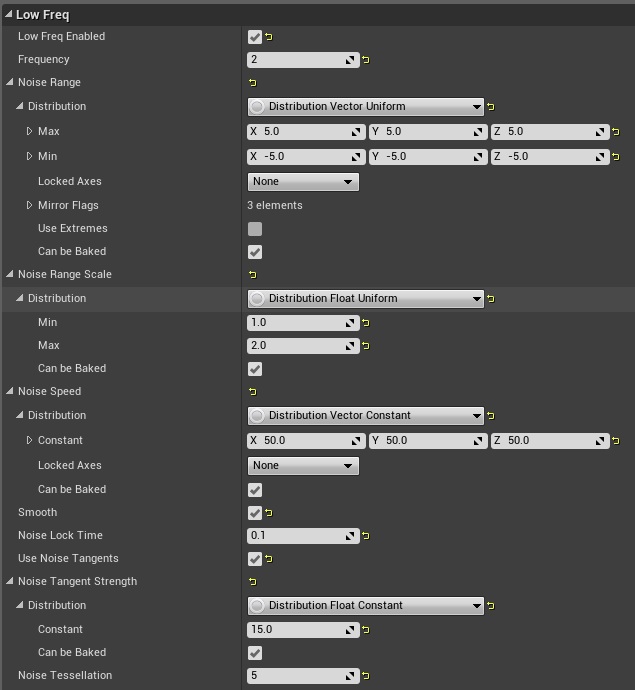
Beam -> Noise:
Go back to RobotWarrior and add TakeDamage event.
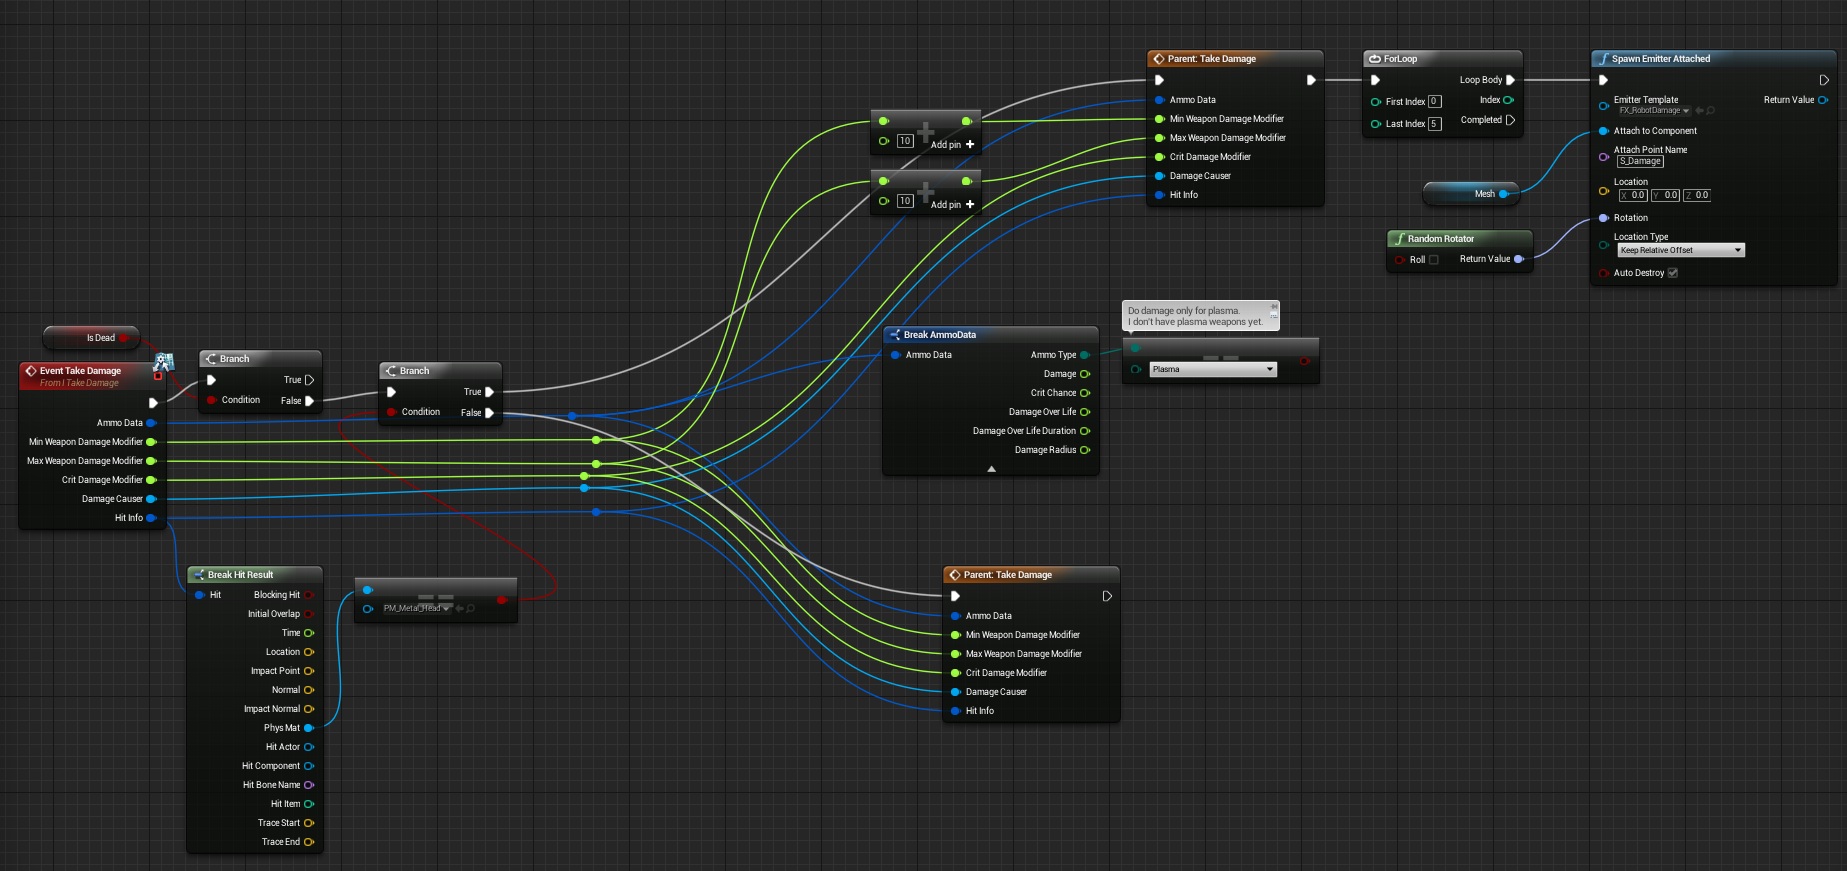
And that’s all for the blueprint! Now we need to crate couple of anim notifies.
ROBOT SHOOT PLAYER FUNCTIONALITY
Create new blueprint extending from Anim Nofity named Notify_SpawnProjectile. Open it and add two variables:
- ProjectileClass (Class Actor, Editable)
- SocketName (Name, Editable)
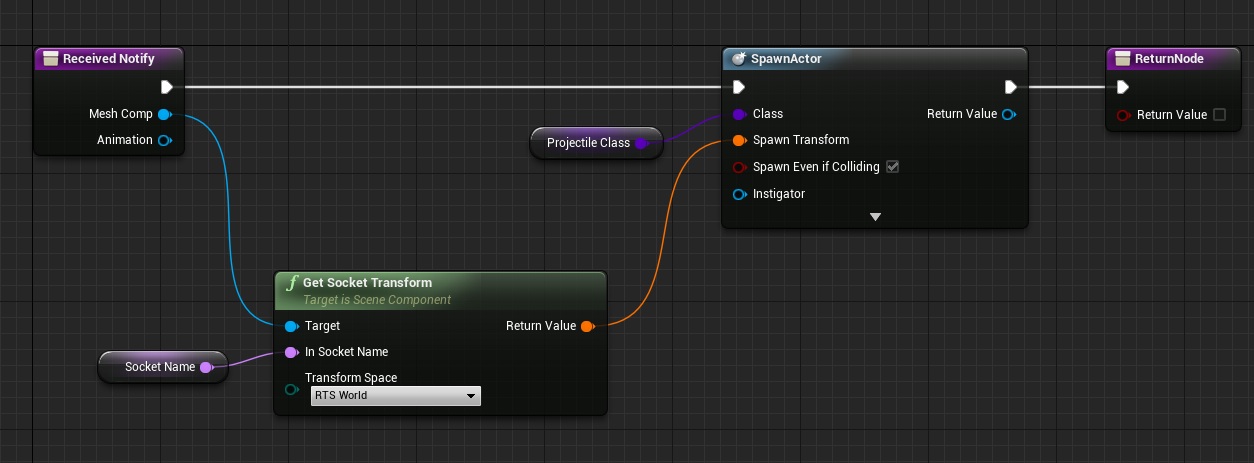
Now create new blueprint extending from BP_BaseProjectile named Robot3_Projectile.
Components – Projectile Movement:
- Initial Speed: 1000,
- Maximum Speed: 1000,
- Rotation Follows Velocity: True,
Add new Particle System Component from P_AssaultRifle_Tracer_Light. This particle can be found in Sci-Fi Weapons Pack.
Add new Particle Systme Component from P_Grenade_Explosion_Light – it can be found in Sci-Fi Weapons Pack as well. Make sure Auto Activate is False.
Some variables need to be changed:
- isCausingRadiusDamage: True,
- MinWeaponDamage: 1,
- MaxWeaponDamage: 1,
- AmmoData -> Damage: 100,
- AmmoData -> DamageRadius: 400,
Open Event Graph and add OnProjectileStop event.
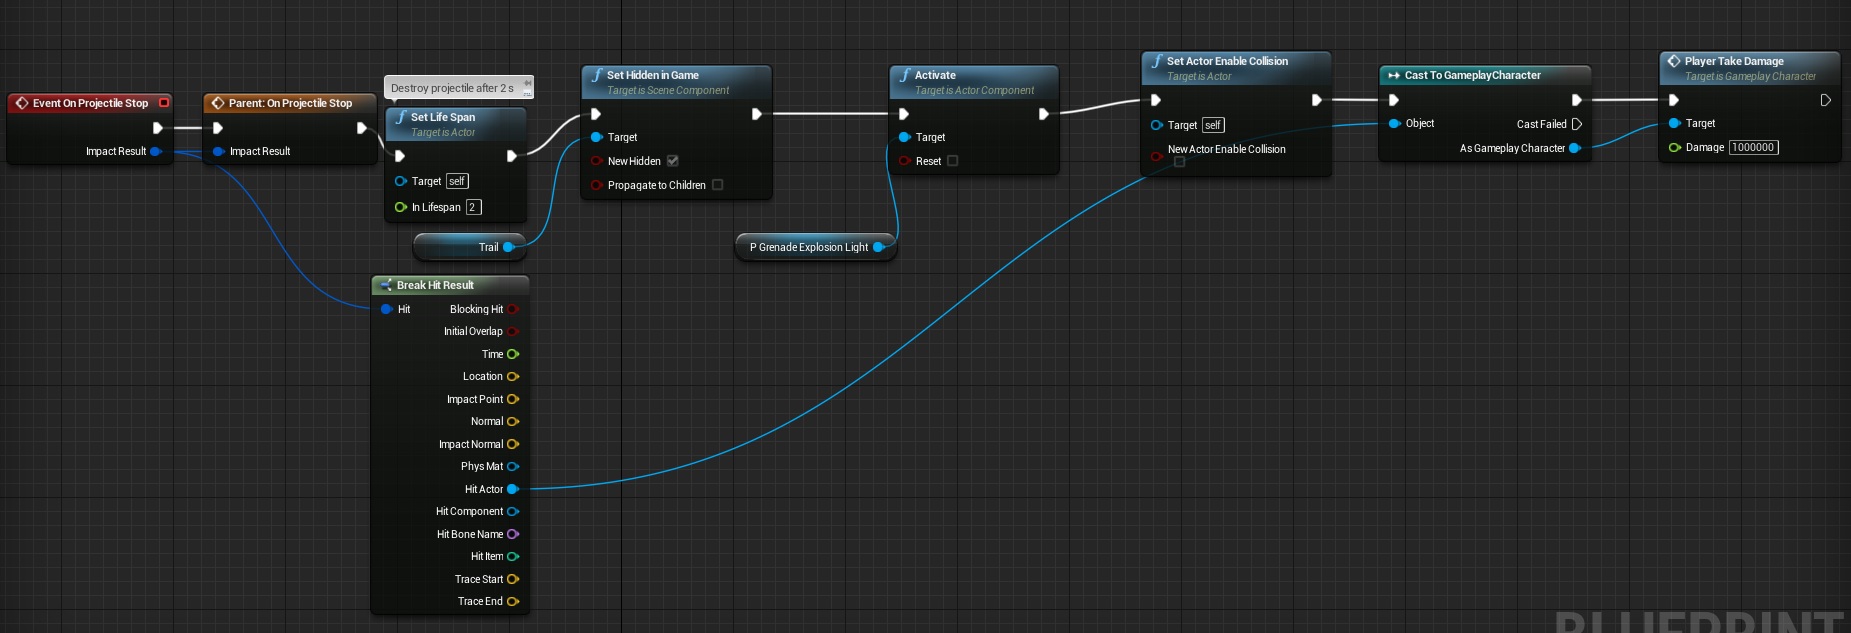
This will deal damage to player and make sure there will be explosion.
Now open robot3_LOD0_Anim_shot_Montage and let’s add notifies.
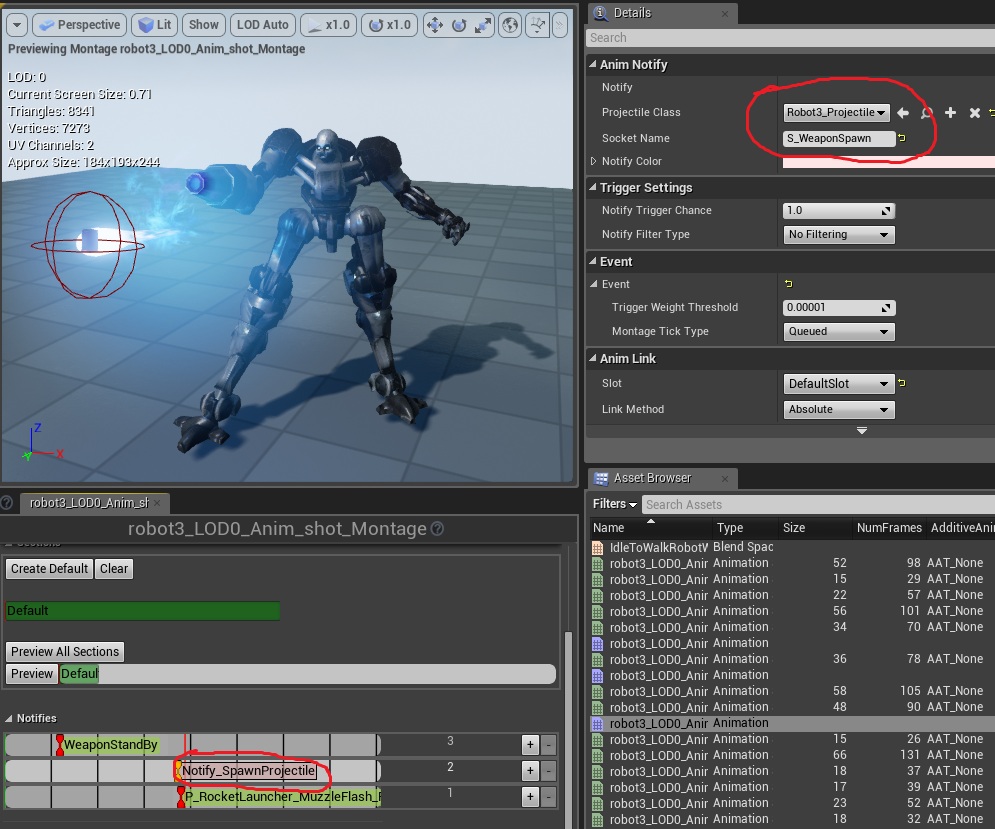
The other notifies are just particles to have some effects when shooting.
Now Robot will shoot at player. Last thing is to add melee damage.
Create new blueprint extending from Anim Notify named Notify_DoMeleeDamageToPlayer. Open it and add one variables:
- Damage (float, Editable),
- MaxDistanceToPlayer (float, default: 80, Editable),
- MeleeSocketName (Name, Editable)
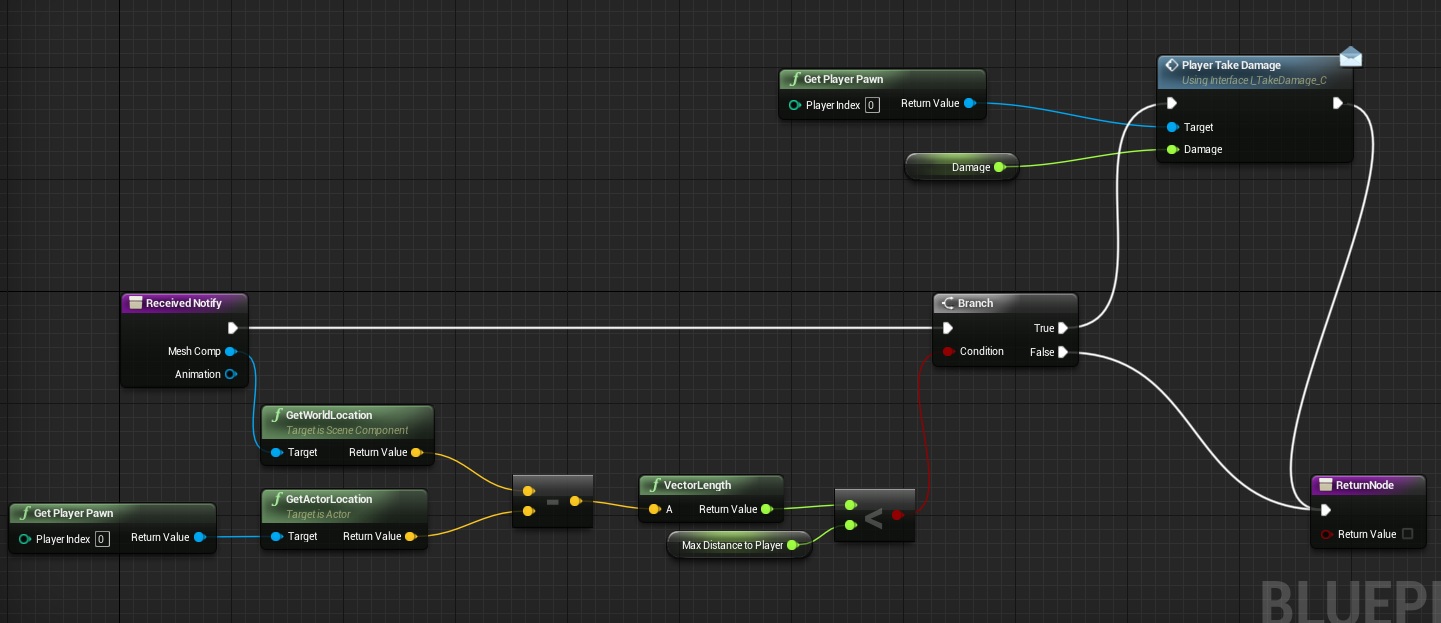
Now just add this notify to your melee animations and set up Damage, MaxDistanceToPlayer and SocketName (S_RightHand)
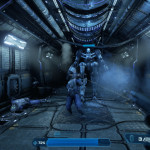
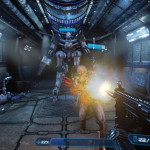
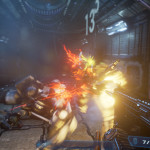
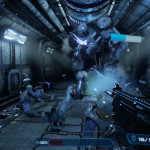
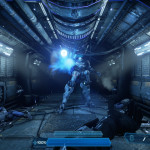
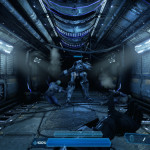
That’s all! Here you can find some screens of the Robot.


Creating ShooterTutorial takes a lot of my free time.
If you want you can help me out! I will use your donation to buy better assets packs and you will be added to Credits /Backers page as well.Implementing game is taking time but writing about it is taking much more effort!

Pingback: Recursos para desarrolladores | Ibuprogames