My stationary shooter needs to have enemy that is able to walk on walls. Thanks to that player will be forced to aim on walls / ceilings. Enemy specs:
- Low health, will explode and do damage to others,
- Possibility to move on walls / ceilings,
- Do damage over time,
- As always – done in blueprints without C++ code,
Let’s go!
|
1 2 |
<strong>This Tutorial has been created using Unreal Engine 4.8.2</strong>. Make sure you are working on the same version of the engine. |
This spider will have some restrictions:
- Can’t extend from Character because of CharacterMovement component which is causing issues when walking on walls. He need to extend from Actor and I would need to implement TakeDamage strictly for him,
- He can’t use navigation and pathfinding. He will just move forward and if near player try to do damage over time. This restriction is harsh for gameplay but I don’t want to implement pro spider in C++,
- He won’t use IK for his legs. He is to small and player won’t see IK working. I will definitely create spider boss enemy, much bigger with legs driven by IK and movement using physics – this will be explained in later tutorial,
- Your mesh collisions need to be prepared correctly. What I’m doing is go to static mesh and select: Collision Complexity: Use Complex Collision as Simple. This can cause issues with movement. Basically graphics artist need to prepare good collision meshes when using Spider,
I have found C++ implementation of exactly the same thing I’m doing here. If you are more advanced UE4 user you can read his implementation.
Importing Spider.
First of all let’s import Spider. This post can be helpful. (download link is broken, here you can download whole spider blueprint and mesh with animations. Place it to BlueprintsEnemies folder)
Spider Blueprint
Create new blueprint extending from Actor.
Components
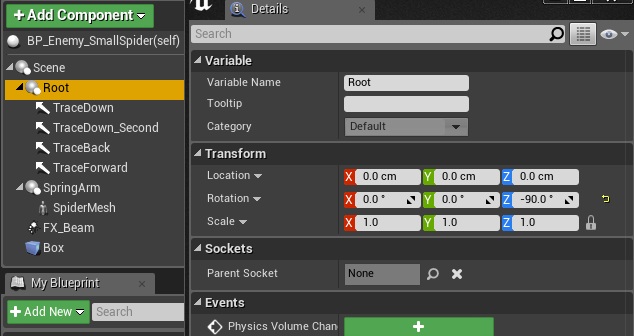
This part is critical if you change rotation of something it won’t work! Be careful when creating hierarchy.
Scene Component – Root:
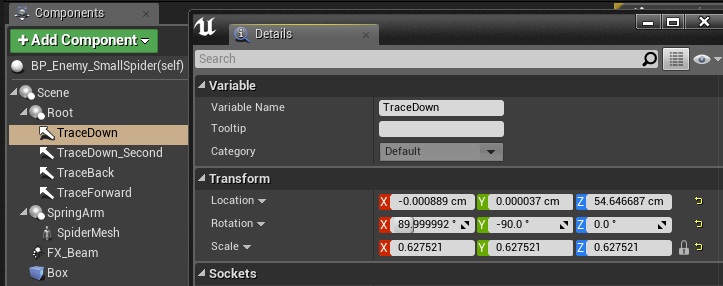
Arrow Component – TraceDown:
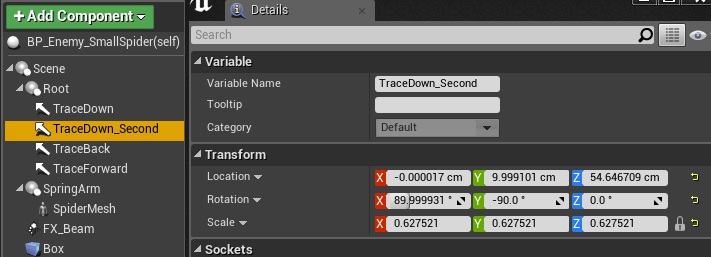
Arrow Component – TraceDown_Second:
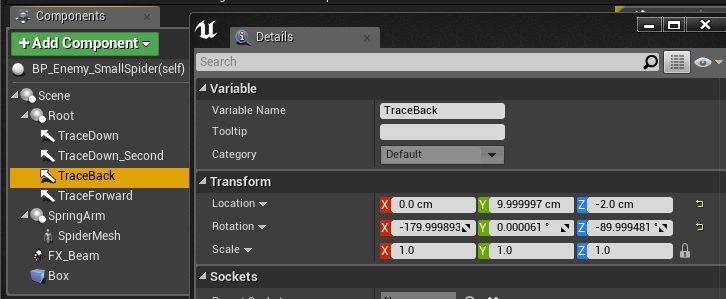
Arrow Component – TraceBack:
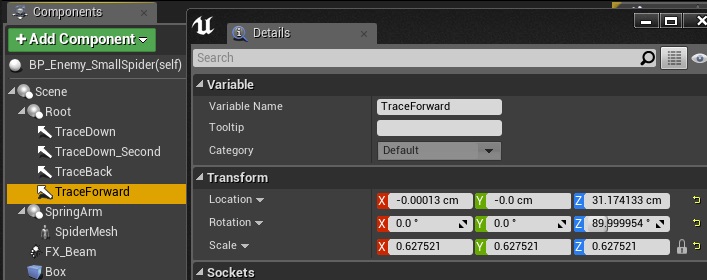
Arrow Component – TraceForward:
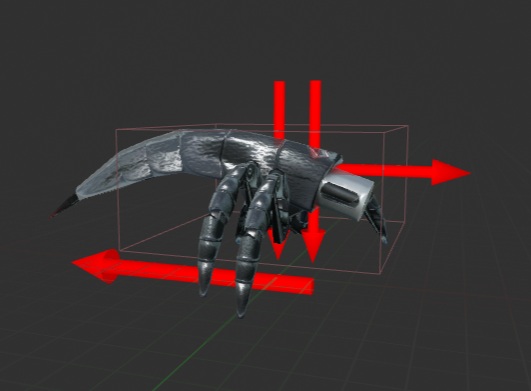
Those are critical because they are used to check walls and they are driving movement.
Spring Arm Component – SpringArm:

Spring Arm is used to interpolate mesh location and rotation because location / rotation of this actor is changing in tick. You could get weird results when tracing when it’s interpolating position/rotation.
Skel Mesh Component – SpiderMesh.
- SkelMesh: SpiderWarior_Skel,
- Anim Blueprint: Spider_AnimBP, (which you don’t have yet)
- Collision Presets: NoCollision,
Particle System Component – FX_Beam.
- Template: P_electricity_arc which can be found in Shooter Example. Later in this tutorial I will update this particle system.
- AutoActivate: False,
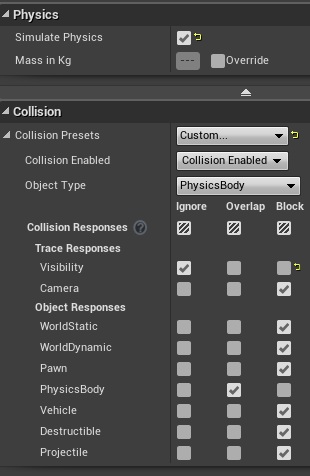
Box Component – Box.
- Location: (X=0.000000,Y=0.000000,Z=27.094894)
- Scale: (X=1.000000,Y=1.000000,Z=0.471904)
It will be used for collisions with bullets.
Now implement I_TakeDamage interface for this Actor.
Spider Movement.
Open graph and create variables:
- DeltaTime (float),
- MinDistanceToPlayer (float),
- isDead (bool),
- Damage (float, default: 2),
- Health (float, default: 25),
And now functions:
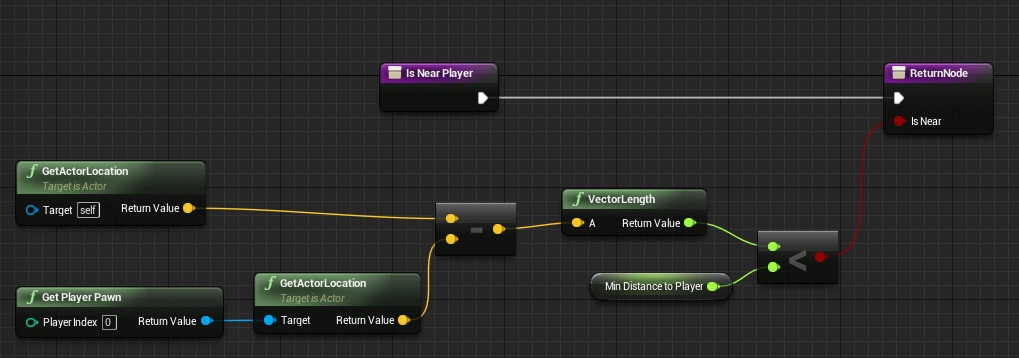
IsNearPlayer – one output isNear (bool) – pure function
ChangeLocation – input: HitResult (hit result)

This function is critical for generating spider location and rotation. I would like to thanks Alexander Tsekhansky and Krystian Komisarek for big help with creating this!
Now let’s go to Event Graph and create some events.
Begin Play

MoveForward (custom event)

Spider will move always forward. You could replace this with spline movement or make path. This is the simplest way for me.
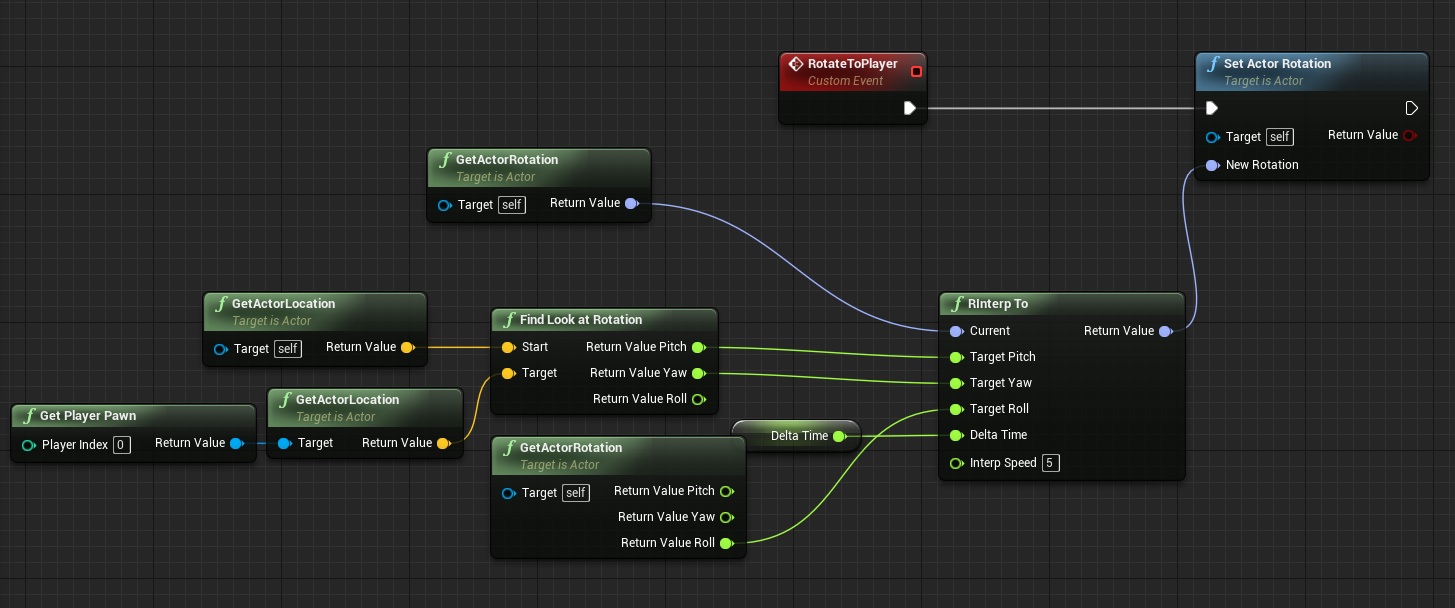
RotateToPlayer (custom event)
And now the most important event – Tick where everything is happening.
It have 4 traces – for easier reading separated screens:
-
- Tick Part 1
-
- Tick Part 2
-
- Tick Part 3
-
- Tick Part 4
So basically spider is checking if wall is in front of him – if yes move toward the wall. He is checking if floor is above him if not find next rotation in ChangeLocation function.
Spider Attacking Player
Currently Spider will stop near player and play Attack animation.
Create new Blueprint extending from AnimNotifyState. Name it SpiderTimeAttack.
Override Received Notify Begin:

This is activating beam particle and select end point for beam.
Override Notify End:
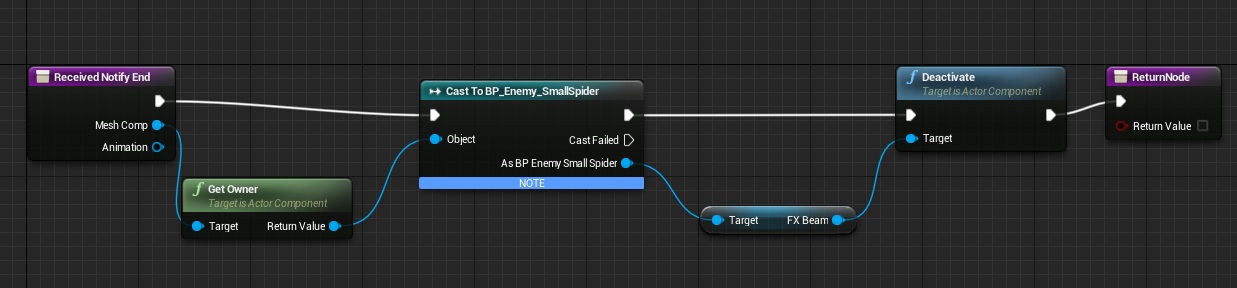
To stop the particle.
Override Notify Tick:
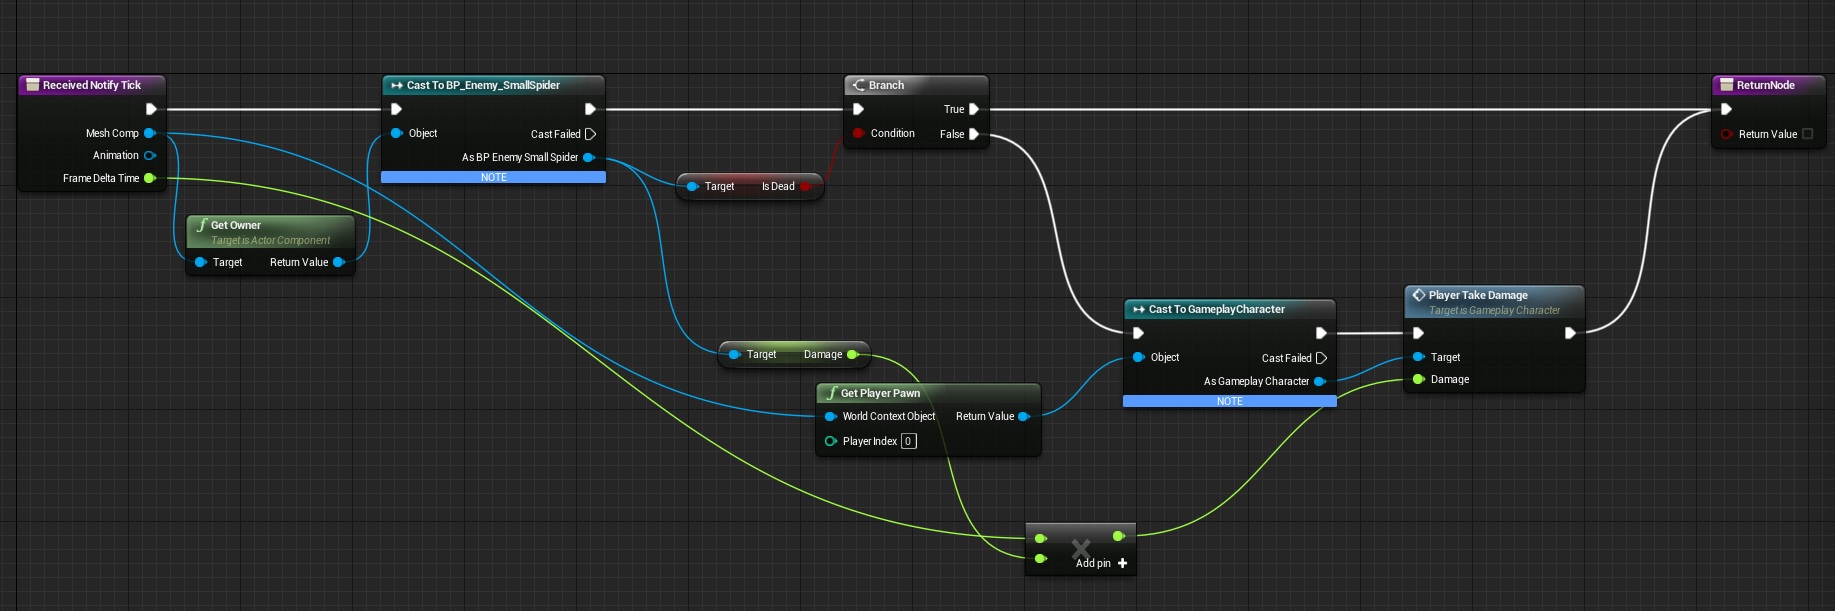
This is actually dealing damage to player.
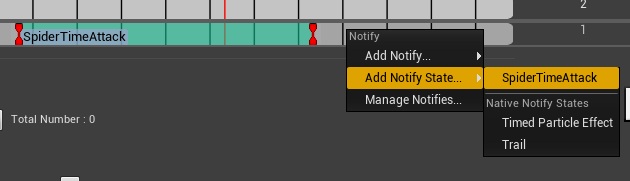
Now go to Attack animation and add this notify.
I have changed some things in beam particle.
- Beam target is “User Set”,
- Beam Data -> Max Beam Count: 2,
Spawn:
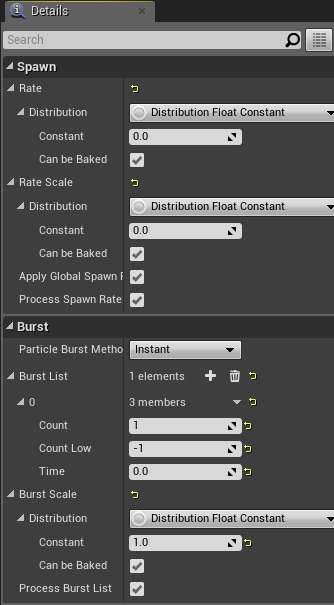
And I have activated light_flickering emitter which is performance killer but it’s looking nice. You need to assign this material into light_fickering:
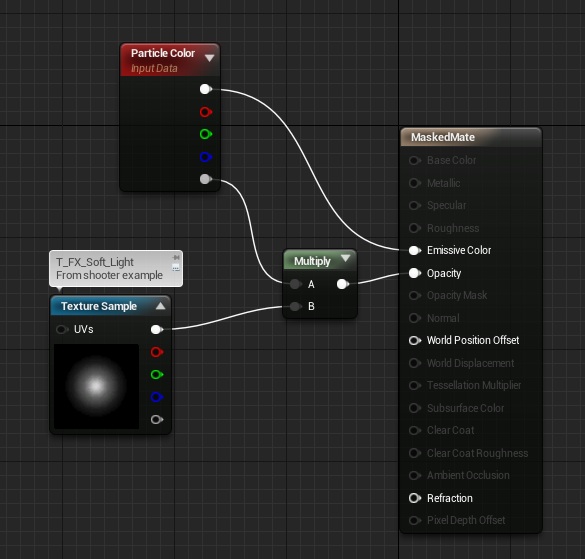
And Light parameters:
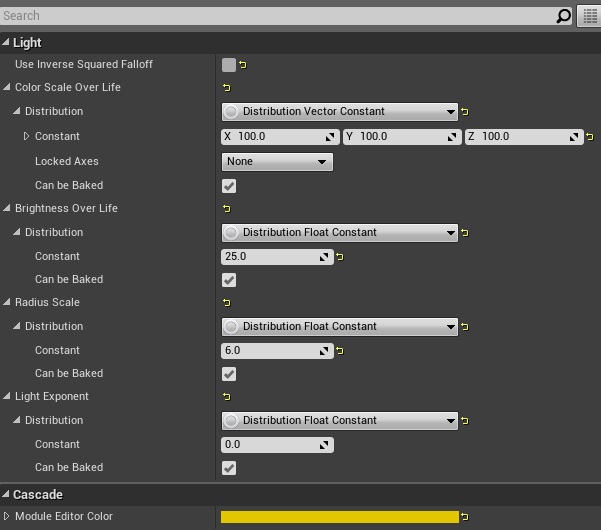
Still in the light_fickering emitter:
- Spawn -> Screen Alignment: PSA Facing Camera Position,
- Initial Size -> 30, 30, 30,
- Initial Color -> start Alpha -> Constant: 1,
And that’s all for the particle!
Spider Explode
Basically spider should be easy to kill and should explode after kill.
Create new Blueprint extending from Actor named SmallSpider_Explosion. If you downloaded spider you should get sliced spider static meshes. Add them to this blueprint.
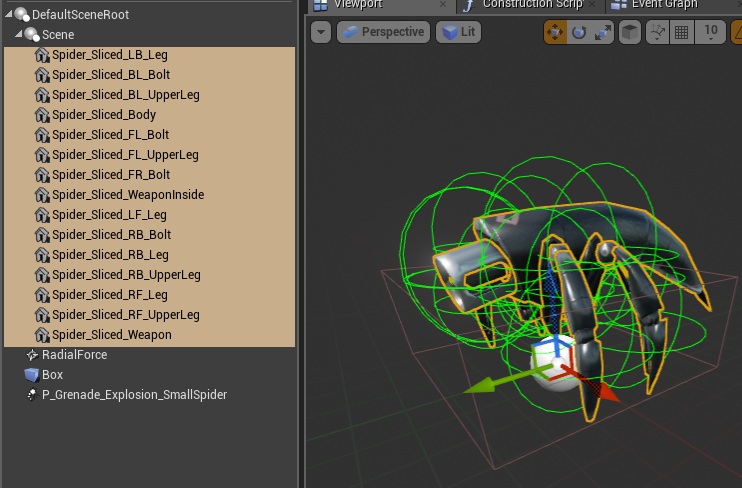
And here’s theirs properties:
- Add Radial Force Component with Radius: 50,
- Add Box Component. Location: (X=0.000000,Y=0.000015,Z=12.651192) Scale: (X=1.000000,Y=1.000000,Z=0.359557) this will be the random place where radial force will be placed,
- Add Particle System Component: P_Grenade_Explosion which can be found in Shooter Example.
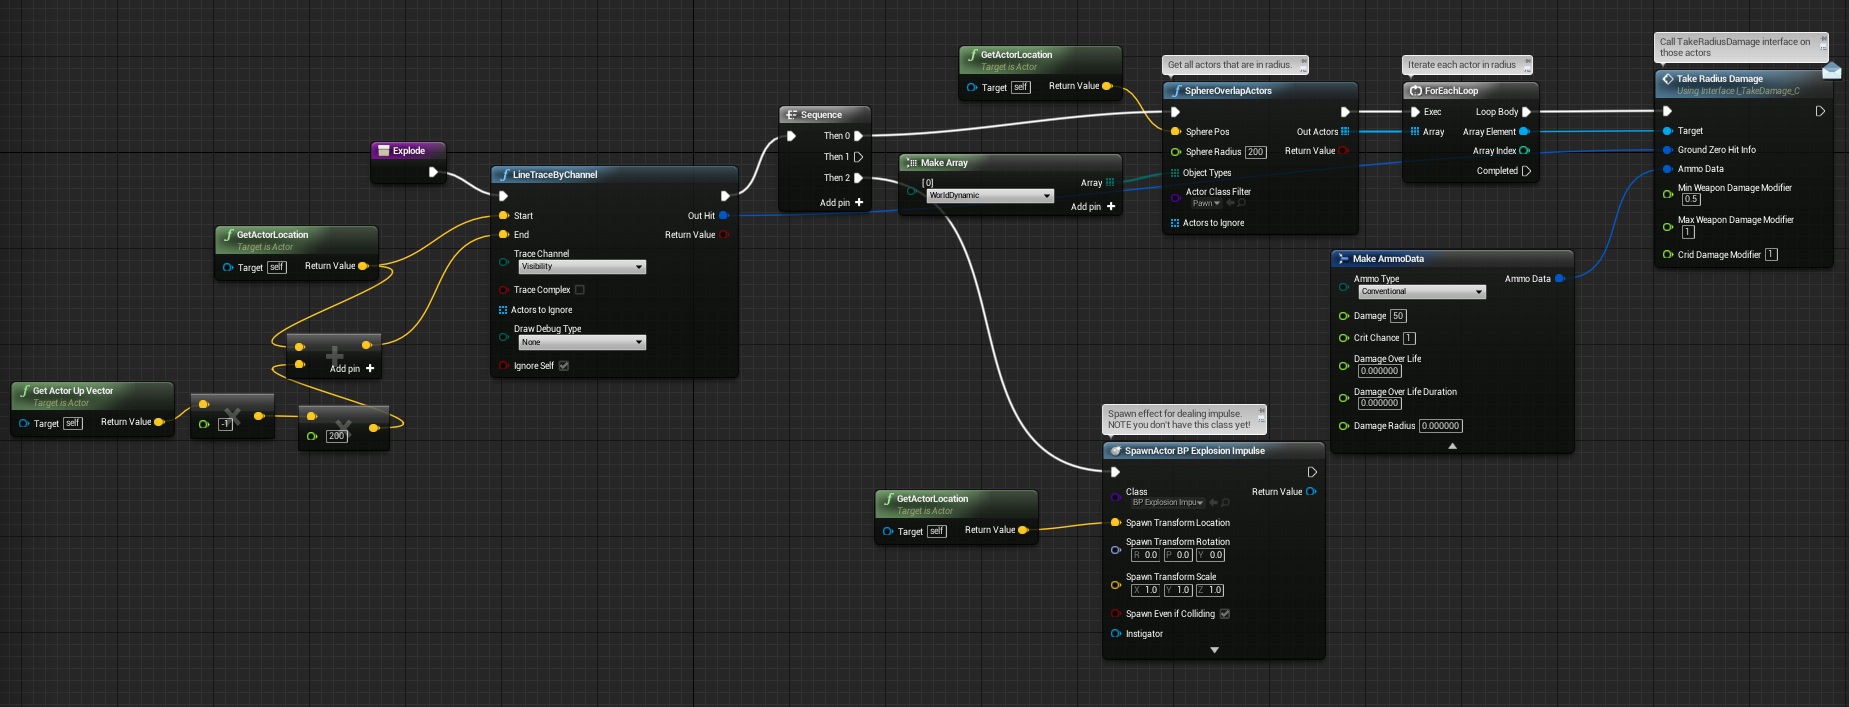
Open Graph and create Explode function:
And Begin Play:

So basically when this actor will be spawned all parts will use physics and radial force will make the “explosion”
Dealing Damage to Spider
Last thing is to implement Take Damage events from interface on Spider Blueprint.
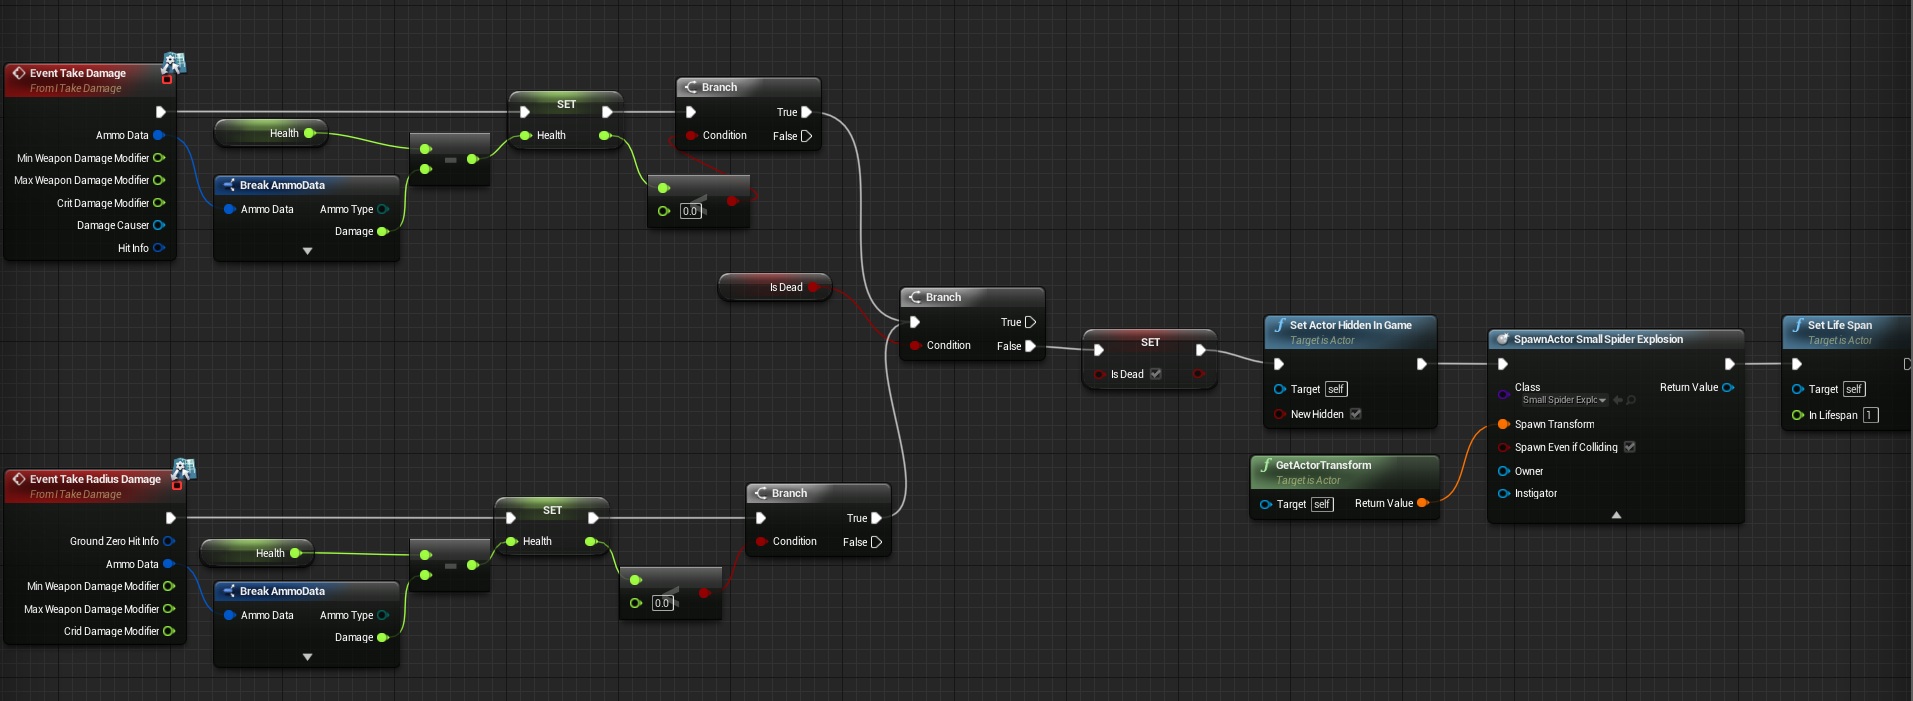
This will spawn explosion and update health.
This tutorial is bad example of Object Oriented Programming. We cannot extend from BP_BaseEnemy because CharacterMovement component is causing issues with spider movement, and we needed to copy lot of functions we had in BP_BaseEnemy. Using OOP is not always good approach.
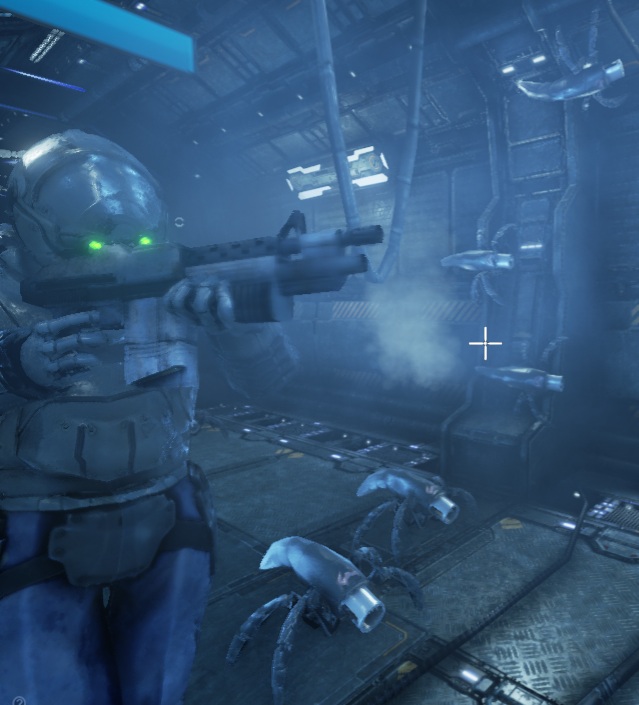
Final Result
Creating ShooterTutorial takes a lot of my free time.
If you want you can help me out! I will use your donation to buy better assets packs and you will be added to Credits /Backers page as well.Implementing game is taking time but writing about it is taking much more effort!

Reblogged this on King Designs.
Does this project use Unreal 4.8?
Yes.
Pingback: Turret Tutorial | Shooter Game Tutorial
Pingback: Creating Gameplay Balance System – Part 3 – Supporting all enemies | Shooter Tutorial
Love the idea and I can see that you got it working but for me the spider always seems to disappear rather then climb the walls. Did this happen to you and if so do you have a fix?
Hey Jason, yeah I don’t think the “Change Location” function works anymore. I spent a couple days confirming I had everything copied the same way and no dice. Also -make sure to download the blueprints and cross check your work with his. Some of what’s been JPG’d for the tutorial does not match what’s in his actual blueprints. Also the anim blueprint is never addressed, trying to work that out myself.
As far as the spider disappearing – I get the same. Might be a version mismatch or something, I’m in 4.10 and it flat out breaks the spider. If I place one right in front of the player and move back, it zooms away from me, clipping through the tunnel. Then I see the beam effect shooting me from outside the map. I disconnected the “Change Location” function and the spider behaves like you’d expect now, except of course, he can’t climb the walls. If you’ve allowed player movement, the spider will use all 3d space to follow you, meaning, he appears to hover/walk on thin air. Kind of a bummer. But I’ve only enabled movement for debugging purposes, and for now I’m placing he spiders by hand on the floor.
As far as the anim blueprint, create a fresh one and simply plug in your walk forward animation. Then plug the anim blueprint into your Spider enemy blueprint. He’ll always play the walk animation until he’s in attack range. Once in range he’ll loop the attack animation you specified in the event graph. You can adjust the speed to match your walk anim in the “MoveForward” event, change the number in the multiply node that’s getting plugged into “Make Vector”.