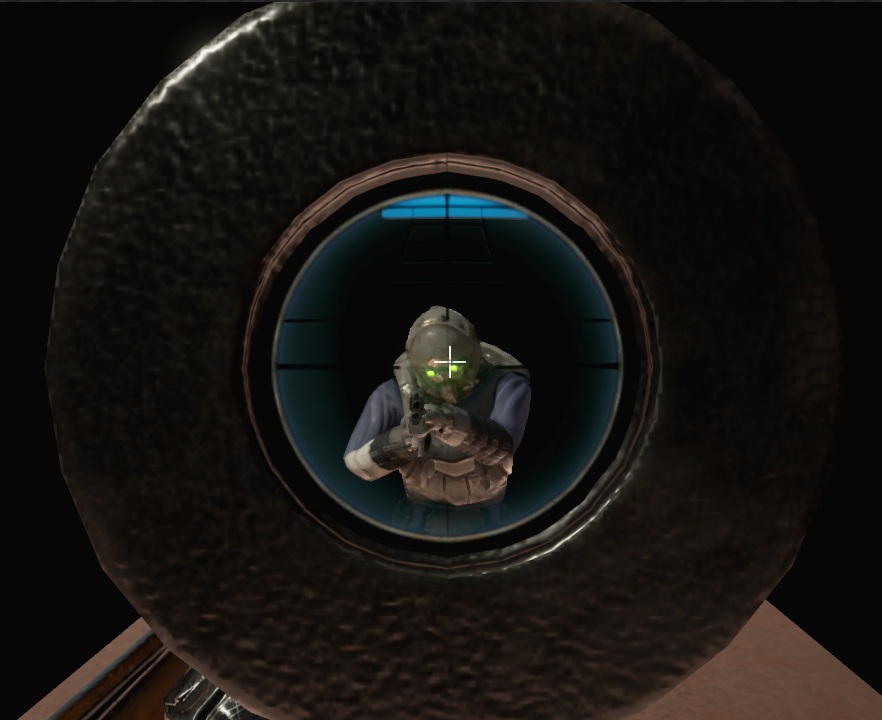
As I wrote earlier will try to implement all of the weapons from Military Silver Pack. Next in line is Sniper Rifle. Again we would need to implement new functionality to BaseWeapon – second fire. In this case second fire will trigger sniper scope.
- Sniper Rifle should have zoom and sniper scope functionality,
- I want to have “bullet time” effect triggered sometimes, (camera chasing bullet),
- Use BaseWeapon functionalities to drive the weapon,
Lot of new stuff coming here.
|
1 2 |
<strong>This Tutorial has been created using Unreal Engine 4.8.2</strong>. Make sure you are working on the same version of the engine. |
Sniper Scope generally
Couple of years ago I’ve created earlier 2 first person shooter games and as far I know there are 3 ways of doing scopes in games:
- HUD overlay.
Just simple texture drawn on-screen with alpha. This way is mostly used in games that are lacking GPU performance because it’s the most fastest way for GPU.
- Render to texture.
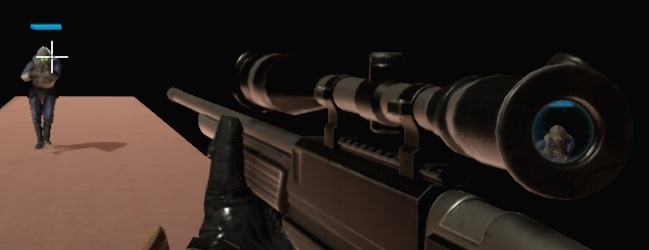
Scope glass have different material which is rendering to texture part of the screen and displaying it on glass. Camera is moving near glass when zooming. You can a lot of features here because it’s rendered in world so you have whole shaders to drive effects. You need to render to texture in tick so it’s heavy for mobile, but you could use it without a problem on PC. It’s heavier than HUD overlay.
- Postprocess Material.
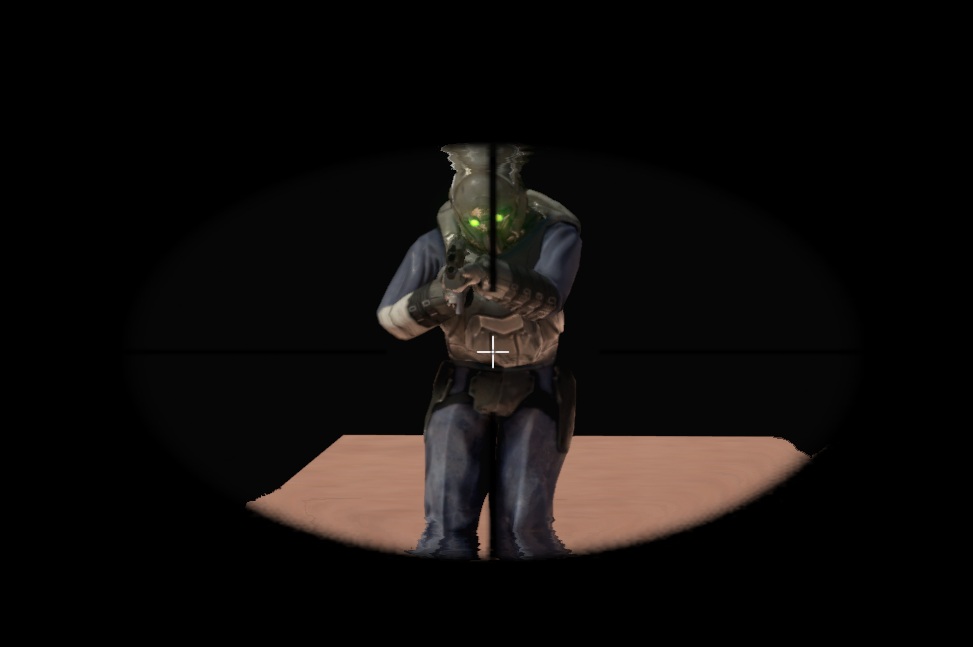
Basically it’s “almost the same” as HUD overlay but you can use shaders here – you can make distortion, draw texture, point out enemies and lot’s of stuff. It’s hard to say how heavy it is compared to render to texture. It depends on engine and how it’s driving post process. This way doesn’t even work on mobile. For my opinion you will get the best results using this way.
Of course there could be other ways that I’m not aware of. Game development is dynamic and everything is changing often 🙂
I will implement them all to show you how to do it.
Overal – Preparing GameplayCharacter
Basically using sniper scope is custom functionality that will be used only for Sniper weapons. We will trigger it using Right Mouse Button. Maybe later I will use Secondary fire for this.
Open GameplayCharacter and add two dispatchers:
- OnSecondaryEnter,
- OnSecondaryLeave,
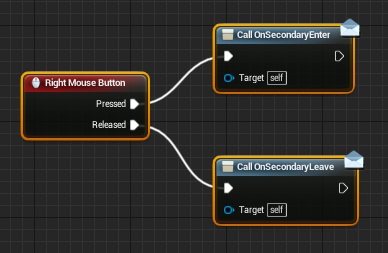
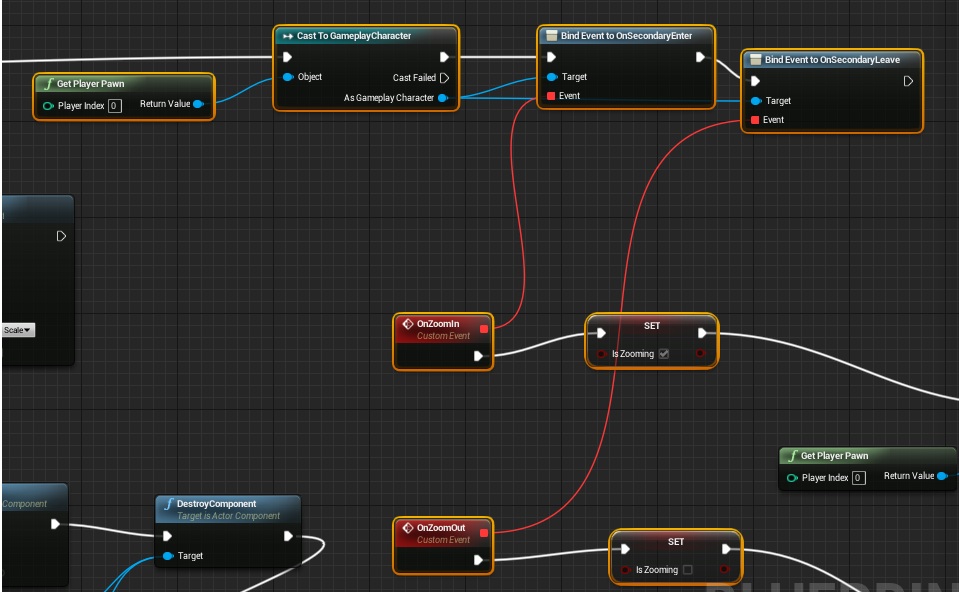
Create Right Mouse Button event and connect those dispatchers.
This functionality is generic and it will be used differently on each weapon. That’s why I have created dispatchers – weapons willing to use them will just bind to them.
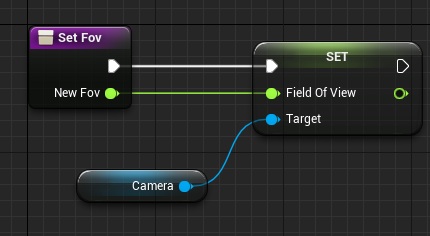
Create new function named Set Fov. Inputs: NewFov (float)
This function will be used to change fov when zooming. It will be driven from Weapon that’s why I have created function for this. (we don’t want to change variables from other classes!)
Overall – BP_BaseWeapon
Open BP_BaseWeapon we need to create some changes here. Create new variable:
- SpawnedProjectile (Actor)
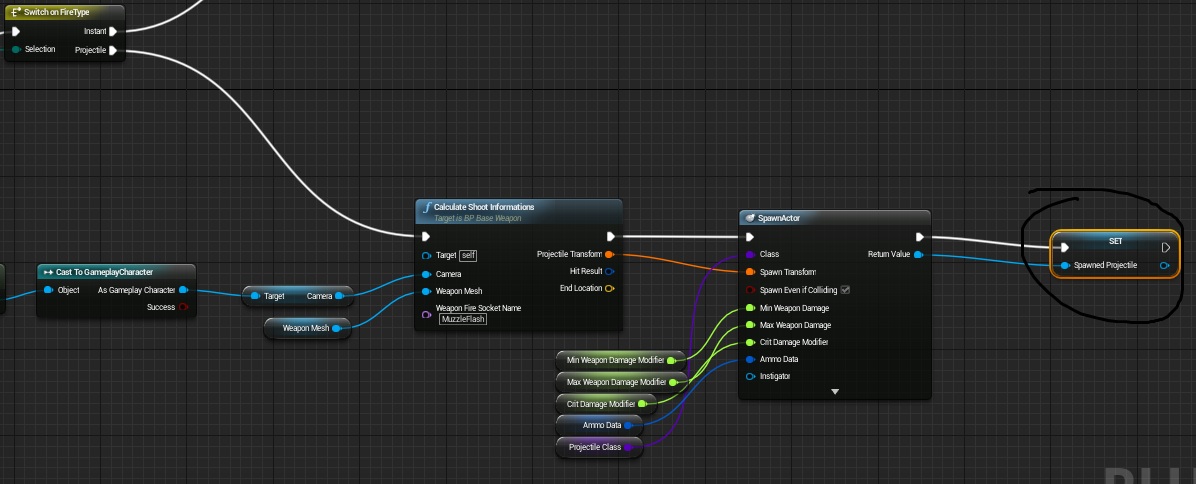
And in Fire function let’s assign spawned projectile to this variable.
Yes, sniper will use projectiles instead of instant fire.
Overall – Projectile
Create new blueprint extending from BP_BaseProjectile named BP_Projectile_SniperWeapon.
ProjectileMovement Details:
- Initial Speed: 10 000,
- Maximum Speed: 10 000,
- Projectile Gravity Scale: 0,
CollisionSphere Details:
- Sphere Radius: 1,
Mesh Details:
- Static Mesh: SniperRifle_A_Ammo,
- Rotation: (Pitch=-90.000000,Yaw=0.633023,Roll=-0.632935)
Now create new camera component here and attach it to CollisionSphere. This will be our camera for bullet time. Place it somewhere near bullet.
- Camera Rotation: (Pitch=-10.000000,Yaw=0.000000,Roll=-0.000000)
- Camera Location: (X=-36.583088,Y=0.000000,Z=14.872269)
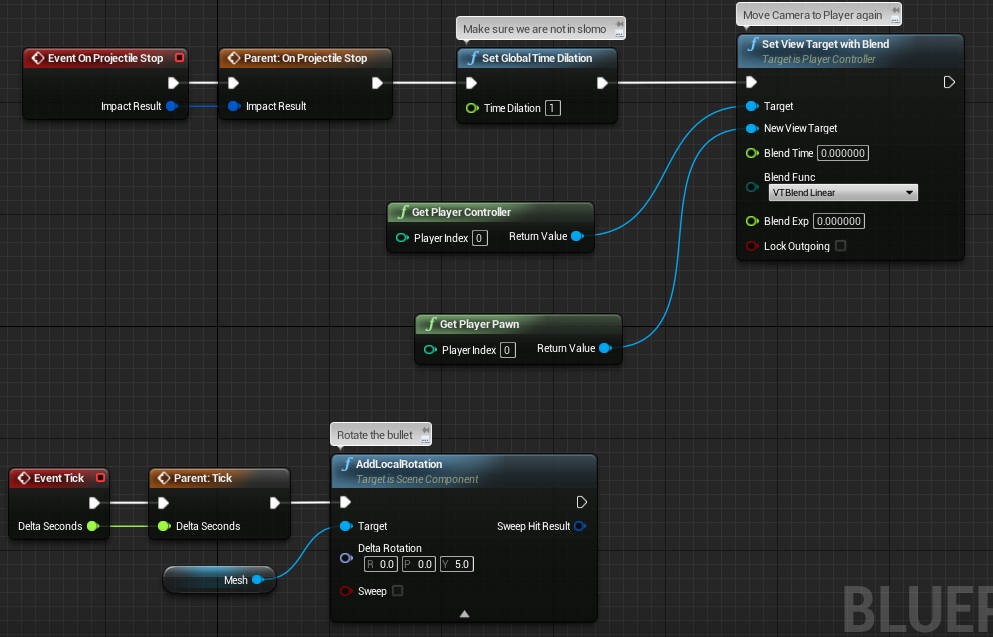
Now in event graph rotate the bullet and on projectile stop set view target to player.
Overall – Creating Sniper Rifle blueprint.
Create new enum SniperScopeType and add:
- RenderToTexture,
- HUDOverlay,
- Postprocess,
Open WeaponType enum and add SnipeRifle to it.
Create new blueprint based on BP_MainWeapon named BP_Weapon_SniperRifle.
Add those variables:
- SniperScopeType (Sniper Scope Type)
- IsZooming (bool),
- SniperScopeUI (user widget),
- NormalFOV (float, default: 90),
- ZoomedFOV (float, default: 20),
- CanDoFinisher (bool),
Fill rest of the data:
- Spread need to be 0,
- ProjectileClass should be BP_Projectile_SniperWeapon,
- FireType need to be Projectile,
- WeaponType: SniperRifle,
- WeaponMesh: Sniper_Rifle_A. Remember to put socket on your mesh and assign name to AttachSocketName_FPP
Basically if you read previous tutorials you should be able to add new weapon without a problem!
Now in ShooterGameInstance add this weapon to the list so you will be able to equip it.
Overall – Sniper Rifle and hands.
Basically we need hands pose for zooming the rifle. To do that open FPP_LauncherAim animation and record new animation without movement (we did that in earlier tutorials), so it won’t have any idle movement. I’ve named it FPP_LauncherAimPose. You could leave idle animation it will be harder to aim then because weapon will move slightly like in real world 😉
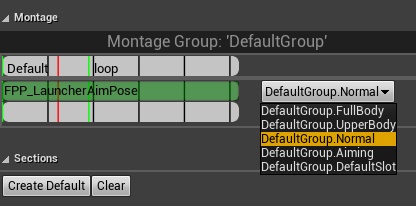
Create animation montage from this pose and set slot to Normal.
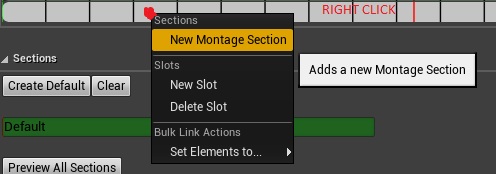
Last thing here is to create loop animation in this montage. It’s little bit tricky:
Now open HeroFPP_AnimationBlueprint and add those variables:
- SniperRecoil (bool),
- SniperRecoilAlpha (float),
- SniperIsZooming (bool),
- SniperZoomingAlpha (float),
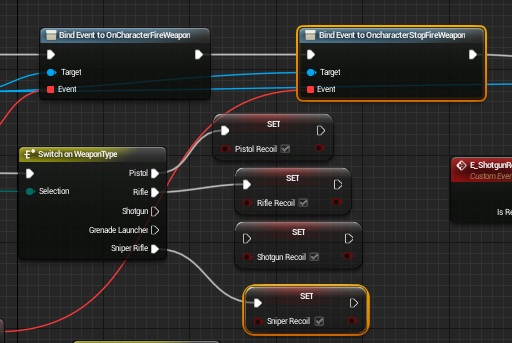
Now in Event Graph -> Initialize Animation there is CharacterFire custom event attached to OnCharacterFireWeapon dispatcher. We need to add Sniper Rifle recoil there.
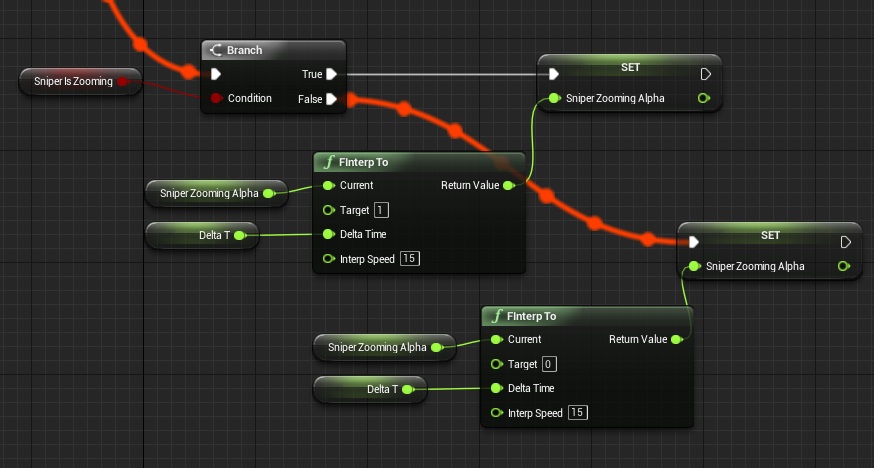
Now in update animation we need to check when we are doing zoom from SniperWeapon.
Thanks to that we will know in animation blueprint when player is zooming. Now we need to drive zooming alpha from this variable. Still in Update Animation:
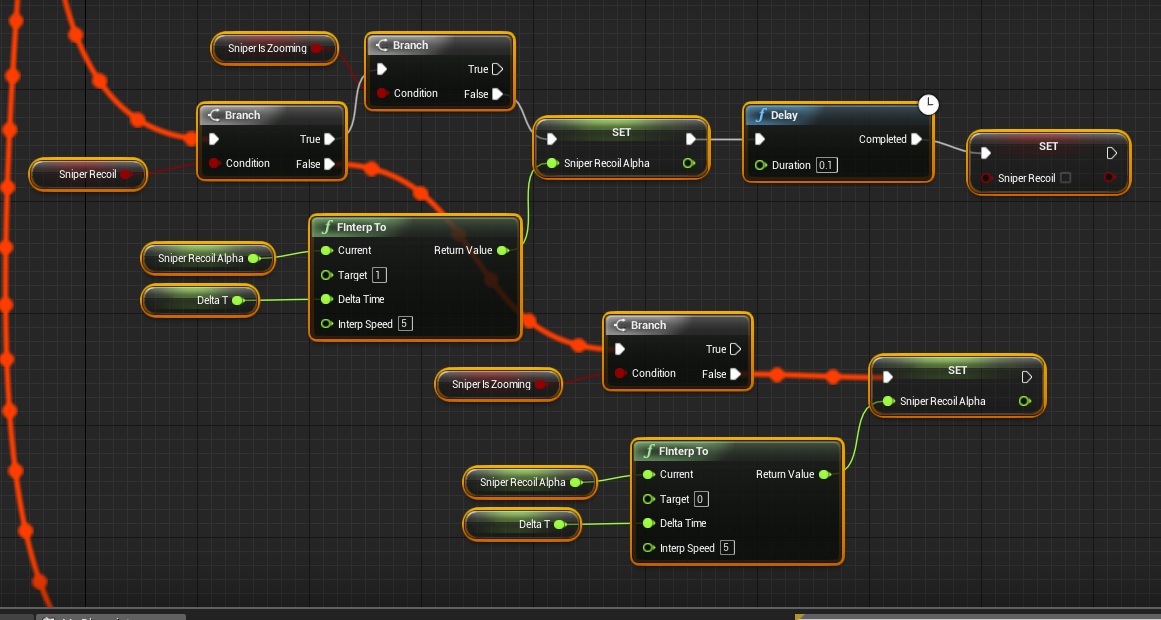
The same thing with SniperRecoil bool:
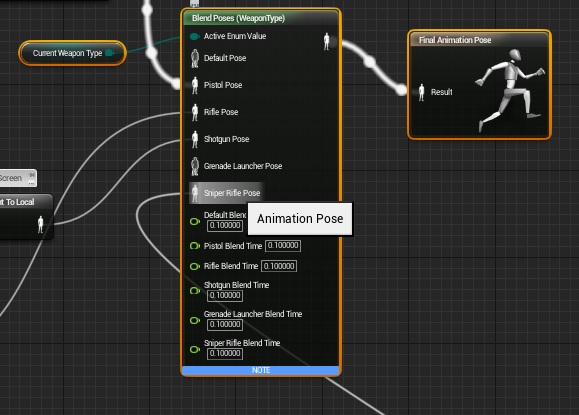
Now in the Animation Graph you would need to create 3 poses:
- for keeping the weapons in hands,
- for recoil,
- for zooming,
The last one is the most time-consuming one because you need to test it in-game if sniper is near player eye. Here’s my graph maybe will be helpful.
Make sure to connect the result to SnipeRifle in Enum!
You won’t be able to test it out because we are not driving IsZooming bool in SniperWeapon. Open BP_Weapon_SniperRifle and in begin play connect dispatchers created in GameplayCharacter.
If you place your weapon near camera you will see clipping. To fix that go to Project Settings -> General Settings -> Near Clip Plane set to 1. You would need to restart the editor to see the effect!
USEFUL TIP: Changing Near Clip Plane value to smaller one will cause more draw calls! Another thing is don’t try to set it to 0 😉
We have our base in place now let’s move to creating overlay!
Scope – RenderToTexture.
This is the most hard type to implement so I will do it as first. There’s great basics tutorial here. Download the M98b_scope.tga texture. (you can’t use it in commercial work!) You will need to have some 3d knowledge to be able to use this method.
There is one big problem with sniper rifle from military silver weapons pack. It have one material. Scope is in the same material as the rest. To be able to do it you would need to set different material for the scope glass only. It can be done using blender/3ds/maya if you export the .fbx file and import it again. I’ve tried to find contact to military weapons pack creators and let them know to add one sniper rifle with different material on scope glass but I wasn’t able to find it out.
What I have done in 3d program:
- Detached scope glass from the mesh and the skin,
- Created UV for the scope,
- Exported scope glass as different mesh,
- Imported as skel mesh,
So I have 3 meshes:
- Sniper rifle mesh from the pack. It have one material,
- Sniper rifle mesh without the scope glass polygons. This mesh is added to WeaponMesh in weapon blueprint,
- Sniper rifle scope glass mesh. It’s added as new Skel Mesh into SniperRifle blueprint and positioned where the scope should be,
Basically if you want to create games by yourself you need to learn basics of 3d graphics. Creating UV, modifying polygons, exporting data, working on bones. There is a lot of tutorials on the web! It will take a couple of weeks to learn the basics but it’s necessary if you are seriously thinking about making games.
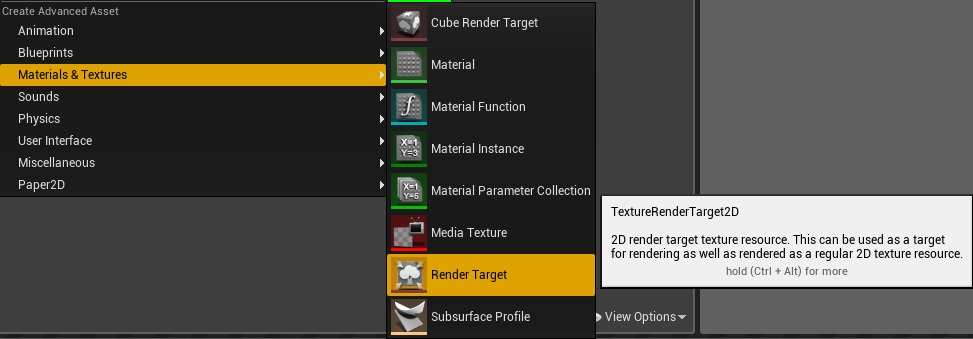
Create new 2d render target. My resolution is 512×512. The bigger resolution the worst performance.
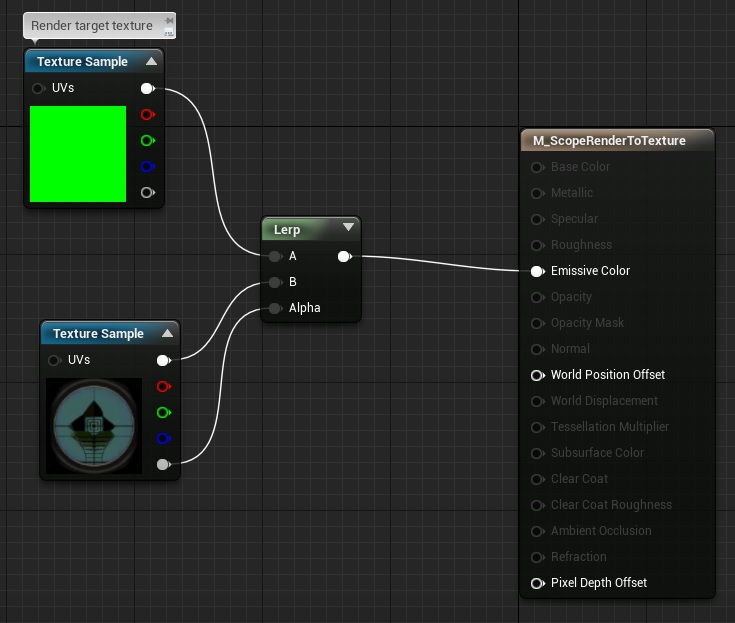
And create new material which will use render target texture combined with M98b texture.
Assign this material to your scope glass.
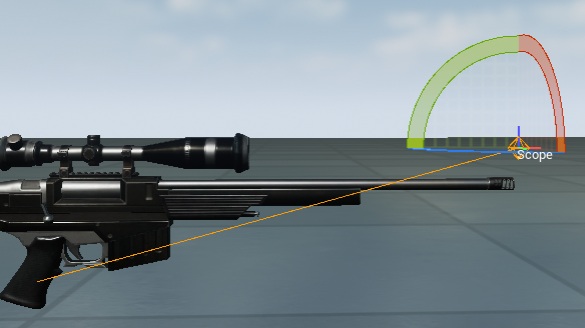
Open your sniper mesh that doesn’t have scope glass polygons or have different material ID for the glass and create new socket called “Scope”
It will be used to position Capture Component.
Now in your Sniper Weapon blueprint. Add the scope in place where the original scope was. Create new component – Scene Capture Component 2d.
- Field Of View should be 7,
- Assign your Render Target texture,
Add another component – camera and place it so it will see a weapon from left side.
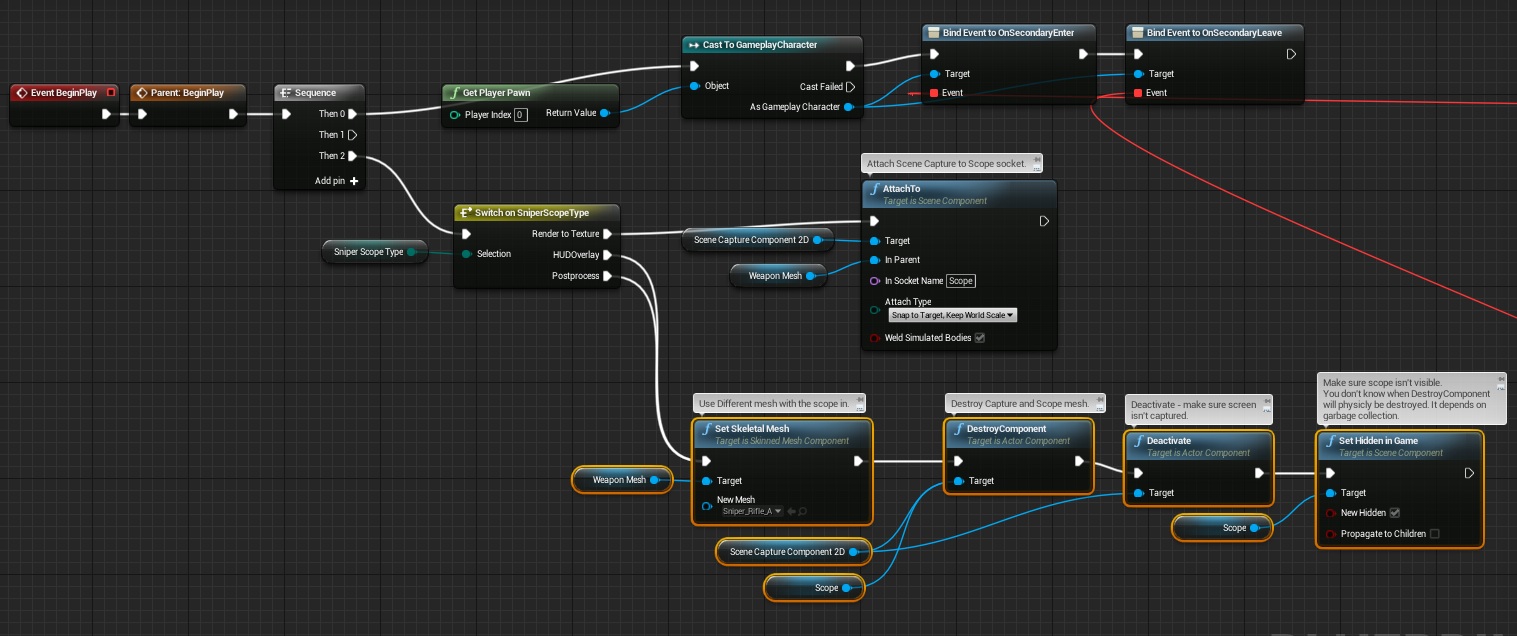
In the begin play attach capture component to Scope socket.
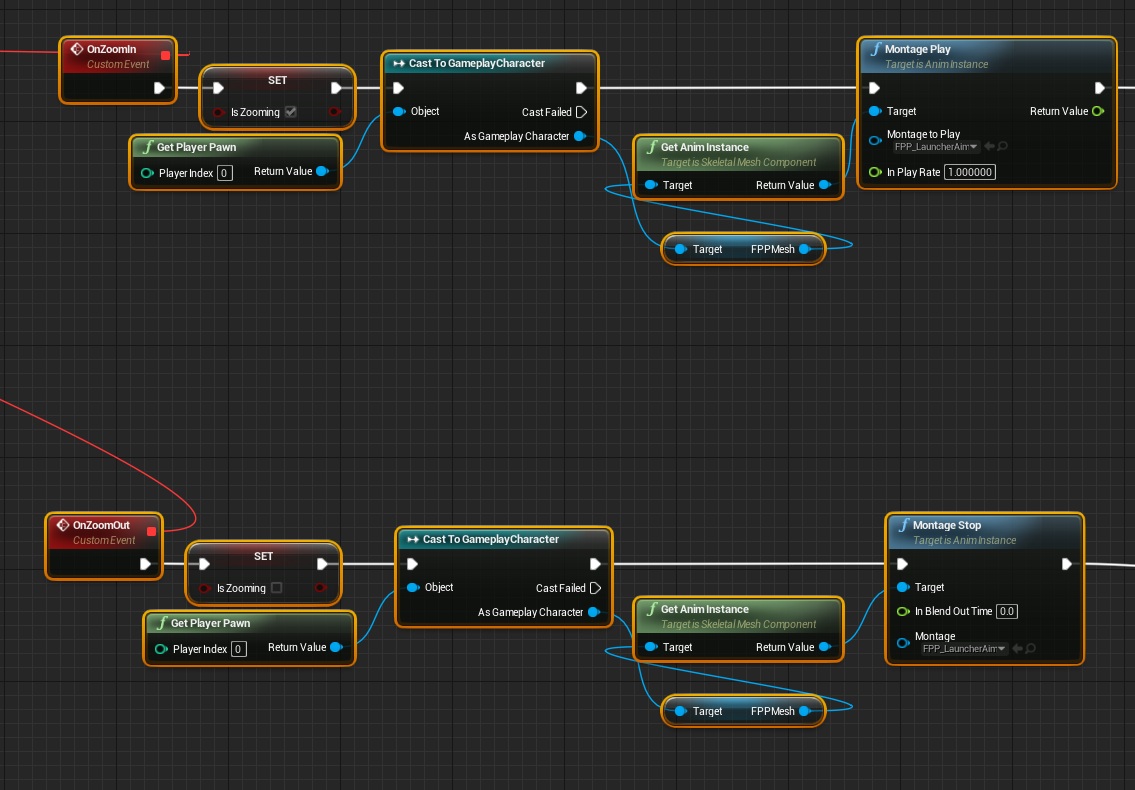
Now in OnSecondaryEnter / OnSecondaryLeave dispatchers let’s play zoom pose which we created earlier.
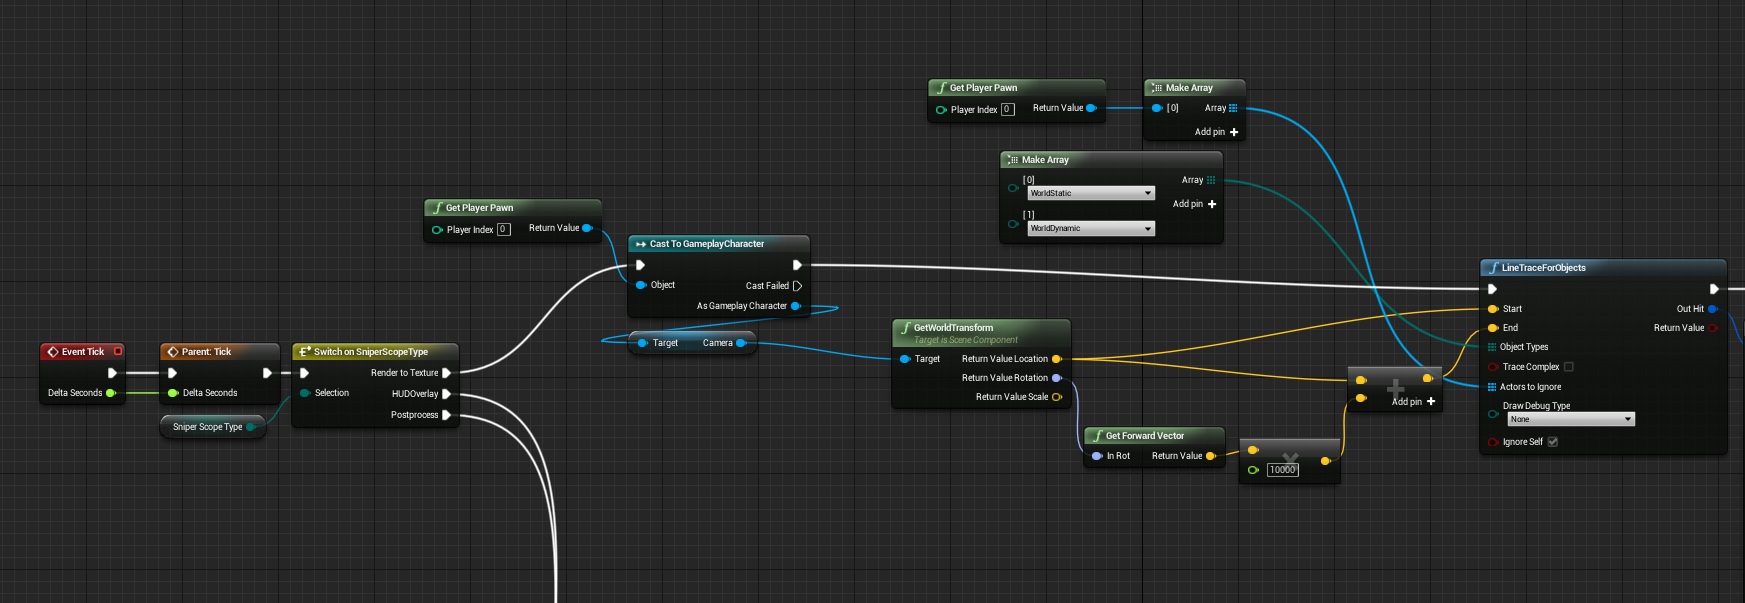
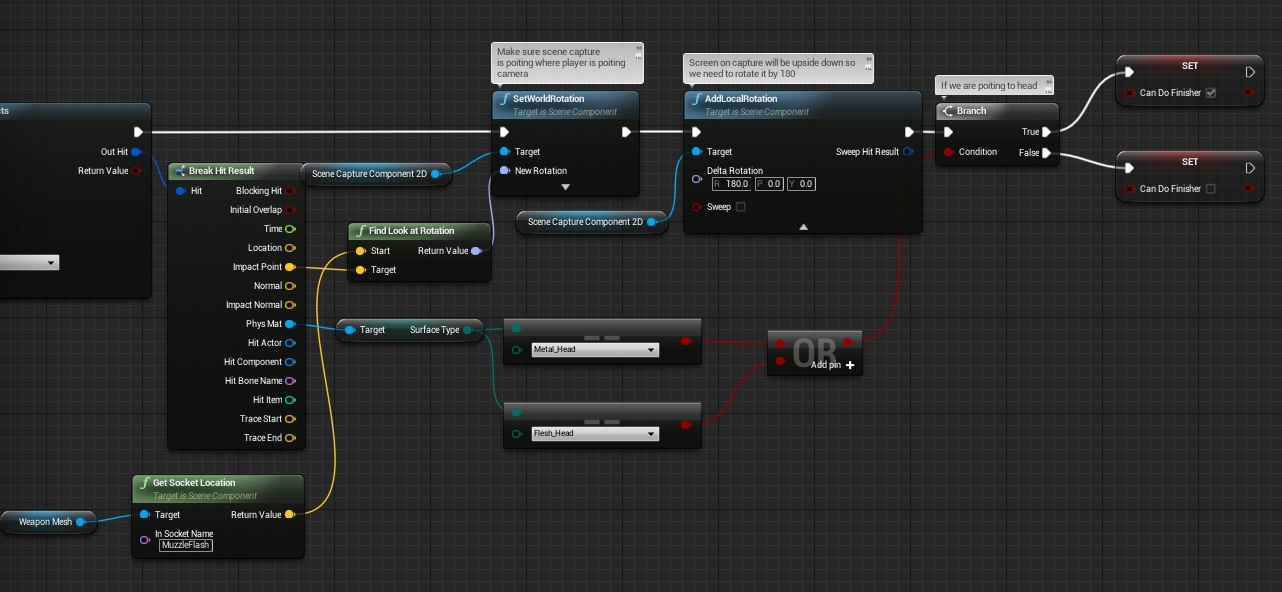
Now in Tick we need to rotate the Scene Capture Component 2d to be sure it’s pointing where player is looking at.
Rest part:
Without this you will have different view when watching level from render texture.
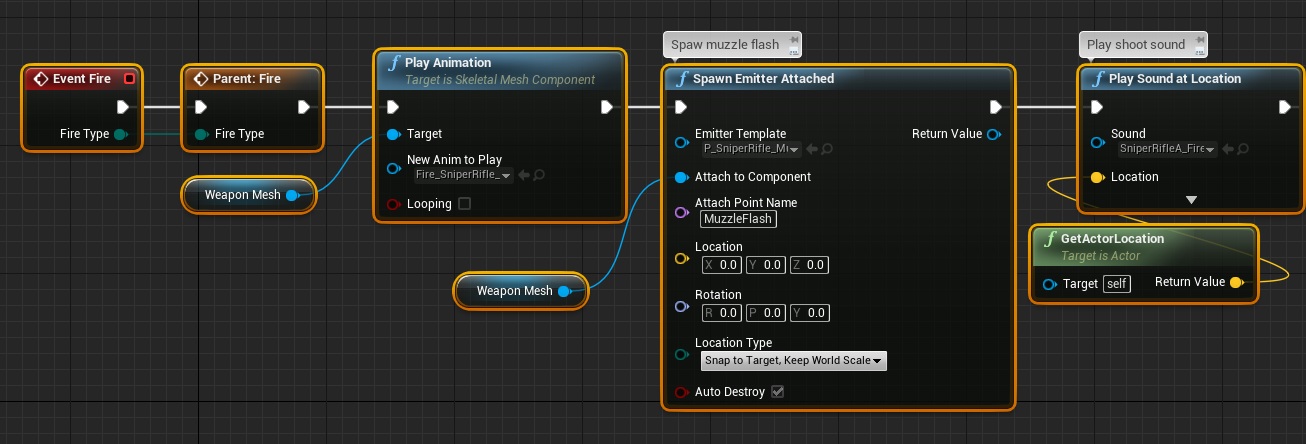
Now we need to shoot the weapon so create Fire event.
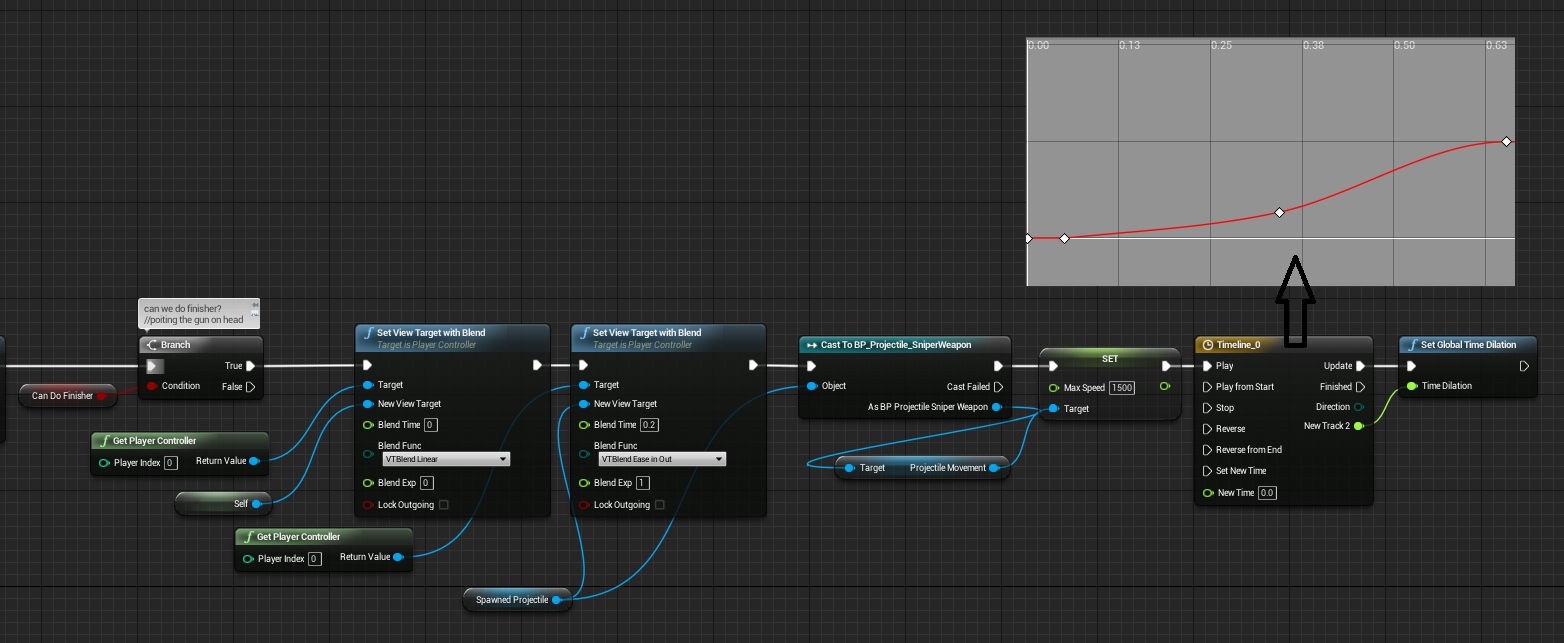
If you want to have |bullet time effect” (don’t know how to name it) just add this in your Fire event.
In Tick we know if we are pointing the head, and here we can just change the camera with blend time and scale the time dilation.
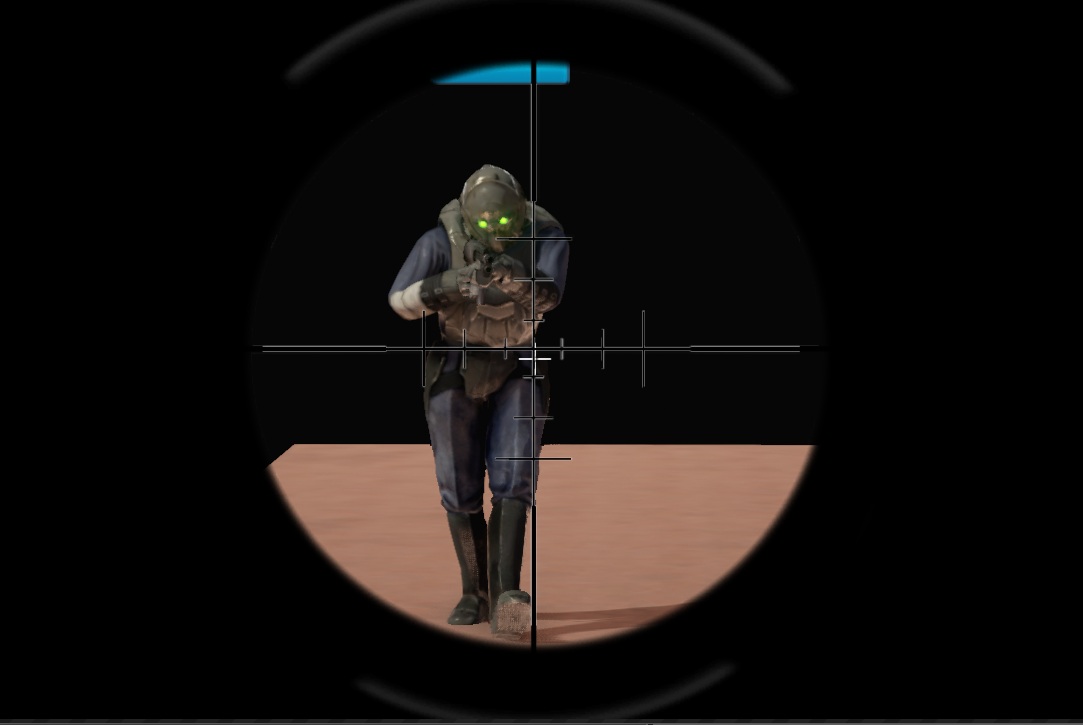
That’s all here. Your scope using render to texture should fully work now!
HUD Overlay
This will be MUCH more easier to create. I’ve searched whole internet for some good free sniper scope texture and I haven’t found any. I have found this but you can’t use it in commercial projects! If I will find free scope or something with commercial license to buy I will let you know! If you are graphics artist and you are able to create such scope – please create one and add to Turbosquid for couple of bucks and let me know!
Good think is that you can create this by yourself using Gimp. Found great tutorial on youtube.
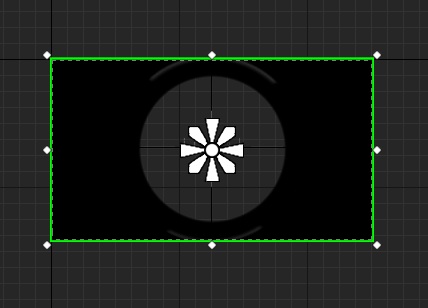
Import the scope texture into content browser. Create new Widget -> UI_Debug_SniperScope and add the image into it. Make sure whole screen is filled.
Now get back to BP_Weapon_SniperRifle. In begin play I’m making sure scope and render to texture are hidden. I’m attaching new weapon mesh (from military pack silver).
Now OnZoomIn event make sure you add widget on-screen.
And on OnZoomOut remove it from the screen.
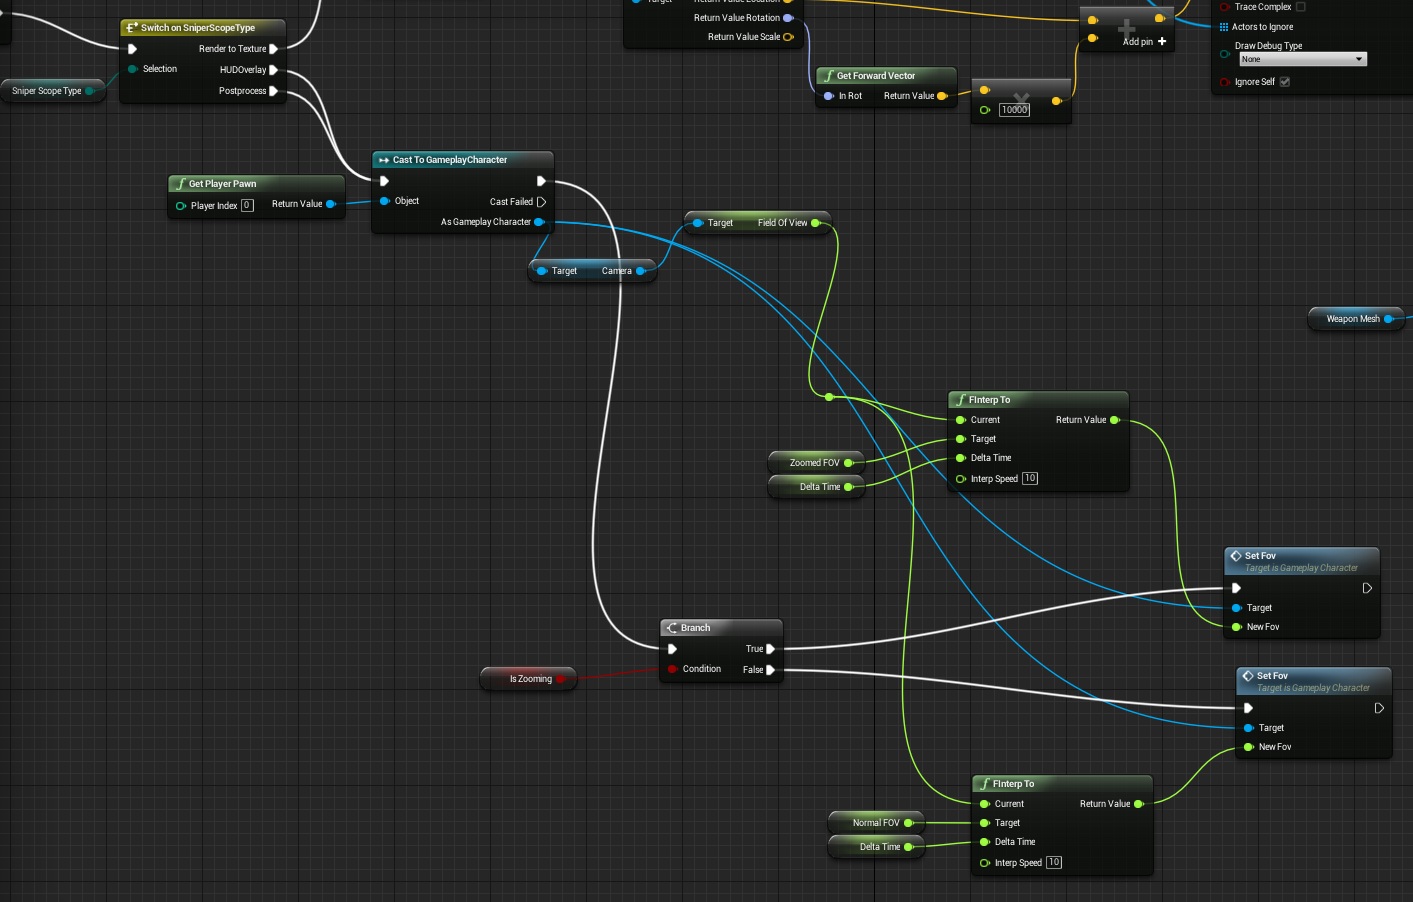
Last thing is to drive fov in tick.
And that’s it!
Postprocess
Before you start please read this documentation from UDN and download sample images. Again you can’t use them in commercial work!
Open GameplayCharacter and variable:
- PostProcessReference (Post Process Volume),
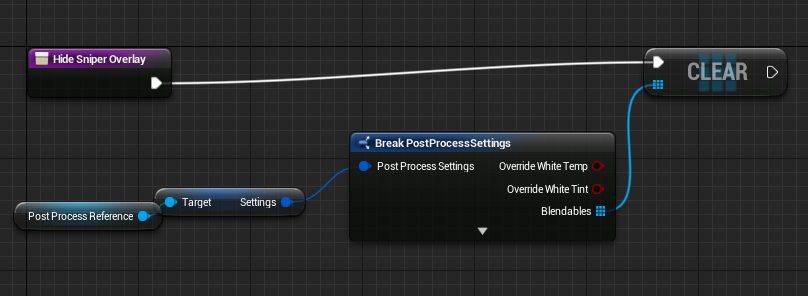
And these three functions:
Those are the missing functions in Weapon Sniper OnZoomIn and OnZoomOut. You should call them now there.
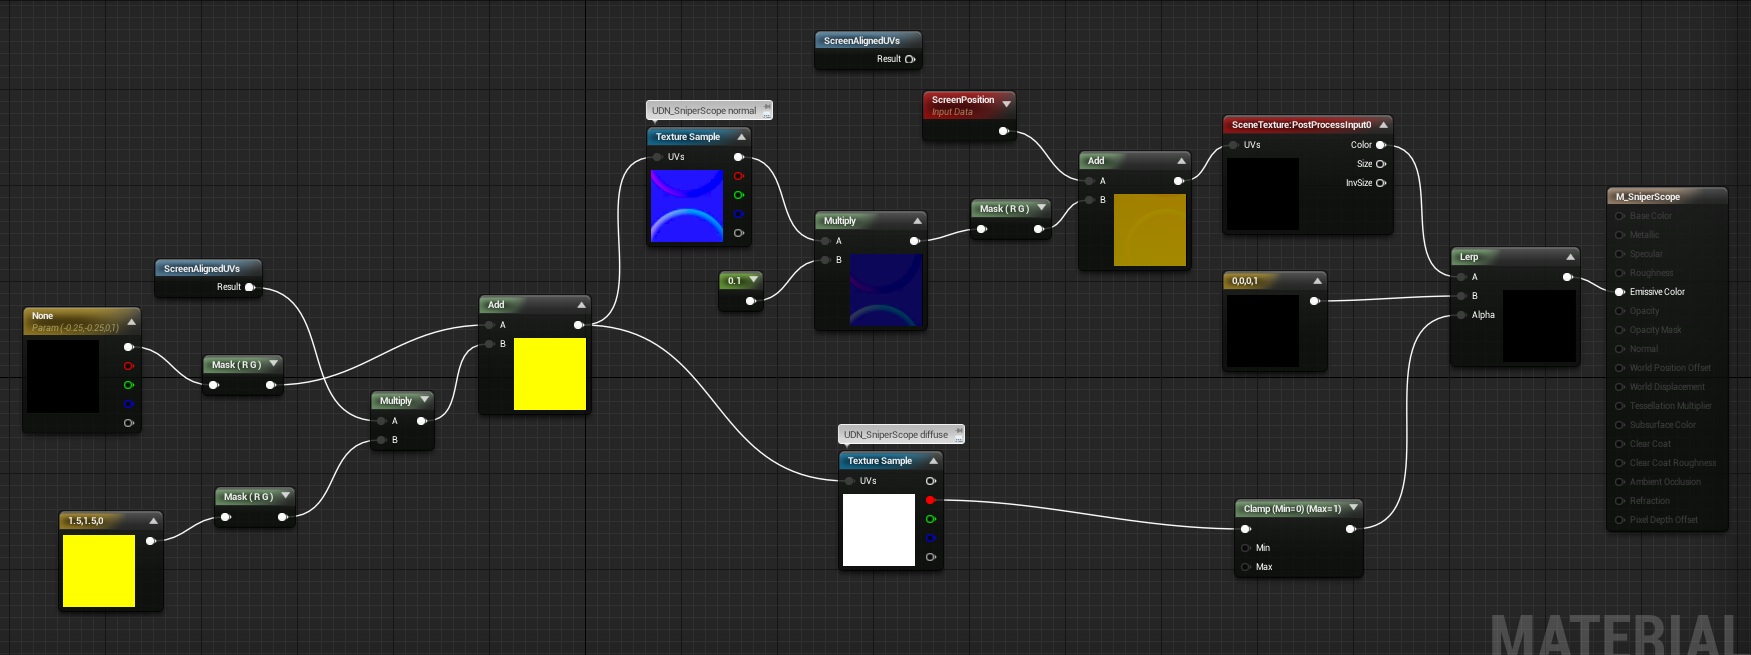
Import the textures and create new material.
Make sure your material is PostProcess.
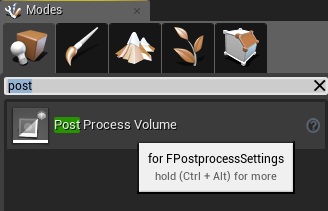
Now in your level place Post Process Volume.
In its settings:
- Unbound should be set to True,
It means it will work even if you are outside the volume.
Now go to Level Blueprint graph and create begin play. We need to assign this volume to our reference in GameplayCharacter.
And that’s it!
It was post for more advanced blueprinters 😉 As always take your time do experiments, add print text nodes. Don’t copy all!
Time spent on writing tutorial: 20h
Creating ShooterTutorial takes a lot of my free time.
If you want you can help me out! I will use your donation to buy better assets packs and you will be added to Credits /Backers page as well.Implementing game is taking time but writing about this is taking much more effort!











Zacnie
The M98b_scope.tga dropbox link is dead, could you make a mirror ? please 🙂
Damage is not working. the projectile is effecting the enemy body and adding impulse there but the health of the enemy is not decreasing
Have you read earlier tutorials? Are you using the same engine version as mine? (info at top of the tutorial) – it’s using custom interface to do the damage.
I solved it. No I am using UE4.9. the solution is that you forgot or I forgot to define the ammo type in begin play. the other issue is that the when I am zooming the sniper and shooting aiming head, enemy dies but the slow mothing that you added is still there until i shoot couple of times again. what the problem?
Hey Farrukh, sorry I’m late but I’m just finally getting to this tutorial – you would just need to make sure your timeline is at a max length of .65 seconds and that it definitely resets to a value of “1” at the end. Sounds like you have left it at the default of 5, possibly.
Another quick note – in the bullet time section of the Sniper Rifle BP you would need to connect the “Set Max Speed” node to ‘Play From Start’ in the TImeline node, instead of “Play” as pictured. That will ensure the slow mo resets. Not sure if that was an error or maybe that was fine/would work in older versions of the engine, but it doesn’t work in 4.10.