In this post I would like to work on:
- Increasing spread when shooting,
- Decreasing spread when in idle,
- Dynamic crosshair that will tell me what’s the current spread,
Crosshair and spread is one of my favorite topic. You can read here great article about aim systems, and math behind spread in AnswerHub. Let’s try to do this by our self!
|
1 2 |
<strong>This Tutorial has been created using Unreal Engine 4.8.2</strong>. Make sure you are working on the same version of the engine. |
Implementing spread.
In earlier post we have created couple of variables in BP_MainWeapon. We need more:
- DeltaTime, (float)
- SpreadDecreaseSpeed (float, default: 0.1)
Functions:
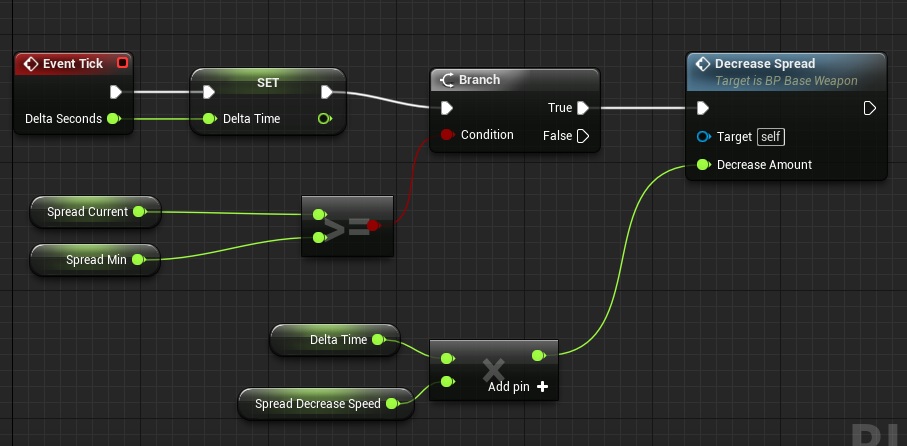
In Event graph create Tick event.
So basically we are decreasing spread all the time.
Now in BP_Weapon_Pistol set variables:
- SpreadMin = 0
- SpreadMax = 0.3
- SpreadCurrent = 0.3
- SpreadDecreaseSpeed = 0.25
And in Fire event add IncreaseSpread by 0.1 like here:
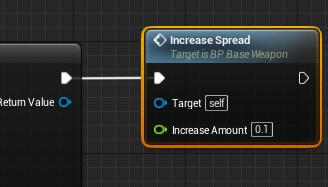
So every time we shoot we will increase spread by 0.1. At this point you will see that spread is working correctly.
Now we need to create an crosshair indicator to show us the spread.
Basically the best way to do this is in C++ using canvas (like in Shooter Example from Epic) I’ve tried to create this in HUD blueprint using Canvas as well but there is still couple of functions not exposed to blueprints (drawicon for example) so I decided to do this using UMG.
Create new User Widget and name it UI_Debug_HUD.
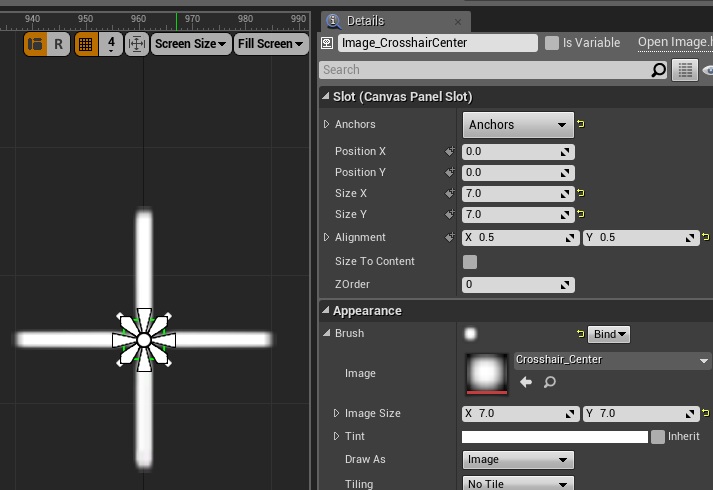
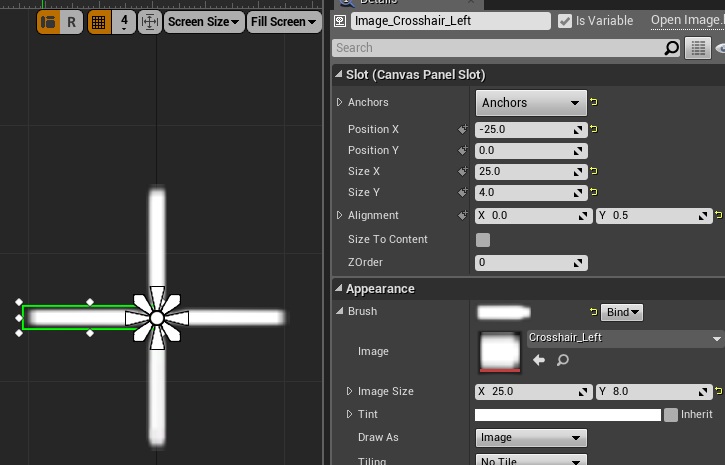
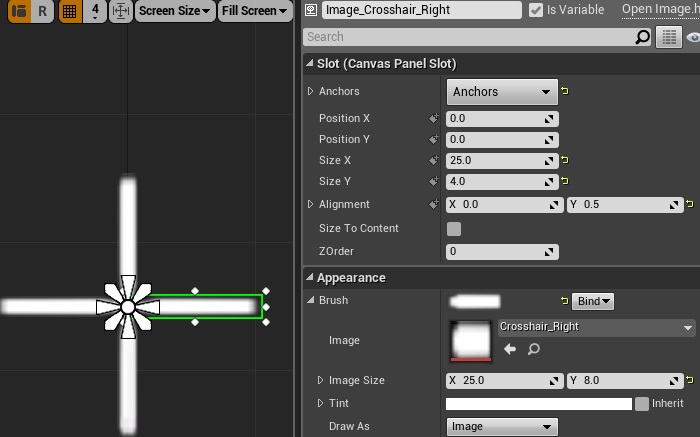
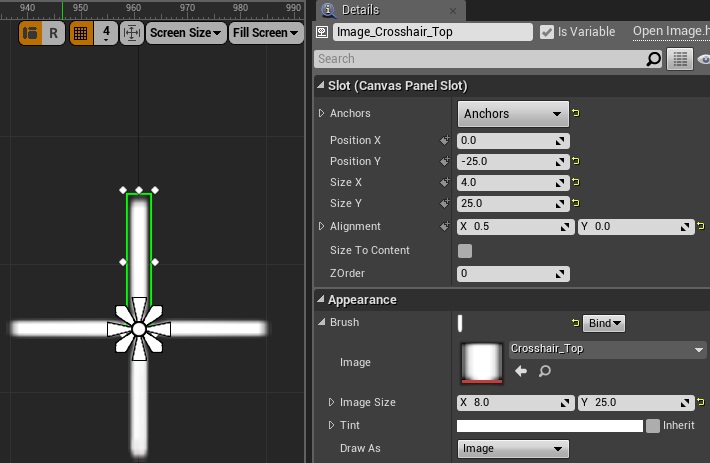
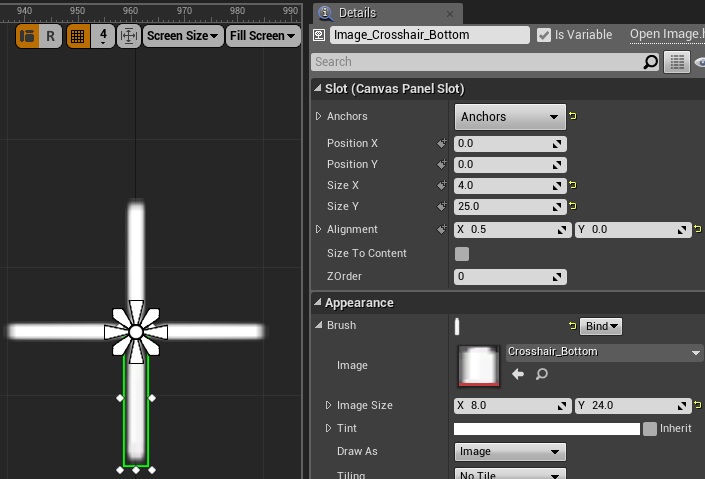
You would need to find crosshair assets. I’ve copied them from Shooter Example HUDMainTexture. UMG can’t draw image based on UV so each part of the crosshair need to be separated (center, left, right, top, bottom)
Here’s the designer settings for all of them:
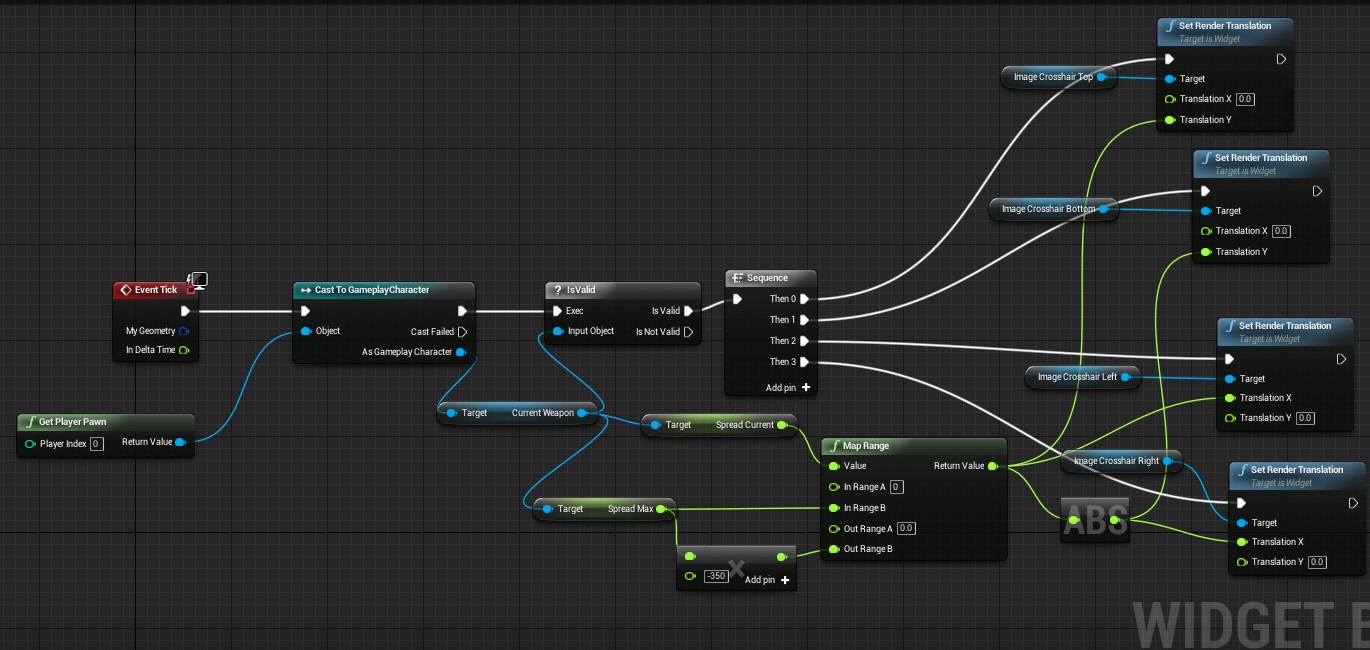
Now in Event Graph create Tick event and let’s move crosshair elements depending on CurrentSpread.
Now in GameplayHUD in Begin Play create UI_Debug_HUD and add it to viewport. Remember that your Game Type should have GameplayHUD connected as HUD class!
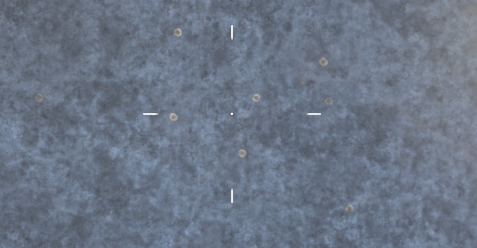
Watch in HD it’s hard to see crosshair.
Creating ShooterTutorial takes a lot of my free time.
If you want you can help me out! I will use your donation to buy better assets packs and you will be added to Credits /Backers page as well.Implementing game is taking time but writing about this is taking much more effort!
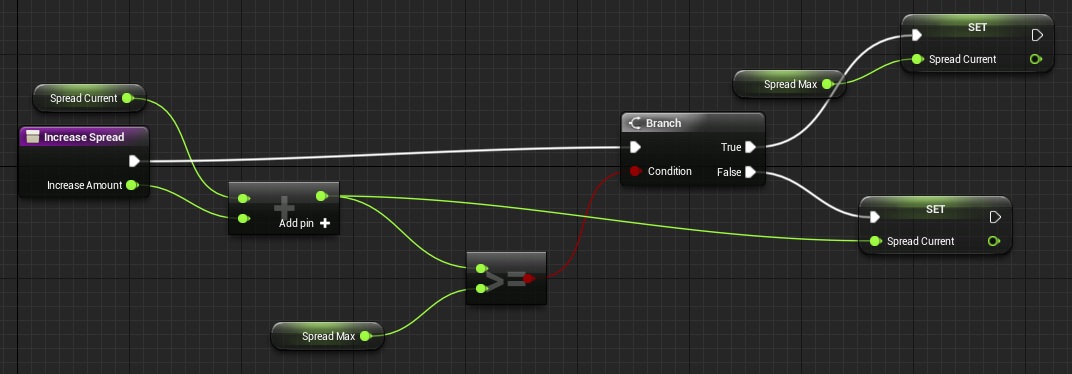
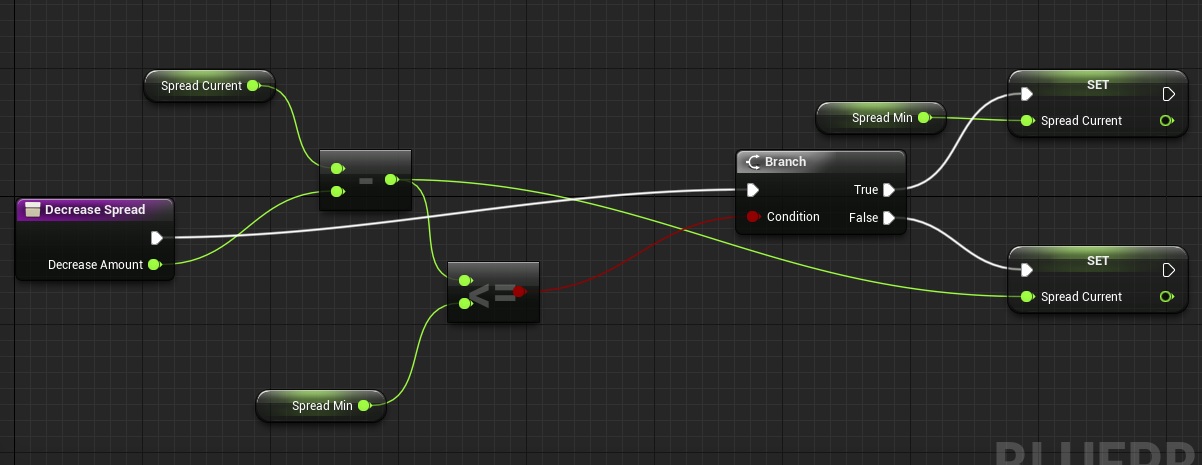

I think that the “IncreaseSpread” and “DecreaseSpread” functions should use respectively the float “MIN” and “MAX” nodes instead of a “branch” node with a “=” test.
Thus:
You simply set “SpreadCurrent” to the “MIN” between “SpreadMax” and (“SpreadCurrent” + “IncreaseAmmount”) in the “IncreaseSpread” function
You simply set “SpreadCurrent” to the “MAX” between “SpreadMin” and (“SpreadCurrent” – “DecreaseAmmount”) in the “DecreaseSpread” function
The Spread is twice as large as the area of the crosshairs, im guessing this is because you forgot that the “Random Unit Vector in cone” node is asking for a “Cone Half Angle” you are giving it the full angle. A solution for this is to multiply the “SpreadCurrent” by .5 before inputting it into the Cone half angle of the “Random Unit in Vector” node.
Very interesting tutorial ! Thanks a lot for this job !
I tried to follow it but at the end I can’t succeed in join the HUDs, could you explain e a little more what do I have to do to use the crosshair ?
By the way, is it normal that in my HUD, the crosshair appears to be in the extrem top left corner of the HUD ? I think I did something wrong but all seem to be OK…
Oh, and I had a last question (yeah I know, I can be a little annoying when I begin ;D), is it possible to use Sprites in a HUD ? Because as you did I imported teh HUDMain Texture but I can only recuperate sprites from it… So I would like to know if I can use them or if I have to find an other way to succeed ?
Thanks in advance for yours answers, and thanks a lot again for this great website ! Very useful !
You need to add this widget to viewport. If it’s top left your anchors are wrong with location. You can’t add sprites to UMG you would need to create material that use sequences but I’m not sure if this will work with UMG.
You can just add texture to the UMG you don’t need to create anything. Just add Image widget and assign the texture.
Basically sounds like you are really new to UMG – try to find some basics tutorials over the web – I suggest Unreal Engine channel on Youtube they have couple of streams about UMG and basics.
Thank you for your answer ! Yes, I don’t know very well the UMG part, I prefer modelling levels and Blueprints, but now I understand I have to improve myself in other things like that. Thanks for your advice !
I’m trying to create a crosshair like this for a top down shooter. It is supposed to follow my mouse cursor, I’ve tried setting the position of the widget in viewport to a 2d vector taking inputs from mouse position, but the widget disappears completely. The crosshair works if i just add it to viewport but it’s useless to me because it’s always in the center. I’ve also tried setting the position of the canvas slots to mouse position (the images top, bottom, left, right) but then the crosshair is all over the place. Do you have an idea how to make it work?
Cheers
Robert
My widget is bouncing constantly and not responding… Any help
for the Set Render Translation it doesn’t separate. How can I make it so I can get the x and y apart?
For those in the newer versions, on the set render transform node, split the “In transform” pin, by right clicking and selecting split struct pin option, once you do that, you’ll be presented with In transform translation pin, split that one more time, and you’ll have access to the pins mention in the article.
These tutorials are awesome! Thank you for putting your time and effort into these!! I’m using 4.15.3 For those in the newer versions, on the set render transform node, split the “In transform” pin, by right clicking and selecting split struct pin option, once you do that, you’ll be presented with In transform translation pin, split that one more time, and you’ll have access to the pins mention in the article.
Thank you so much; this is so helpful 😀