I would like to share some tips for you guys about creating full featured game in 42 hours. I will try to share some tips about:
- Team Structure,
- Team Organization,
- Time Management,
- Voxels in pipeline,
- Materials,
- Animations,
- AI
Hope it will be helpful for someone!
Team Structure
We were working in 4 people team: me, two programmers and one graphics artist. (Jacek – programmer, Kacper – programmer and Rafal – graphics artist)
| Skill | Jacek | Kacper | Me | Rafal |
| Design/Gameplay | X | X | X | |
| UMG / UI | X | X | ||
| C++/Math expert | X | X | ||
| Blueprint expert | X | X | ||
| UE4 C++ expert | X | |||
| Shaders | X | X | ||
| Level Design | X | |||
| Voxel Graphics Design expert | Guru |
Programmer 1 – Jacek:
- Experienced in gameplay related stuff – lot of design/prototyping skills in Blueprints,
- Knows how to do UI in UMG, feels the animations as well,
- C++/AI/math knowledge,
- Shaders knowledge,
Programmer 2 – Kacper:
- Fast prototyper as Jacek is,
- He doesn’t like Blueprints, only works in C++,
- C++/AI/math knowledge,
- Loves to be deep and create his own systems,
Me:
- Fast prototyper as Jacek and Kacper,
- Small C++ knowledge,
- Level design knowledge,
Graphics Artist – Rafal:
- Our Voxel Guru 🙂
- Doesn’t have lot of UE4 experience yet,
As you can see from the skills we knew on which part of the game we will work and that’s first tip for you guys. Know your team and make game that match your team skill set.
Team Organization
- Don’t do jams without repository. We used Perforce in local network, just bring some router with you and you can host Perforce locally,
- Golden rule: “doing is better than talking” helped us a lot. Basically when using UE4 you can create a prototype in 20 minutes- same time as normal meeting takes,
- We used Trello for storing ideas/features – just to be sure we wont forget about anything,
- If you have cool idea how to improve the game – just do it. Don’t ask. We will see if it fits in game,
- Teamplay: Always have something to do, pick things that are most visible for player,
Time Management
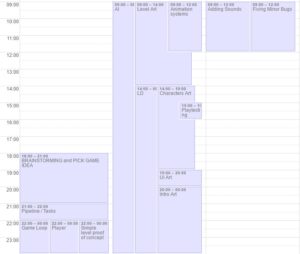
During every game jam our time management is the same.
Day 1: Have the idea about the game and first playable,
Day 2: Finished game,
Last Day: Sounds, minor bugs,
Here’s what it looks like in this particular jam:
Basically the game is AI / Animations / Events oriented so Jacek with Kacper were doing a lot of job to cover this and I focused almost only on level design.
As for the picking game idea we need to be sure we all want to do such game. We dont want to change our minds that’s why we have invested a lot of time for brainstorming and talking about ideas before choosing one.
Voxels
They are really fast to work with. We used MagicaVoxel and exported them to OBJ. We haven’t had time to implement native voxel support for the engine (but we did such support earlier in our career)


Beside of quick production they just look great! We are in love with 3d pixel art!
For lighting we used only dynamic lighting with one Movable Sky Light and custom cubemap.
Materials
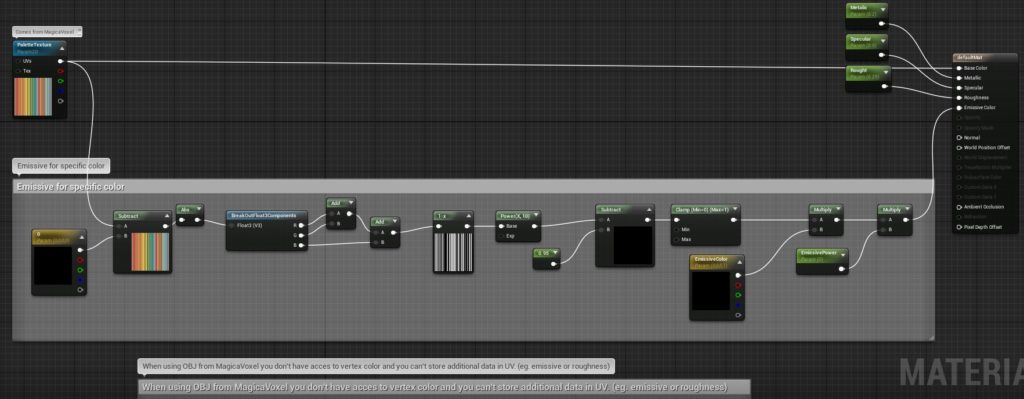
Voxels used only one material:
We wanted to have possibility to choose which color will be emissive as we weren’t able to store additional data in UV. We could use different material ID for this but it require to open 3d software like Blender or Maya and change UV by hand (takes time) Another thing is we wanted to keep things simple without adding not necessary draw calls as the mesh topology is complex.
Thanks to this we are using only one simple material for Voxels in entire game!
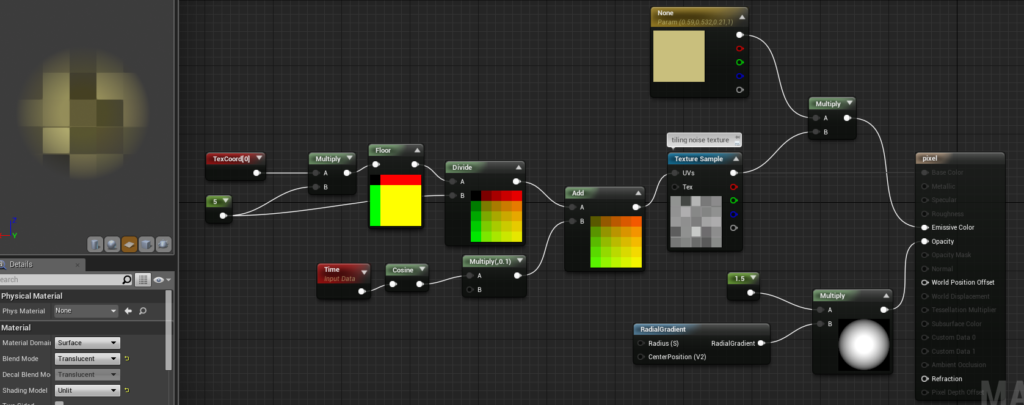
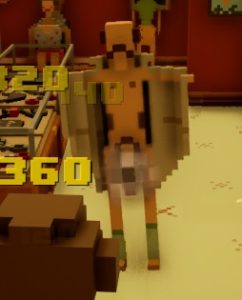
One thing that could be interesting for you guys is censorship. We used simple plain mesh with this material:
You could change RadialGradient for small texture instead generated by shader.
File Structure
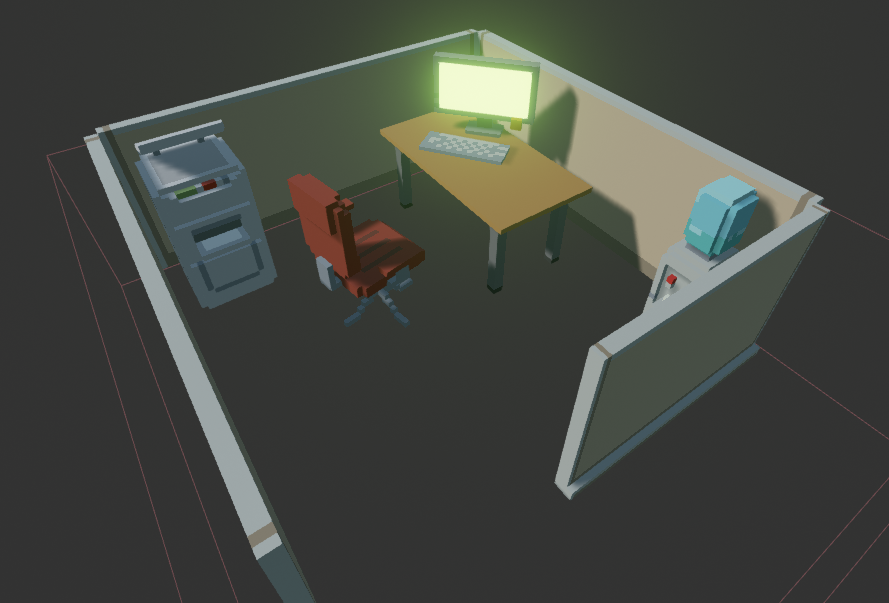
When working together during game jams there is big possibility that someone will work on file that you want to work with. That’s why we split a lot of things for main engine classes like Character, Game Mode and our custom classes like obstacles, enemies etc
For example Character have base class in C++ then two others in Blueprints, one for gameplay and one for art/animations. Thanks to this everyone can work at full efficiency in the same class.
CharacterBase is base C++ class for any character in the game. Then PlayerCharacter (C++) is base class for the player and then PlayerBP( Blueprint ) and finally PlayerFinalBP (Blueprint) which is connected with Game Mode.
Use Blueprints as prefabs
We were using Blueprints as prefabs so we don’t invest our time to place a lot of assets.
Props are randomly selected.
Animations
During the game jam we spent a lot of time thinking about how we want to approach animations. The ideal way would be to have something like skeletal animations but it would modify the position of the voxels rather than morph them. But it’s not something you create during a game jam.
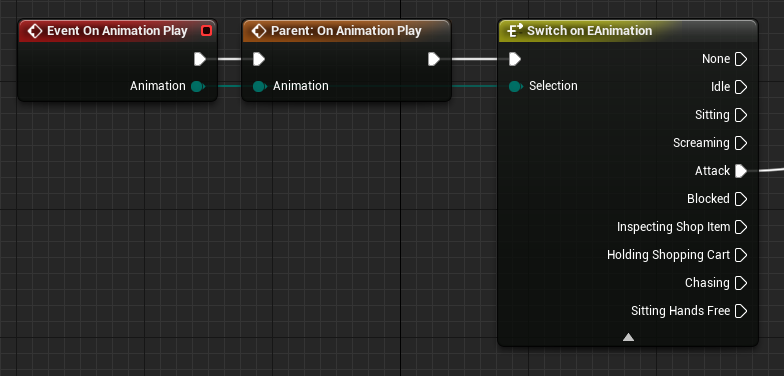
We decided that we will create our own simple animation system. It was based on custom Anim Sequences that were just an array of animation frames (here being static meshes). You were able to specify the amount of FPS and animation events (for handling things like when to apply damage etc.). In addition to that, we had a simple state machine that would decide which sequence should be played.
|
1 2 3 4 5 6 7 8 9 10 11 12 13 14 15 16 17 18 19 20 21 22 23 24 25 26 27 28 29 30 31 32 33 34 35 36 37 38 39 40 41 42 43 44 45 46 47 48 49 |
void ACharacterBase::UpdateAnimations(float DeltaTime) { EAnimation WantedAnimation = BP_GetWantedAnimation(); // If blueprint script did not request any animation then choose one natively if (WantedAnimation == EAnimation::None) { WantedAnimation = GetWantedAnimation(); } // Update animation data if it changed if (CurrentAnimation.Animation != WantedAnimation) { CurrentAnimation = GetAnimData(WantedAnimation); CurrentAnimationTime = 0.0f; AnimationPlays = 0; if (CurrentAnimation.IsValid()) { UpdateAnimationMesh(CurrentAnimation.Frames[0]); } OnAnimationChanged(CurrentAnimation.Animation); OnAnimationPlay(CurrentAnimation.Animation); } else if (CurrentAnimation.IsValid()) { const int32 PreviousAnimationPlays = AnimationPlays; const int32 NumFrames = CurrentAnimation.Frames.Num(); const int32 PreviousFrame = FMath::FloorToInt(CurrentAnimationTime * CurrentAnimation.FPS) % NumFrames; CurrentAnimationTime += DeltaTime; const int32 CurrentFrame = FMath::FloorToInt(CurrentAnimationTime * CurrentAnimation.FPS) % NumFrames; // Update animation plays AnimationPlays = FMath::FloorToInt((CurrentAnimationTime * CurrentAnimation.FPS) / NumFrames); if (CurrentFrame != PreviousFrame) { UpdateAnimationMesh(CurrentAnimation.Frames[CurrentFrame]); } for (int32 i = PreviousAnimationPlays + 1; i <= AnimationPlays; i++) { OnAnimationPlay(CurrentAnimation.Animation); } } } |
We were able to react on animations in Blueprints.
AI
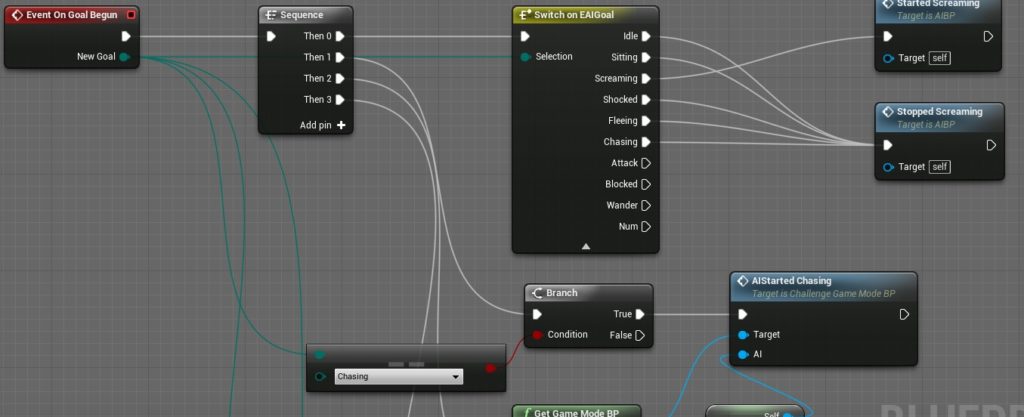
AI was an important part of the game, so we were iterating the AI code constantly during whole duration of the game jam. It was based on our custom implementation which is something between a state machine and HTN (Hierarchical Task Networks). Thanks to that it was easy for us to implement new type of actions and simply add them to our AIs behavior. While the girls have a simple behavior (they just do their routine like sitting, standing or wandering) the security’s behavior is a bit more complicated. There are two types of security behavior and it is selected so that there are always about 30% in what we call a “spread” behavior and 70% in “chase” behavior. The chase behavior is just running to the last known target location and if the chasing character loses sight of his target he starts to search for him. Firstly near the last known location broadening the radius at fixed time rate. The other behavior, “spread”, is something taken directly from Pacman! The AIs that are running it spread around the map and then run to their target flanking the player in result.
Summary
We had almost the same team in our earlier game jam – Grand Theft Taxi which went well, but this time we would like to ship Intensive Exposure on Steam – we have added a lot of new content and polished it a lot.
If you haven’t done this yet – support us on Greenlight!



Great article !! Quite inspiring 🙂 I’ve tested Your voxel material, created Material Instance based on it, pointed color that should be emissive and defined power but after lights building objects become completely black ? What could be the reason?
I forgot to mention that palete texture need to have Filter set to Nearest – then it’s easier to pick emissive color.