When working on a project you would like to have backups and ability to revert files. Another thing is you probably want to work in team. Unreal Engine 4 supports Perforce out of the box. I will show you how to quickly deploy perforce server and set it up!
I will use Vultr as my server provider. It cost only 5$ a month and it will be enough for small teams. Even if you grow you can increase your server specification to match your needs.
Why I’m using Vultr? Because it have big storage disc (not SDD) at really low price. It have couple of gift codes as well.
Registering Account
Register on Vultr and then in My Servers click on “Deploy New Instance”:
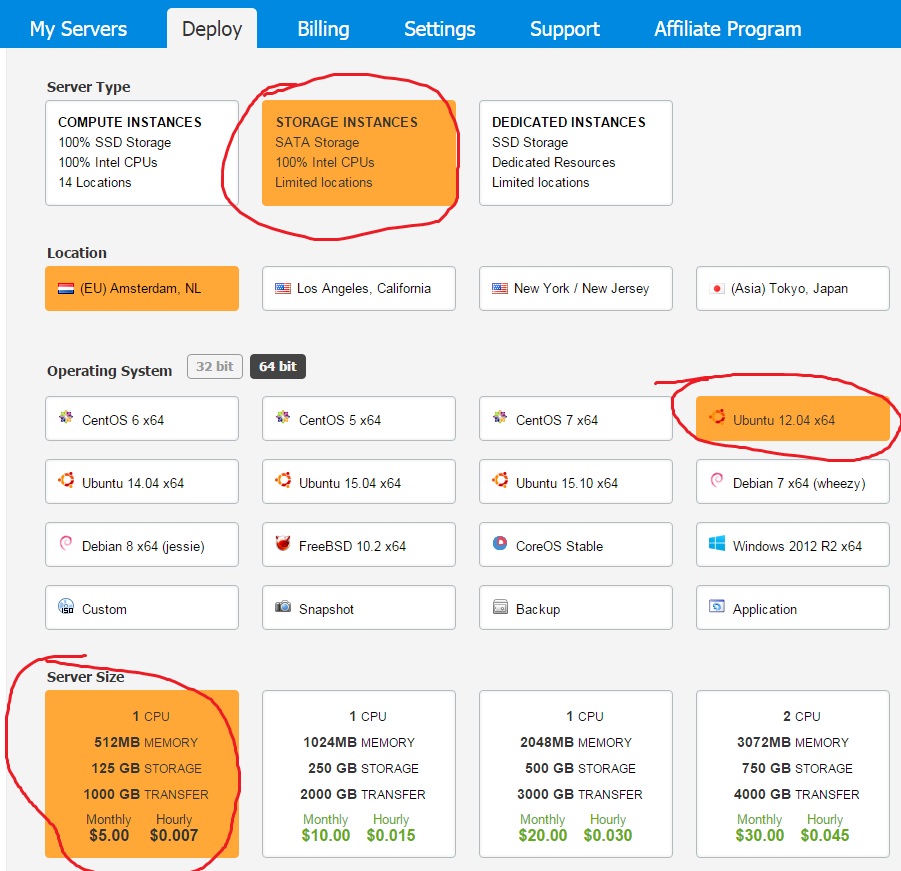
- Enable IPv6: Checked,
- Enable Private Network: Checked,
- Server Label: perforce,
And click Place Order. You would need to add your credit card.
Opening Server Console
Click on Manage button:

Here you can find a lot of information:
- Your server IP – copy it somewhere because it will be used for perforce,
- Your server root user – it’s login name to Ubuntu,
- Your server default root password – copy it as well it will be used to first login into server,
Now just click View Console.
It will ask you for login:
- vultr login: root,
- Password: default password provided in manage screen,
After you successfully logged in – change the password! Just type this in console:
|
1 |
sudo passwd |
Installing Perforce
Perforce is free to use for 20 users. If you have more team members you need to pay for using Perforce.
To install Perforce I will use Allar’s script which was mentioned in this great tutorial with detailed explanation how to install perforce.
Just type this in your console:
|
1 |
wget https://raw.githubusercontent.com/Allar/linux-perforce-installer/master/install-perforce |
When finished downloading type:
|
1 |
chmod +x install-perforce |
And then:
|
1 |
sudo ./install-perforce |
After installation it will ask you for new user ‘perforce’ password. I won’t use this user, but you need to pass some password. Just make sure after leaving full name etc blank to type “Y” in the question “Are those information correct”
Your server should restart after installation and you need to login again – use root login.
That’s all in server now lets move to clients!
Preparing Perforce Client
To connect to Perforce Server you would need Perforce Visual Client which can be downloaded here. You need to scroll down to find P4V: Visual Client

If you get alert that default server can be reached – just go forward and don’t run connection wizard.
After installation is complete run P4V.exe
In the server type: YOURSERVERIP:1666
Now hit New User to create user for you.

You don’t need to add password for the user. I’m leaving it blank as I’m working alone. Type something in email thou – it’s required to save the user.
After creating user we need to create workspace. Click on “New”
- Workspace name: name of the workspace. Mine is kolos_dupa-PC_5768,
- Workspace root: this is the folder which perforce will be downloading files,
If you hit OK you will be prompted to upload some file into the server. Just hit cancel.
Your perforce is ready!
Copying project to Perforce
Go to your workspace root folder and create new folder with name of your project. Now copy your project files into it:
- Binaries,
- Config,
- Content,
- Plugins, (if you have one)
- Source, (if you are using C++),
And .uproject file. (which need to be writable)
Then open P4V and just Mark For Add.

In pending right-click on your change list and submit it.
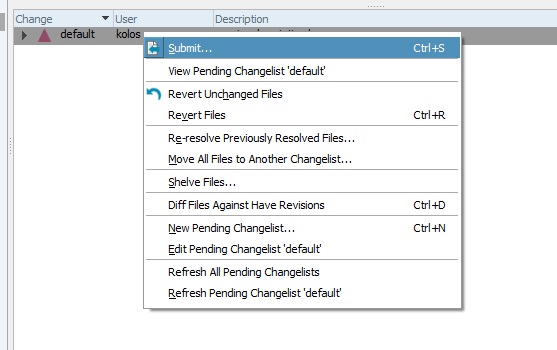
Add description and submit. That will be all – your files will be uploaded to perforce.
Using Unreal Engine 4 with Perforce
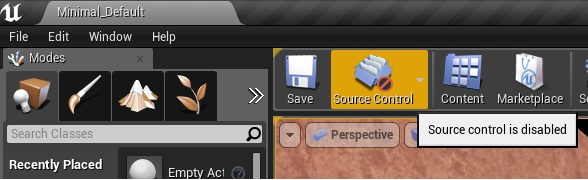
Now you can enable Perforce integration in Unreal Engine 4. Open your project file that was uploaded to perforce.
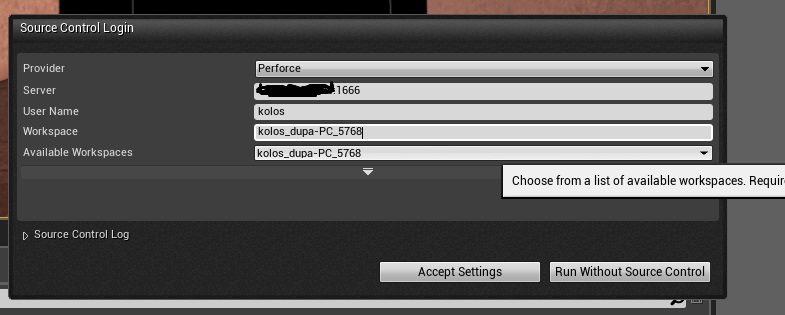
Enable Perforce:
If you are using 4.10 you will get alert about checking content browser files – disable this feature.
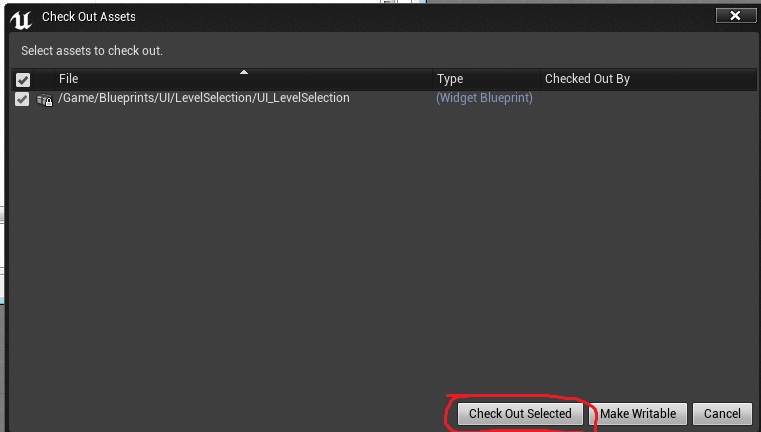
When saving files UE4 will ask you to checkout files that you want to modify:
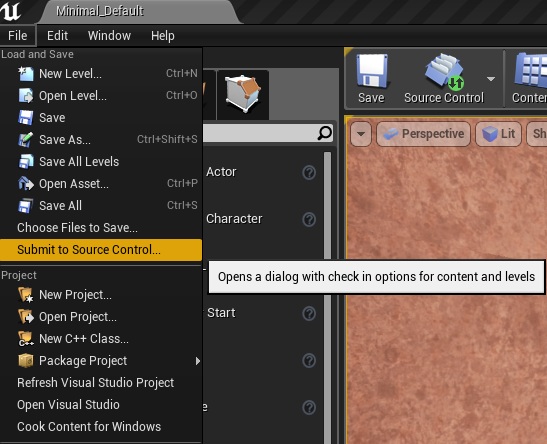
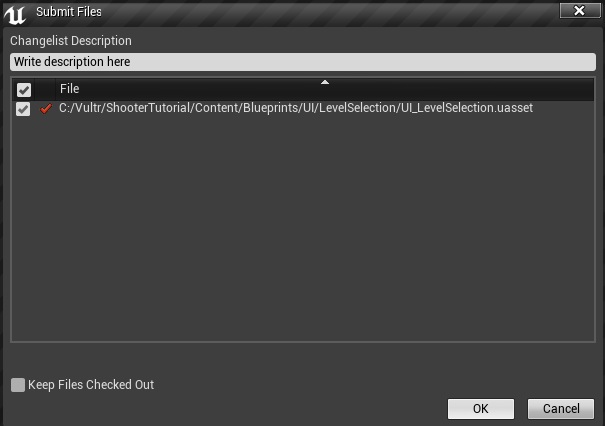
When you finish your work just Submit:
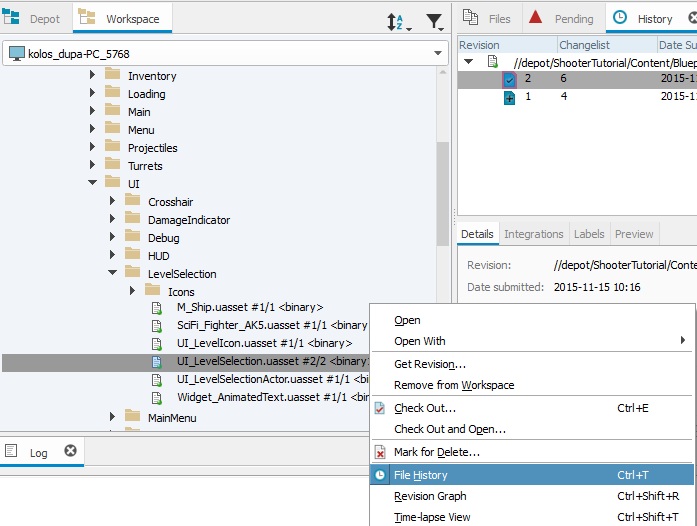
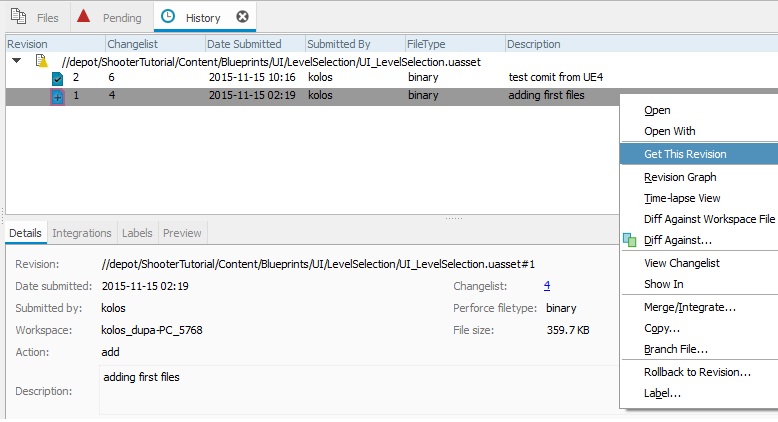
If you want to revert file open P4V and right-click on the file:
Useful Commands
You need to check if you are running out of space or memory. Open your server console.
Checking ram usage:
|
1 |
free -m |

I have added 5GB project and I’m using 248 MB of 512 ram space.
Checking disk usage:
|
1 |
df -h |

Other useful commands can be found here.
Installing Mantis on your server
For those that want to have mantis bug tracker installed on the server as well just follow this step by step tutorial.
Creating ShooterTutorial takes a lot of my free time.
If you want you can help me out! I will use your donation to buy better assets packs and you will be added to Credits /Backers page as well.Implementing game is taking time but writing about it is taking much more effort!

When you say open your project file that you uploaded to perforce….Do you mean the files in my depot folder that I copied from my unreal projects folder, or do you mean the project file in my unreal project folder?
Nevermind, it looks like it is the project in the depot folder. I suspect this is where I need to develop from now. Thank you for the writeup.
Thank you very much! Worked like a charm and is so much cheaper than Assembla, which I used so far. By much cheaper I mean 1/10 🙂
Very good tutorial! but I am having a very strange issue with the vultr server. For some reason I am getting tickets that I have used 800 GB of bandwitdh when I have not used the server for some days. Do I have to stop the server everytime I don’t use it? I have no idea what is happening, and I followed the tutorial just like you have shown.
Have no idea what to do 😐
Thanks for this helpful post. I seem to be running into an issue while connecting to the server. Connect to server failed: check $P4PORT” and WSAECONNREFUSED error. Any help would be much appreciated.
Replying more for posterity, but WSAECONNREFUSED means the connection was refused, likely because of a firewall. In the Vultr settings, you’ll need to allow for a TCP connection and then apply it to the server.
Still doesn’t seem to help for the problem I got RIGHT afterwards, which is a WSAETIMEDOUT.
Did you fix this?
sudo service p4dservice start <—— dont forget to start it after it reboots
This doesn’t work as it should anymore, although if you follow the original tutorial ( https://allarsblog.com/2014/09/24/setup-perforce-digital/ )
And Instead of
wget ftp://ftp.perforce.com/perforce/r14.1/bin.linux26x86_64/p4d
use:
wget ftp://ftp.perforce.com/perforce/r18.1/bin.linux26x86_64/p4d
It will work.
Here is what I Frankenstined together, seems to work
Copy and paste 1 line at a time into PuTTY
Had to add “sudo apt-get update” because getting daemon wasnt working
Hope this helps someone
wget ftp://ftp.perforce.com/perforce/r18.1/bin.linux26x86_64/p4d
chmod +x p4d
sudo mv p4d /usr/local/bin
sudo adduser perforce
sudo mkdir /perforce_depot
sudo chown perforce /perforce_depot
sudo mkdir /var/log/perforce
sudo chown perforce /var/log/perforce
sudo apt-get update
sudo apt-get install daemon
cd /etc/init.d
wget https://raw.githubusercontent.com/Allar/linux-perforce-installer/master/p4dservice
chmod +x /etc/init.d/p4dservice
sudo update-rc.d p4dservice defaults
sudo reboot
AFTER REBOOT
sudo service p4dservice start
This worked for me as of today, thanks so much for typing up an abridged version!